Let the Demo BEGIN!

It’s happening! It’s happening! I’m finally about to start working on my ugly green bathroom!!!!

Just take a look at the number of exclamation points I just used, can you feel my excitement?

I mentioned in my Bedroom Inspiration post that I had started ripping things out of my ugly green bathroom, but was stuck until my dad could come over to help me finish removing the door rail from the stupid tub.

Well, my dad is coming over to save the day this weekend! Heck YEAH!

So in anticipation of my dad coming over, my husband and I took a fun little trip to Home Depot and purchased some of the things that I’ve been stalking for our new bathroom.

Now let me remind you, this isn’t going to be a full renovation because it would break the bank for us to rip out the ugly green tub. So, we’re leaving it there and just covering it with a new shower curtain. The tile-work in the tub is in great condition (other than the one tile my husband ripped out of the wall by “helping” me with my project…) and the floor is fine as well.

Here’s what I hope to start on this weekend:

  • Finish removing the metal track that remains from shower doors.
  • Remove the old shower curtain rod and determine whether I can spray paint it (or just throw it away).
  • Remove broken hooks on the back of the door.
  • Remove the green toilet and replace it with our brand-new white one.
  • Remove the green sink and replace it with our brand-new vanity and faucet.
  • Replace the current shower head with a handheld version to make it easier to wash Jack.

List for a future weekend:

  • Whatever didn’t get done this weekend.
  • Remove the medicine cabinet and lighting fixture.
  • Refinish the mirror that came with our vanity (I don’t like matchy-matchy) and hang it over the sink.
  • Buy and install a new lighting fixture.
  • Decide on paint color, then sand and paint the walls (something from the light smoky blue color family).
  • Buy and put up new artwork.

Here’s a little sneak peek of the direction that I’m going to go in:

1. Graduated Stripe Shower Curtain from West Elm, $15.00

2. Progress Lighting Fixture from Home Depot, $95.00

3. American Classics Vanity from Home Depot (comes with sink AND mirror), $150.00

4. Assorted art inspiration ideas from Pinterest

5. Recycled Jersey Bath Mat from West Elm (or something similar) $24.00

6. Brushed Nickel Faucet from Home Depot, $26.00

7. White Toilet from Home Depot, $150 (can’t remember which one we picked, so no link)

So I cannot WAIT until this weekend when my dad comes over. He and I are going to tear this bathroom apart and make it into something so much nicer, for less than $500! My goal is to have an “in progress” post update after this weekend’s work and hopefully have a final reveal before Thanksgiving.

What do you think; would you do a half-renovation project like me in order to keep the costs down? Or would you just save up the money and wait until you could rip the whole place down to the studs?

Like what you see? Share me with your friends!

Bedroom Inspiration

Yay, I’m finally thinking about starting another house project. Well, I mean I’ve been THINKING about all kinds of projects for months and months… but I actually ordered something so that means I’m committed now!

I actually did start ripping things out of my ugly green bathroom, but I’m at a bit of a standstill because I can’t get the {gosh darned} metal bottom part off my {even more gosh darned} ugly green tub. So I need to wait until my dad can come over and help me rip that thing off. The next step in the bathroom project is to purchase a new vanity/sink, toilet and flooring so that when my dad DOES come over, he can watch (aka help) me throw those things together. Crossing my fingers that I can drag the husband out to Home Depot with me on Wednesday night to get a few things.*

So since I have to wait for other people to work on the ugly green bathroom project, I’ve decided to go full steam ahead on the bedroom project!

Basically, our bedroom is just boring at the moment. The walls were a muddy khaki color when we moved in, so we just left it alone and threw our furniture in there. We have some matching furniture from Ikea and a few old pictures I threw up on the wall, but BORING is pretty much the only word that I feel when I walk in there. And that’s kind of NOT the feeling you’d like in your bedroom, right?

So, after stalking a duvet cover on West Elm for months I noticed that one of the colors I liked was backordered until December. YIKES! That was just the kick in the pants I needed to finally go through with my order. The fact that my mom is giving me birthday money helps too!

To celebrate the start of my bedroom makeover, I’ve made my very first mood board. Oh, and if you’d like to follow along with my ideas for this project and others, you can always follow me on Pinterest.

1. Purple/Green Ikat Shower Curtain from World Market — I LOVE this pattern and the 100% cotton curtain is only $25! Using their 25% discount currently running on the website, I got 2 of them for less than $50 to use for curtains.

2. Inspiration quilts — Would like to find a pretty blue quilt to put at the end of the bed for color and added warmth.

3. Gold mirror — this is very similar to a mirror that I already have in my bedroom.

4. and 8. Ikea Hemnes dressers — already owned and loved.

5. Organic Cotton Pintuck Duvet Cover in Soot — lusted after for months and finally ordered from West Elm with my birthday money.

6. Cute yellow owl from West Elm – Also ordered because I love it. I think that the yellow will look great against all the soothing colors.

7. Inspiration bench — planning to put padding and upholstery on our old coffee table to make it look kind of like this bench. Will place at the foot of the bed as a Potter step.

9. Possible wall color — will have a better idea once I receive the curtains and duvet cover.

Also on the project list is to build an upholstered headboard and also figure out some kind of art for the walls. Now that I’ve ordered a few things off the mood board I’ll have to sit patiently and wait for them to arrive so I can make sure I love them just as much in person. Oh, and also descend on Homegoods like a crazy shopping banshee – I could still use some pretty bright colored sheets (maybe more of a turquoise), the blue quilt and a couple fun accessories!

Hopefully I’ll have a full bedroom reveal with before and after pictures within the next month or so. How about you, are you finally getting around to a project you’ve been putting off for months?


*Yes, I’m the one that drags HIM to Home Depot. In our house, I’m the Queen of home improvement projects and he’s the King of vehicle projects.

Like what you see? Share me with your friends!

Updating the Jungle Room

Yes, I know – TWO decorating posts in a week. WHAT?! I told you I was a busy little chickadee over the long weekend. This time I attacked Jack’s nursery.

I wrote the original post about the nursery shortly after Jack came home from the hospital in March. Our theme was giraffes and monkeys and I just kind of threw the room together without putting in too much thought. Basically just moving into our house + popping out a preemie = not in the mood to bring it (or “consider it brought-en” as you will).

Each evening while hanging out in the rocking chair and feeding Jack his last bottle of the day, I’d look around the room and think about what I wanted to change. My mental list got longer and longer, until I finally had a chance to make some changes over Labor Day weekend. Nothing super huge, just a few tweaks here and there.

So, what did I do?

Pennant Update
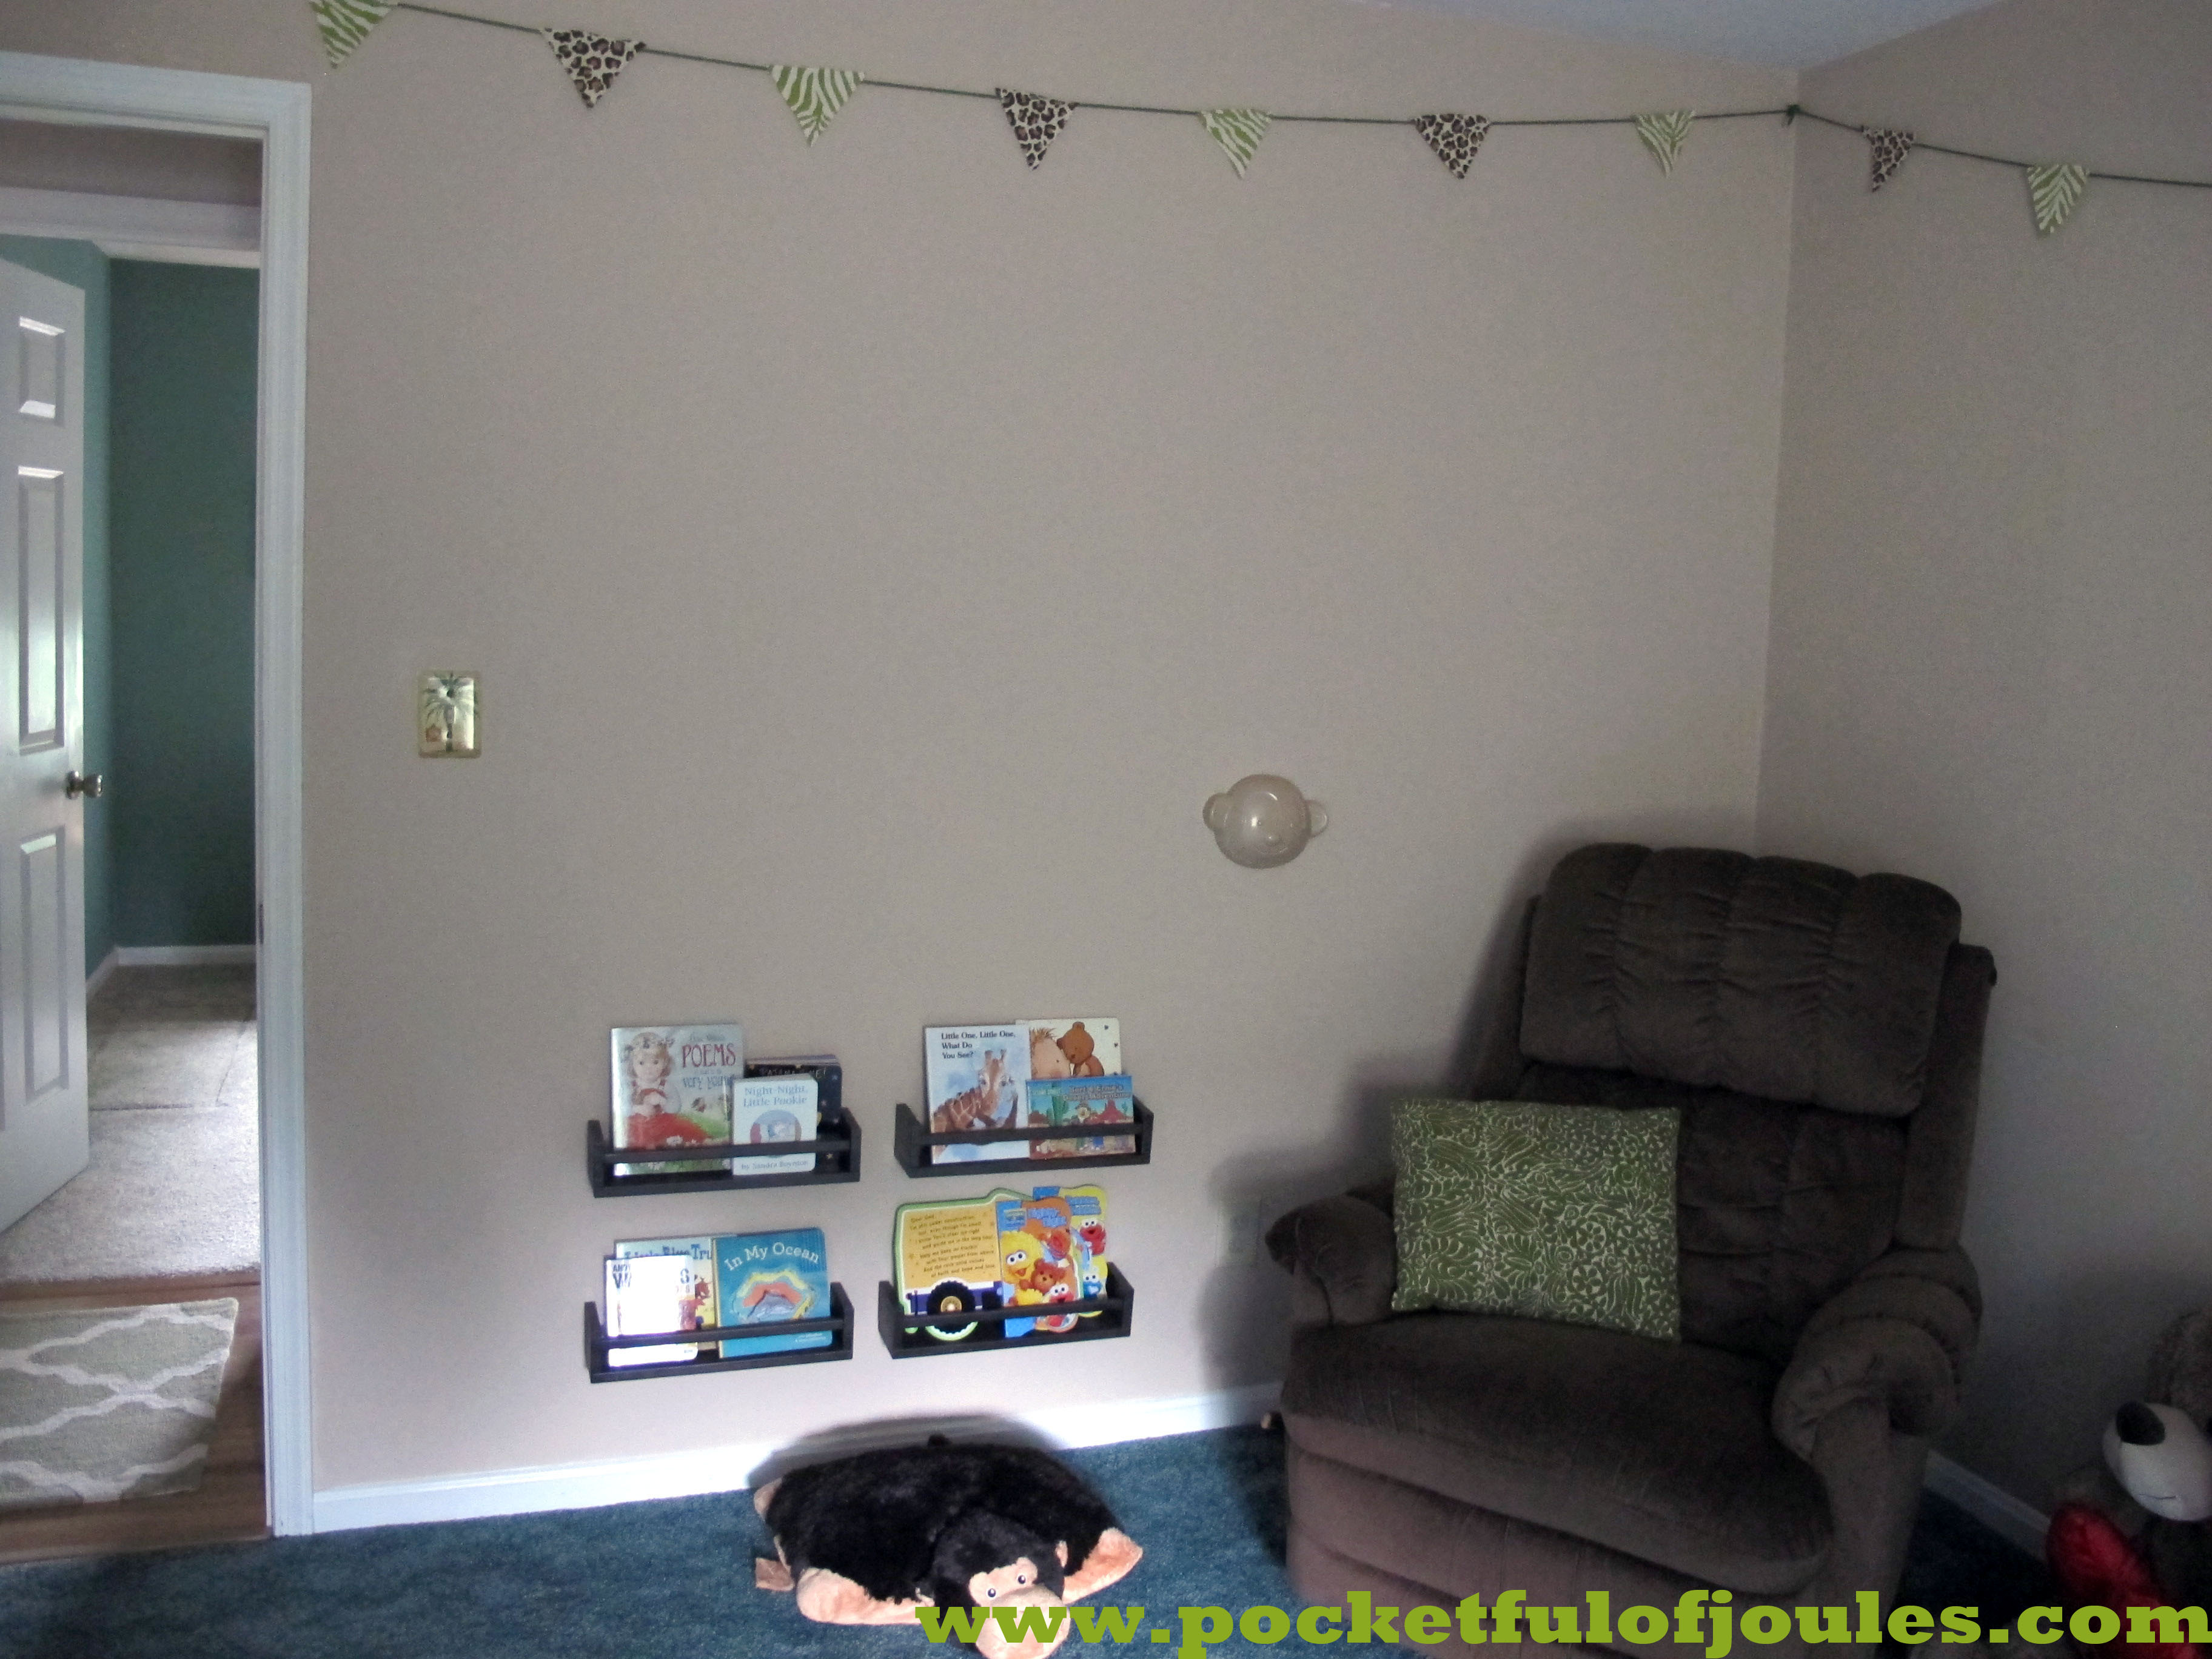
I had made a fun little fabric pennant to go over Jack’s bed. However, I totally ran out of the ribbon when I was making it, so it ended up being kind of cheesy. Not having the time (or energy) to deal with it meant I tried to make the best of the situation by just hanging it over the crib. Now that I had some time to devote to the room, I made a super easy replacement pennant (my guest post with instructions is coming soon to Scribbletown.com) and ripped the old one down. The new pennant reaches all the way around the room and looks so much better. Also, since I literally stapled the fabric to the yarn it was incredibly quick to make!

The first version of the jungle themed baby pennant
Ooh, ahh check out that new pennant. The baby is pretty cute too.

Baby Bookshelves
I hated the way this wall looked with the stupid prints on it. They were just too small and dinky to be of any interest in the room. I added  bookshelves to the wall so that we’d have plenty of space to store all Jack’s baby books and love the way it turns into a pretty and colorful focal point. I blogged about the shelves in the Pinterest challenge post, but never shared the ones I did for Jack’s room. It makes such a world of difference!

Old wall with dumb pictures
The pretty new bookshelves (which are actually $3.99 spice racks from Ikea). Still debating whether to add a third row of shelves, as I have two more leftover from the project.

Curtains
I don’t have a “before” picture of the window — probably because it was so uninteresting that I didn’t bother to photograph it. I made a super quick cafe curtain from some leftover fabric. Honestly, it was the easiest curtain ever; I just measured and cut out a big rectangle a couple inches wider than the window, hemmed it and used curtain clips to hang it from a cheapo curtain rod. I love the way the curtain finishes the room and it is totally child-safe since Jack can’t even get near to reaching it.

Easiest curtains EVER and the room looks so much more complete now!

Picture Update
In the first room design, I had framed scraps of fabric and hung them over the dresser/changing table. When I took down the jungle canvases to make way for the bookshelf project, I really liked the drawings but I just wasn’t a fan of the cheap way they were mounted onto the frames. They were only $2.50 each at Target, so I really can’t complain much. All I did was rip the canvas off of each frame (they were held tight by glue and came apart pretty easy) and then put them in my existing photo frames. So much better and Jack LOVES staring at the lion during changing time!

The old pictures — I framed three different kinds of fabric (the same fabric used for the original pennant).
The updated dresser view — these prints look so much better in frames.

So there you go, it just took a couple hours total to make some small changes, but now I feel like I can live with Jack’s room for a little longer. You know, until I get bored again and trash the whole place to redo it with a different theme!

How about you, is there a room in your house that just needs a few little changes to be liveable again?

Like what you see? Share me with your friends!