I first talked about my love for Pinterest here when I shared “21 Suggestions for Success” by H. Jackson Brown, Jr. For anyone not familiar with the website, Pinterest is a virtual pinboard which allows you to organize and share stuff you find on the internet.
I started my account about a year ago and one of the very first things I pinned were these super cute and inexpensive baby bookshelves.
I was actually pregnant at the time, but wasn’t able to share it yet so I labeled the picture with “Ikea spice racks for book storage – only $4 each! Love this idea for a future kids room.” Sneaky, right?
Anyways, my favorite bloggers just launched the Summer version of their Pinterest challenge so I figured that this was the perfect time to finally work on those bookshelves!

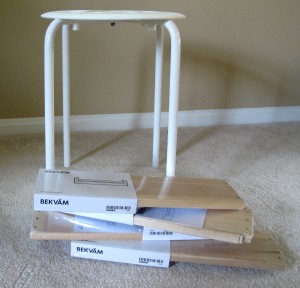
I stopped by my local Ikea (which is dangerously located about 5 minutes from my work) and picked up some Bekvam shelves. Since they were only $3.99 each and I have lots of baby books, I decided to buy some for both my living room AND Jack’s room. So I grabbed 10 of them and also a super cheap and plain little stool out of the clearance room (only $3!).

One area of our living room is called “Jack’s Corner” and contains all his toys and books for the first floor of our house.
The three baskets of this shelf have his toys in there, so they look grown up but are still useful for the baby. As he gets older and starts crawling around, the higher shelves will be switched out with more kid friendly things. I thought that the blank wall under the window would be a perfect area for his new bookshelves.


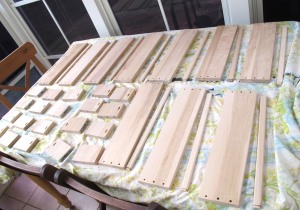
So, first things first – I took all the pieces apart and spread them out for painting.
The wood was an unfinished pine, so I didn’t need to do any preparation at all. I had about half a can of leftover oil rubbed bronze Rustolium paint (not the spray kind, the little jar for brushing on), so I used that and did two coats on each side. Once it all dried (which took FOREVER in this heat and humidity), I put the shelves together and took them outside for a coat of matching spray paint to give it a nice finish.
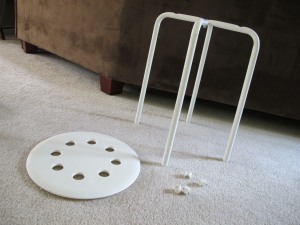
 While waiting for the shelf pieces to dry, I also took apart my little $3 stool.
The seat was kind of grungy, so I threw it in the sink with some soft scrub and left it to bleach out while I worked on the legs. For the stool legs, I branched out from my typical sparkly brown color and got a fun turquoise instead! It took about three coats to get a nice thick coverage with no white shining through.
Even though this little project was super simple, I do have a few tips if you want to do something similar:
- When using Rustolium paint, wear gloves! Rustolium paint is SUPER STICKY – especially when you use the kind in the jar. It is really hard to scrub off of your hands, so make your life easier by using gloves. As you can tell from the picture above, I was smart and used gloves when spraying the stool. Unfortunately, I forgot to wear them on my first coat of painting the shelves and currently have brown under most of my fingernails and on the front of my left leg.
- When using Rustolium paint, use disposable paint brushes! As I just mentioned, the paint is super dooper sticky. Last time I used it (on the patio furniture), I used disposable foam paint brushes. This time I used my favorite edging brush. {sad trombone horn sound} Yeah…my paintbrush is trash now. The paint is so darn sticky that when you try to wash it off it just makes a sticky mess everywhere. So, learn from my mistakes and use a brush that you’re planning to throw away.
- When painting on top of a table, an old painting sheet is NOT sufficient coverage. Yeah, I’m going to chalk this up to me being excited to complete the project while Jack was napping. Normally I would throw a piece of cardboard on top the table and then the sheet, this time I totally forgot. The top of my sunroom table is now an absolute mess, which would upset me if I hadn’t already planned on painting it. Now I need to add a step of sanding the top down before I start. BOO!
Okay, now that you’ve learned from my mistakes…here’s the finished product!
I love how the stool turned out with the snazzy turquoise legs. You can’t see it in the picture, but I have a few pops of turquoise throughout the room, so it totally works.
I’m also really loving the little bookshelf area — it gives that area of the room some color, in addition to being a nice little space where Jack can keep his books.
I still have 6 finished shelves left that I will most likely put in Jack’s room. However, I was thinking that they could also be handy by my sewing area (for jars of pins, thread, scissors, etc) or even in the bathroom (to hold magazines). So we’ll see where they end up!
Updated 7/10 — Want to see some other Pinterest Challenges? Check out the ones from Young House Love, Bower Power Blog, Centsational Girl and Ten June!


