
It’s time for the full reveal! Last month, I shared Office Updates: The Before & My Plans and as happens often in life… some of my plans went great and one did not. Just as a quick refresher, I was planning to: add wallpaper, upgrade my cube organizer with new bins and legs, and organize my sewing area with a folding table and storage cart.
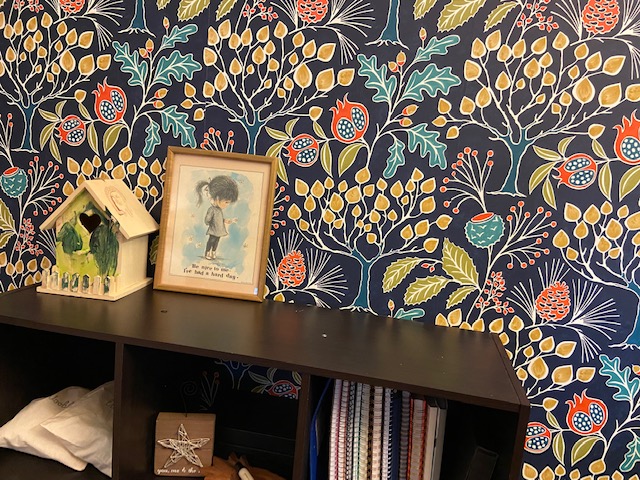
Here is the before:

First off, the wallpapering plan went spectacularly! I wrote a full Office Updates: Peel & Stick Wallpaper post that outlines the entire wallpapering process. It was much easier than I expected and I absolutely LOVE the look of the new wallpaper:
Here are the quick links to what I bought for my wallpaper project:
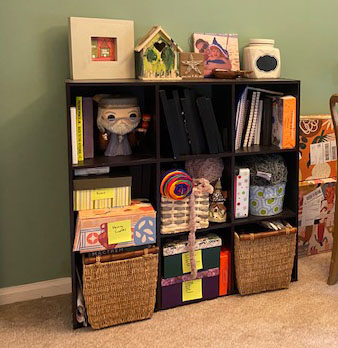
Next up, upgrading my cube organizer. I had organized it previously with a bunch of random boxes and it just looked super messy. Especially because it was right in view on my Zoom calls.
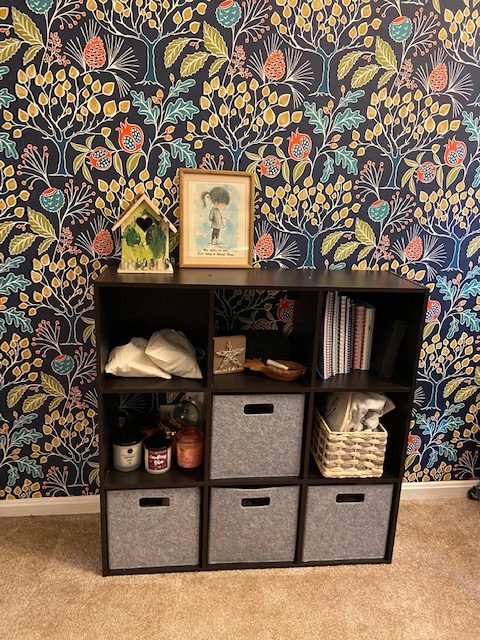
I went through and reorganized my cubes again, donated a bunch of stuff I wasn’t really using, and put other stuff into the nice new felt bins I purchased.
Unfortunately, although I ordered the gorgeous legs to screw into the bottom of my cube organizer, once I looked closely at the crappy laminate “wood”, I realized it wasn’t going to work at all without fully destroying the whole thing. I returned them and plan to be happy with the current state of things. Unless I come across something else that will work better when out thrifting.
What I bought for my cube project:
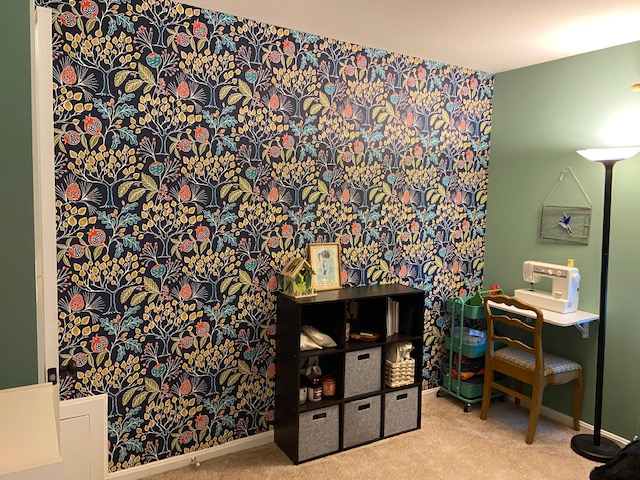
Last stop: the sewing corner! I had a table that I had thrifted probably 20+ years ago as my sewing table. Because the table was so large, it also became a catch-all place for crap that needed to go elsewhere. I wanted something much skinner that would fit just my sewing machine. I also wanted some open storage so that my sewing stuff was nearby.

I ended up going with a folding table that screws right into the wall. It is the perfect size for my sewing machine and can even collapse to the wall if I’m not planning to use it. Most of my sewing consists of hemming the length of skirts or making easy pillows… so I don’t really need much space. However, if I do need a larger sewing space for a gigantic project, I can always set my sewing machine up on my desk, which is right across the room.
As for the cart – I LOVE it! It went together super easily and has wheels, so I can roll it around if I’d like. It’s perfect storage for my extra fabric, pins, scissors, thread and miscellaneous sewing stuff. Now it’s right within my reach, takes up less room, and is super organized.

What I bought for my sewing area:
Here is my favorite Before & After:


And one more for funsies:
As an added bonus, that little area to the left of my organizer is a perfect background for outfit photos!

If you add up the cost of everything I purchased for my Office refresh, the total is: $191. I’m super thrilled at the new look of my office. Especially because I spend a lot of time there on my telework days. I wish I had done this a year ago!
Disclaimer: This post contains ShopStyle affiliate links. This means that clicking on a link may help me earn a small commission at no cost to you.
It looks fantastic! Love that cart! I might get something like that for work for when I have to travel to other classrooms.
It would be so handy for that!
What a difference! Those felt felt bins really look great! I love the paper. It looks so clean and organized, yet in a stylish way. I need that cart for dog things ( I watch dogs ) I have no room for. Thanks for sharing, great job!
Thank you! I love the cart and it would have also been so great when Jack was younger to hold all his little toys! Or art supplies!
I know that you already returned your legs, but just a thought. You could buy a piece of plywood and cut it to the size (or have them cut it at home depot) of the bottom of your shelf. Paint it black, and then you could put the legs in that and screw your shelving unit onto the plywood. Just a thought.
Thank you for your recommendation! I did think about adding wood to the base to give the legs something more substantial to screw into. However, it just seemed like ‘putting lipstick on a pig’ and I decided to just use the cubes as they are while keeping my eye out for some sort of dresser or drawer set that I could find secondhand. How great would something wood and mid-century look in its spot?! For now though, I’m happy with the cubes and the new felt containers. =)