The Absolute Easiest Way to Adjust an Elastic Waistband (NO Sewing Required!)

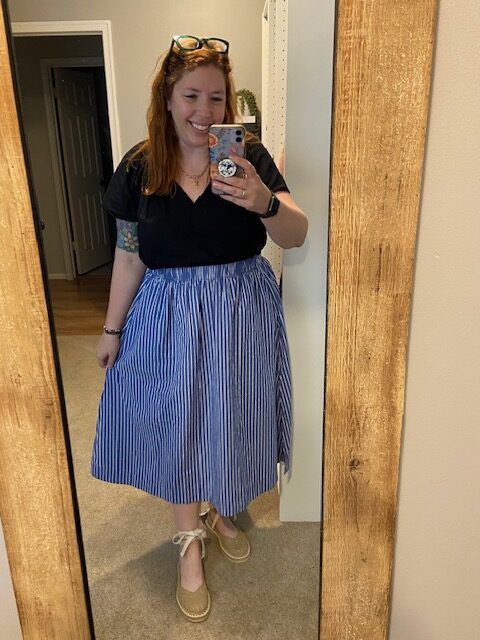
You know I love a good thrifted find. However occasionally when I find something I love, it needs a little adjustment to fit my body. In this case, I thrifted a beautiful vintage skirt in Arizona, but the elastic waistband was a bit too roomy.

But here’s the thing: I didn’t want to permanently alter the skirt. I wanted it to fit me now, but also be forgiving if I fluctuate a little in size. Whether it’s weight loss, gain, or just that time of the month, sometimes your waist size needs a little flexibility.

And I know some of you are a little intimidated about the idea of getting out a sewing machine. So here is the ABSOLUTE easiest way to adjust an elastic waistband with NO SEWING.

Easy AND fast. It literally took me longer to write this blog post then it did for me to check this task off my list.

What You’ll Need

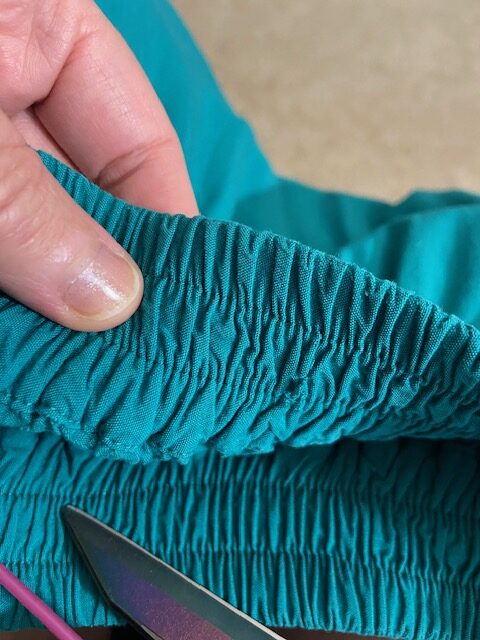
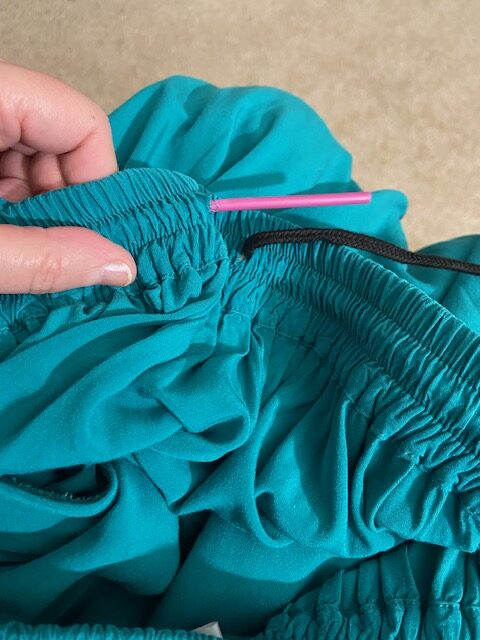
My skirt had elastic sewn into the top with two lines of stitching going through it. I just took my scissors and made two little cuts where I wanted to drawstring to poke out. You can do this on the outside (where the drawstring and bow will be seen) or on the inside (where only you will know its there). I choose the inside.

Then, I grabbed the drawstring threader and stuck my drawstring through one of the holes.

Poke the other end of the threader through the channel in the middle and thread it all the way around the skirt, pulling the drawstring through as you go.

Once you get to the end, detach your drawstring from the threader and THAT’S IT!

Now, I can tie my skirt a little tighter so that it fits my body every single time I wear it. I can tighten the waistband when I need to, loosen it when I don’t, and it won’t change the structure of the skirt. It’s completely reversible and super comfortable.

I love easy hacks like this, especially when they give new life to a piece of clothing I thrifted or already owned. No need to pass on a too-big skirt just because the waistband is loose and no need to stress about the fit fluctuating!

Disclosure: This post contains an Amazon affiliate link. This means that clicking on a link may help me earn a small commission at no cost to you.

My TJ Maxx Haul: K-Beauty + Rothy’s!

It happened again. I went into TJ Maxx to grab a few things and I ended up with all kinds of stuff that wasn’t anywhere on my list. Oops. No regrets though… so let’s check out my haul!

Which brings us to… since WHEN does TJ Maxx have Rothy’s?!

Rothy’s Espadrilles, $59

I thought it was a fever dream when I saw the first pair, but then I ran around like a drunk leprechaun looking for gold and gathered four different pairs into my cart! I ended up narrowing my choices down to two pairs (and I tried on a couple different sizes too)… both of them The Espadrilles from Spring 2024.

This style was sold by Rothy’s last year for $140 and they changed them a little bit this year to be more of a Mary Jane look. I loved both the black/tan cap-toe and the sparkly gold version and was having a really hard time deciding which ones to keep.

I let my Instagram friends vote and the winners were the black/tan cap-toes! I tried each pair on with some other items in my closet to see which pair would pack the most bang for the buck, and the black/tan cap-toes were the winner. I returned the gold pair to the store for someone else to enjoy.

After I lost my damn mind in the shoe section, I wandered over to the skincare section to see if I could find any of my holy grail product: COSRX Snail Mucin for less than Amazon’s price of $17.

Not only did I find it for $13 (SCORE!), I also found a few Korean skincare goodies to add to my stash:

Beauty of Joseon Glow Serum (here it is on Amazon), $12.99 at TJ Maxx

I’m a serum girlie, and who doesn’t want their skin to glow?! This one is supposed to exfoliate and hydrate for skin tone and pore improvement. It is also supposed to provide nourishing and an anti-aging boost. So far, I’ve tried it three times (2x at night before bed and once in the morning) and it’s great! It doesn’t feel sticky when you put it on your face, soaks in nicely and does give you a healthy glow.

Beauty of Joseon Rice + Honey Glow Mask (here it is on Amazon), $12.99 at TJ Maxx

Another product from the same line. I’m almost out of my current masks stash, so I thought this one would be fun to try. This masks offers nutrition from honey, absorption from clay powder, and texture care ingredients from rice bran powder. It is an all-in-one mask that provides skin clearing, antioxidant, moisturizing, firming, scrubbing, and soothing. I gave it a try over the weekend — wetting my face, applying the mask in circular motions and then let it sit for 15-20 minutes before rinsing it off. It left my face feeling soft and moisterized, so I’m calling it a win!

Shinbi Beauty Japanese Vitamin C Serum (here it is on Amazon), $7.99 at TJ Maxx

This one was a wild card.  I hadn’t heard of this brand before, but I’m low on my Vitamin C serum and the price was good, so I figured I’d give this one a try. In addition to the Vitamin C, this one also contains rice water (for exfoliating) and Hyaluronic Acid (for hydration and plumping fine lines). I’ll give this one a try when I’m completely out of my current product.

So now I have all the fun K-beauty items to try AND a new pair of Rothy’s for the summer.

Have any of you seen Rothy’s at your TJ Maxx or Marshalls?? Are you also obsessed with trying all the K-beauty products?

Disclosure: This post contains Amazon affiliate links. This means that clicking on a link may help me earn a small commission at no cost to you.

An Honest Review: Reusable Nespresso Pods Are Way Easier (and Cheaper) Than I Expected

I’m a Nespresso girlie and have been since December 2022 (My Nespresso Citiz Review and my 2 Favorite Nespresso Recipes), when my friend influenced me into getting my own Nespresso machine. Every single morning, I happily pop in my pods and make my fancy home coffee. It gives me coffee shop satisfaction at home, and I’ve perfected my daily recipe.

But then the whole tariffs situation started swirling around, and I had a tiny internal freak-out. What if espresso gets more expensive? What if it’s harder to get? What if I run out and have to switch back to lame regular coffee?!

So I started researching reusable Nespresso pods. I mean, they are better for the environment and I’d save money… so this was the perfect shove for me to give them a try. Before I made the leap though, I asked ChatGPT to do a little cost analysis for me so I could determine when I’d break even.

My current set up: about $2 per cup (this includes 2 pods, milk and cold foam)

My new set up:

According to ChatGPT, my new cost per cup is about 60 cents.

Which brings us to yearly savings – assuming I drink 1 cup per day for 365 days and I have a savings of $1.40 per cup over my previous recipe, I will save $511 per year! And that’s with the ‘expensive’ espresso powder. I found some at Aldi (pictured above) for $5 that I’ll be trying once my illy jar is empty!

Oh and I did a TON of research into which stainless steel reusable pod set to purchase and this one is perfect. It comes with 6 cups, 100 lids, a scoop/tamper and little brush. It’s all super sturdy and nice, and doesn’t anger my Nespresso machine. In fact, my machine treats these reusable pods exactly the same as it does the expensive Nespresso brand pods.

Okay, so cost savings is one thing… but more importantly is ease of use and flavor.

Switching Over Was Shockingly Easy

You know how sometimes you try something new and it feels like a whole production? This was not that. From the very first cup, using the reusable pod was ridiculously simple.

  • Fill the pod
  • Tamp the grounds (leave a little room at the top)
  • Stick on the lid
  • Brew as usual

That’s it. No mess, no frustration, no weird learning curve. Honestly, I was kind of annoyed at myself for not doing this sooner.

I first started by replacing my non-flavored espresso pod with my new home-done version and could barely tell the difference. Actually, the illy espresso was more flavorful and tasted stronger than my normal blend. Once I ran out of my flavored espresso pods, I started using two of my new reusable pods and adding either a splash of flavored creamer or one pump of flavoring.

After I use a pod, I just let it hang out in the interior chamber of the machine (it’s super hot when you first use them). Then, when I’m cleaning up my coffee cup later, I grab the used pods, peel the foil lid off, shake the grounds into the trash and rinse it under water. Just like that, it’s ready to go for my next cup of coffee.

The Pros

  • It’s Easy – Truly. If you can scoop and press, you’re good.
  • Big Money Saver – Once I hit that 30-use mark, everything after was cheaper than buying pods. I love that for me.
  • Eco-Friendly – Less waste!
  • More Coffee Options – I’m no longer locked into Nespresso’s selections. With flavored creamer options and coffee syrup options, my options are unlimited!

The Cons

Um… none. If you’re someone who doesn’t want to add any steps to your coffee routine, maybe it’s not for you. But this adds all of 30 seconds and gives you complete control over your brew — seems like a fair trade to me.

Disclosure: Not sponsored. This post contains Amazon affiliate links. This means that clicking on a link may help me earn a small commission at no cost to you.