Looking Back: Before/After Fun

I can’t believe that we had our two year house anniversary yesterday.

There was a lot of drama leading up to the purchase of this house. Here’s the Reader’s Digest version, but you’re welcome to go back and read through the archives for the full nitty-gritty. I worked at a job for 6 years when I heard that I may be losing it. At that same time, I also happened to be pregnant with Jack. Oh, and we had our townhouse on the market for over a year and had FINALLY gotten an offer. So there we were, townhouse sold, pregnant, jobless and moving into a rental house owned by my parents.

A little bit of stress… right?

We were incredibly lucky though – I ended up keeping busy with freelance work and landed a job that started just 4 weeks after my last day at my previous position. After a couple weeks at my new job, we restarted our search for the perfect home… and found one on Christmas Day. We put our contract in on New Year’s Day, went to settlement on January 27, 2012.

I started painting my first room that Saturday. While I was almost 8 months pregnant.

A few days later my pregnancy became a bit more complicated when I received a double diagnoses of gestational diabetes and cholestasis.

Just 15 days after we signed the contract for our house I went into early labor at 31 ½ weeks of pregnancy. When they told me that they were going to try and stop my labor and keep me in the hospital on bed rest, I told them that we had just moved and I need to go home and unpack.

I remember I was very upset that the crib was in pieces.
And I had more rooms to paint.

After hours upon hours of the doctors trying to stop my labor, Jack was born on February 15, 2012. Just 19 days after settlement. And the house was a mess.

Leaving the hospital a couple days later, while Jack had to stay in the NICU was one of the hardest things I’ve ever dealt with in my life. So, each day I would throw myself into house projects in morning, scrub the paint off my hands at the NICU scrubbing station each afternoon and spend as long as possible just staring at Jack through the walls of the incubator. Travis would work a full day and then join me in the hospital. Sometimes we were allowed to hold Jack and sometimes I was only able to poke a finger in to touch his soft skin.

Oh and I licked him.
Because he was mine and I could.

Then, when we were so tired that we couldn’t stay for another minute, we’d make the hour long trip home and I’d wake up the next day and do it again.

Turning our house into a home was the only thing keeping me sane.

Over the past two years, I’ve done more house projects then I can count. I can truly say (even though I’ll never be DONE) that our house feels like a home.

So each Thursday for the next month or so, I’ll be sharing the before and after of each room. Each before picture will come directly from the listing photos of how we first saw our house. Each after photo is the actual NOW that we are living in.

I hope you enjoy them!

Oh, and if you have been reading this blog so long that you were reading along when I was going through all the drama, leave me a comment. I’d love to know if there are any long, LONG time readers!

Like what you see? Share me with your friends!

A Toddler Pillow to Make EVERYONE Happy

Today is part two in my mini-craftinista* series and it starts with a little story…

Have you heard of sleep regression? Apparently it’s a wonderful time in a child’s life where after months of going right to sleep and sleeping through the night, suddenly they don’t like to sleep anymore.

For Jack, this happened a few weeks ago – after sleeping like a champ we had to coax him into bed with a tiring combination of reading, rocking, milk in a sippie cup, snuggling with mommy, snugging with daddy and some more rocking. He even ended up in bed with us for a couple nights, only to be kicked out when he kept KICKING ME in the back all night long. I mean, I’ll take that crap from an 8 pound rescue dog… but NOT a 30 pound little man!

It was exhausting.

Which is funny because JACK was exhausted and just would NOT go to sleep.

So in a fit of brilliance (or just overtired madness) I told Jack that I had a SPECIAL pillow only for Big Boys to use. This SPECIAL pillow would go into his crib, but ONLY if he was a Big Boy who would lay down on it and go to sleep.

Can you believe that this worked?

Suddenly Jack stopped fighting sleep and would go right into his crib to lie on his special Big Boy pillow.

I’m a genius. A parenting genius.

Send your checks today to get your very own SPECIAL Big Boy pillow. Also available in Big Girl…

Just kidding. The secret is that I grabbed the closest pillow I could find, which was an old accent pillow that I had made for our couch ages ago. After living on the couch for a while, it somehow ended up in Jack’s room on his rocking chair. It was so well-worn that it’s quite flat… which makes it perfect for Jack since he can’t smother himself on it.

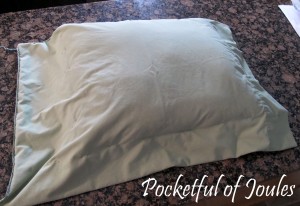
After Jack slept on it contently for a couple weeks, I figured I should make a pillow case for it so that I can keep it clean. So I grabbed an old pillowcase that we’ve probably used for 10 years or so and made it fit:

Toddler-pillow-before-updatedCheck this out… it’s a magical pillow. Which is actually just a pillow I made a bunch of years ago from an old pillow case from Crate & Barrel.

First, I stuck the throw pillow in our old pillowcase and pinned around it with straight pins. I pulled it in and out a couple times to make sure that it wasn't too snug.First, I stuck the throw pillow in our old pillowcase and pinned around it with straight pins. I pulled it in and out a couple times to make sure that it wasn’t too snug.

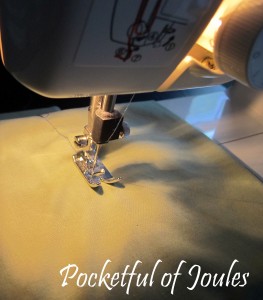
I then removed the throw from the case and stitched around all three sides, removing the pins as I went so that I wouldn't stab myself and yell out bad words.I then removed the throw from the case and stitched around all three sides, removing the pins as I went so that I wouldn’t stab myself and yell out bad words.

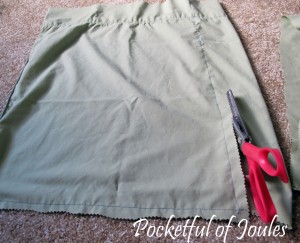
Once I finished sewing, I cut off the extra fabric. You can use normal scissors or be all fancy like me with my pinking shears. Is it weird that I have no idea how pinking shears came to live in my house?

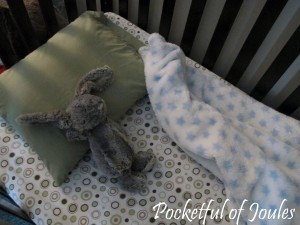
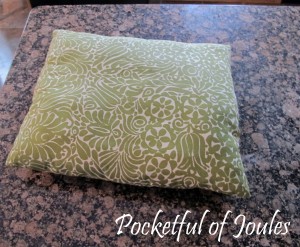
The finished magical SPECIAL Big Boy pillow. Mr. Bunny Rabbit approves.

Super cute, right?! And basically free.

And the best part is that I can sleep again!

* If TJ Maxx can call someone a Maxxinista… I can certainly call myself a craftinista!

Like what you see? Share me with your friends!

Toddler Painting: $6 Worth of Materials for $60 Worth of FUN

I think this is going to be another crafty week, because darn if I haven’t been feeling like a crafting QUEEN lately.

As most of you know, I was home for 16 days STRAIGHT for a sweet combo of work being closed (yay for working at a university) and a couple vacation days. SIXTEEN DAYS in a ROW. That’s kind of a lot.

And no, I’m not complaining because I loved having time off to hang out with Jack and Ollie. And yoga pants. And Christmas cookies. But mostly Jack and Ollie.

Keeping Jack entertained for that much time really forced me to be a little crafty, which is why I decided to do two different painting projects while I was home. The first project was from this month’s Citrus Lane box – it was supposed to be a handprint project, but turned more into abstract art. And I totally love it and hung it on my ‘Jack projects’ wall!

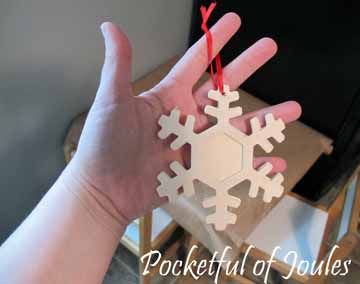
Our second painting project was inspired by some wooden snowflakes on clearance at JoAnn’s.

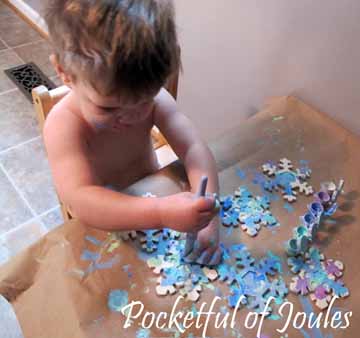
snowflake project - bare snowflakeThe snowflakes were on clearance for 50% off, which brought them to just $ .70 each. I also picked up a cheap paint pots kit for $1.50 and used some paintbrushes I already had at home. Then, I covered Jack’s little table with some kraft paper and stripped him down for some painting fun.

snowflake project - painting

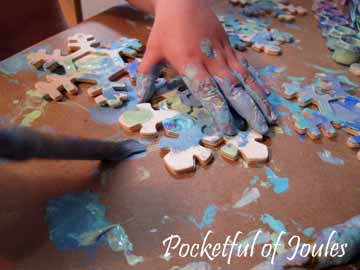
snowflake project - painting close up

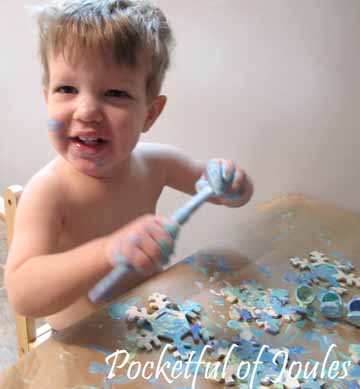
snowflake project - happy jackAnd it was SO MUCH FUN! I can’t believe how long Jack concentrated on painting the snowflakes… and believe me, doing anything for more than 15 minutes with a kid this age is impressive! When he was finished, I just threw the paper away and stuck Jack directly into a bath (the paint washed off easily).

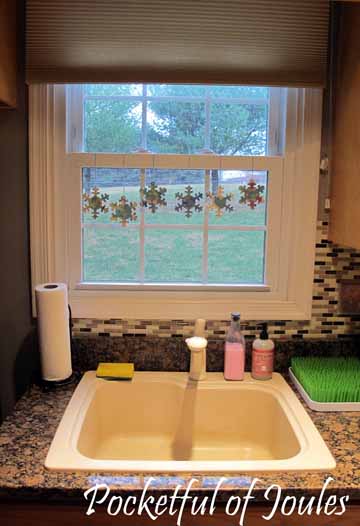
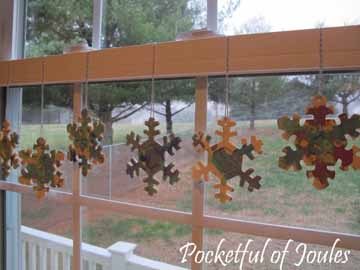
Once the snowflakes dried, I stuck some thread through the holes and hung them up in my kitchen window. I also wrote the date on the back of one of the snowflakes so that 10 years down the road I remember when we made them.

snowflake project - finished

snowflake project - finished close upI really like my happy little snowflakes because they’re not “Christmassy” but more “wintery” so I can keep them up for the next couple months. This is especially nice since we took all our Christmas decorations down over the weekend and I’m totally going through withdrawal.

Do you have a super cheap and fun craft project for toddlers that I should try? Feel free to leave me a link below! Also, are you suffering from Christmas decorations withdrawal too? I kind of wanted to leave my tree up for another month…

Like what you see? Share me with your friends!