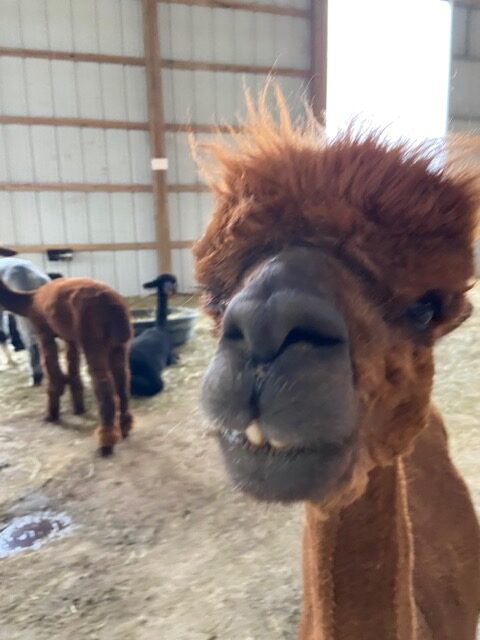
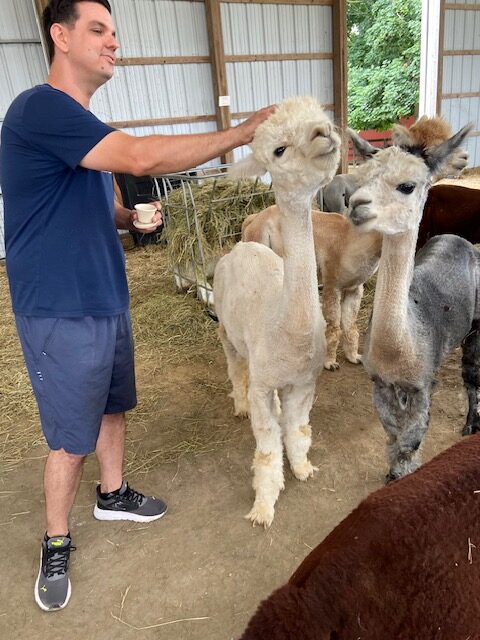
I’ve done yoga in a studio. I’ve done yoga in a greenhouse. I’ve done yoga while following along with a Peloton instructor while Ollie tries to tackle me. But this weekend… I did yoga with alpacas.
Yes. Alpacas.
And it was fun. And a little stinky.
I signed Travis, Jack and me up for a yoga class at Black Barn Alpacas, which is exactly what it sounds like… yoga surrounded by fluffy alpacas. Typically, the class is offered outside in their fields; however, since it was a rainy day, our class was held in a large indoor alpaca barn.
Before class started, we had some time to mingle with the herd and get over the initial ‘why does it look like every middle school boy’ feeling.
Then, we rolled out our yoga mats and a nice instructor put a little pile of alpaca food at the end of each mat to encourage them to chill with our group.
Spoiler alert: They were NOT interested in us.
Instead, we enjoyed an hour-long yoga class and the group of alpacas that they let out of their pens just kind of swarmed around and moved from side to side of the barn. It was a weird mix of relaxing into stretches and hilarious when you’d accidentally make eye contact with an alpaca.
Fun fact: it’s a little hard to do deep breathing through your nose and out your mouth when it smells like alpaca poo. Just saying.
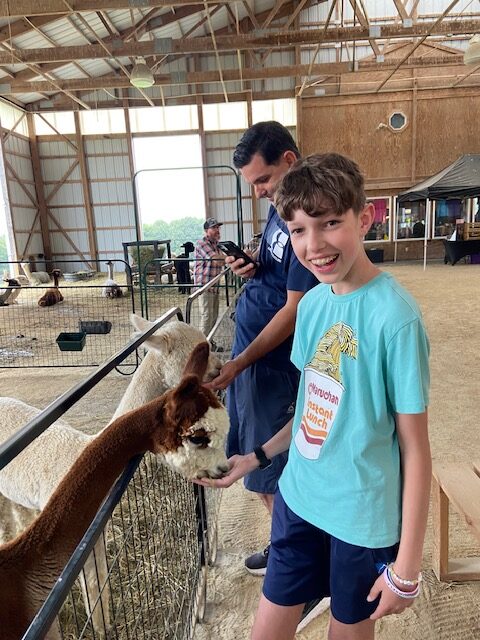
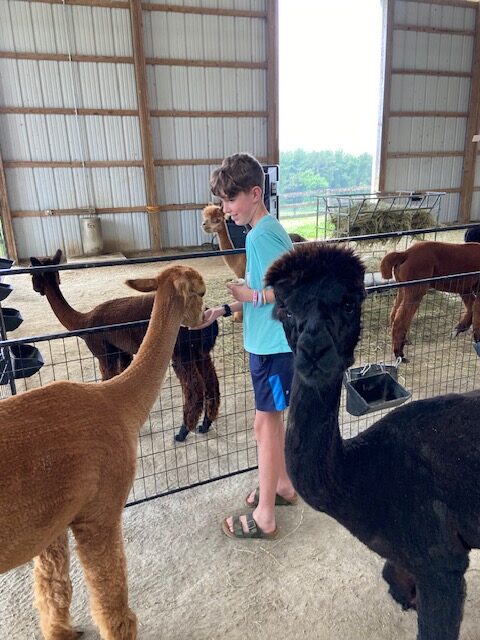
Anyways, Jack lost interest about halfway through the class, so he went and played with the alpacas. Which was SO MUCH better than having to listen to “is it almost over yet” a million times while trying to hold yoga poses. 5 out of 5 stars… highly recommend!
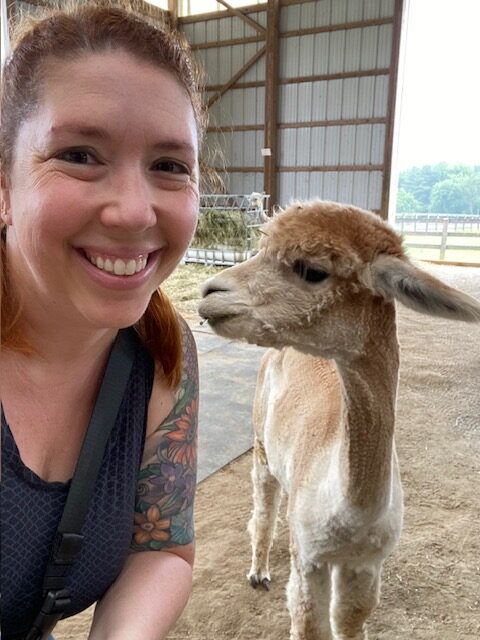
After the class, they handed out little cups of alpaca feed and let us go wild hanging out with the alpacas. We were allowed to go in any of the pens, feed them, pet them, and laugh at their silliness.
Family Verdict: WE LOVED IT! It was a fantastic, slightly ridiculous way to spend a Saturday afternoon and I highly recommend trying it out!
For part three of our Arizona Family Adventure series, let’s talk about Prescott! Why did we decide to stay in Prescott? Well, Sedona is expensive. Instead of staying in Sedona like we did last time, we looked for a spot that was within easy driving distance to both Phoenix and Sedona — with a bit longer (but totally manageable) drive to the Grand Canyon for a day trip. Prescott quickly rose to the top of our list, and I narrowed our VRBO searches to Prescott and nearby Prescott Valley.
We ended up renting a house perched on the side of a mountain in Prescott, complete with absolutely gorgeous views from the deck and hot tub. If you’ve only ever stayed in hotels, let me wax poetic about the magic of renting a VRBO for just a moment:
You get your own house, which makes it feel like you’re truly part of the community.
You can be as introverted as you want! No hotel registration lines. No awkward elevator small talk. No sharing walls with strangers and listening loud conversations as people walk down the hallways while you’re trying to sleep.
A full kitchen and laundry room are a must. We always make sure our rental has both, so we can eat meals at “home” and travel with just carry-on suitcases — doing laundry halfway through the trip.
We like to add a little extra luxury, renting places with a spectacular view, hot tub, or private pool whenever possible. Honestly, it’s amazing how much further your money can go renting a whole house instead of a hotel room!
On our Spring Break 2025 trip, we spent 2 ½ days in Prescott – day 2, day 4 (Easter) and the afternoon of day 5.
Day 1: A Donut Stop before the Grand Canyon and Red White Brew After
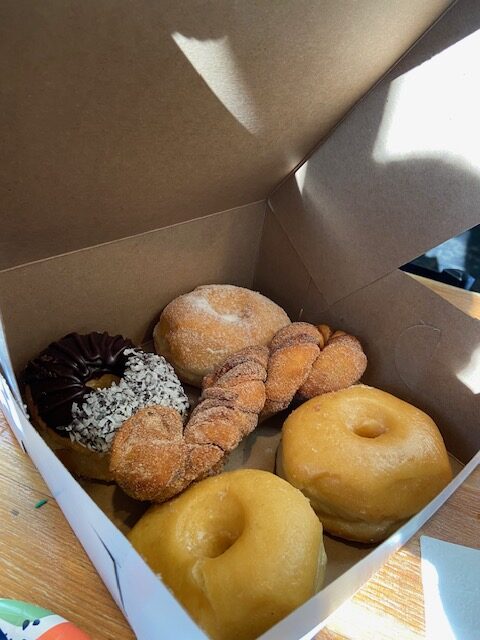
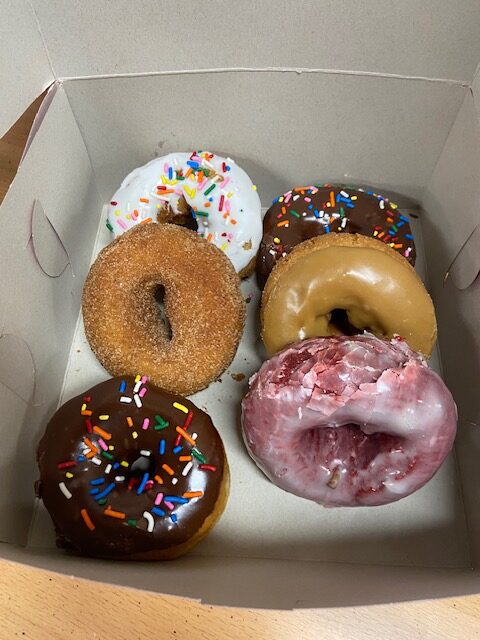
Okay, I’m going back in time a bit. We already talked about our Day 1 adventure to the Grand Canyon. However, I wanted to make sure to tell you all about Outlaw Donuts. We stopped there for breakfast and ordered coffee, homemade donuts, and even a breakfast wrap and everything was delicious. If you are staying in Prescott (or even driving through), it’s a fantastic hole-in-the-wall that needs to be added to your itinerary!
After our Grand Canyon visit we pulled back into town hungry, so we stopped by Red White Brew because the menu looked good and they were open until 9pm. I ordered the chicken parmigiana to share with Jack and Travis ordered the chicken marsala. The food was great and the portions were so huge that we not only enjoyed dinner, but had plenty for lunch the next day.
Day 2: Shopping and All the Weather
After a long drive to the Grand Canyon and back on Day 1, we decided to take it easy on Day 2. The weather forecast was calling for chilly temps and a bit of rain, so it felt like the perfect excuse to throw on our comfiest clothes and spend the day exploring downtown Prescott.
We drove to Courthouse Plaza on South Montezuma Street, where there was lots of free parking and easy access to a bunch of stores, restaurants and bars. We then wandered around and poked our heads into pretty much every store around. Some of our favorites were: Prescott Trading Company, the shops in Whisky Row, Arts Prescott Gallery and Drawn West.
We headed back to the house to heat up our leftovers from Red White Brew, watched a little TV and then decided to head out to explore some thrift stores. We ended up checking out a Goodwill and two different locations of the Disabled American Veteran’s Thrift Store (DAV). You can learn more about the DAV thrift stores and their mission here. The thrifting in Prescott was excellent with great items and really low prices. You can see my thrift scores here, but Travis also ended up with some tee shirts, a super soft plaid flannel shirt and an Under Armour hoodie.
When we were driving around thrifting, we were SHOCKED when the rainy weather turned into giant flakes of snow! We decided to check out a nearby tapas restaurant, El Gato Azul, and had a delicious dinner while watching the snow float down. I love a fun, tapas menu and it’s a great opportunity for us all to taste some different things (even Jack). We ended up ordering: artichoke & spinach dip, Mediterranean nachos, fried artichokes, and carnitas.
It actually ended up snowing a few inches, so we woke up to a winter wonderland the next morning… before it all melted and it was 70 degrees again.
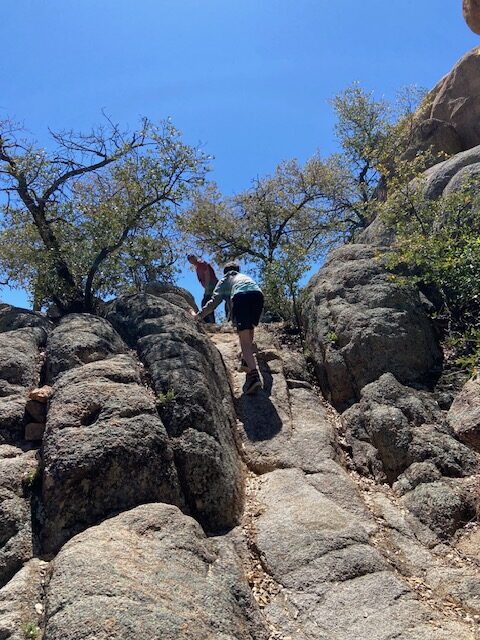
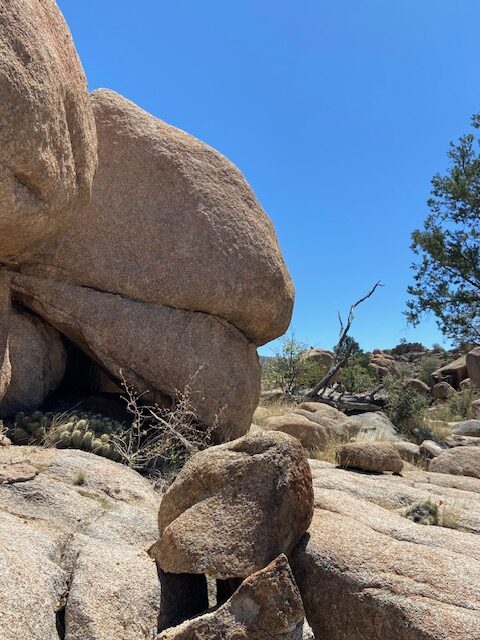
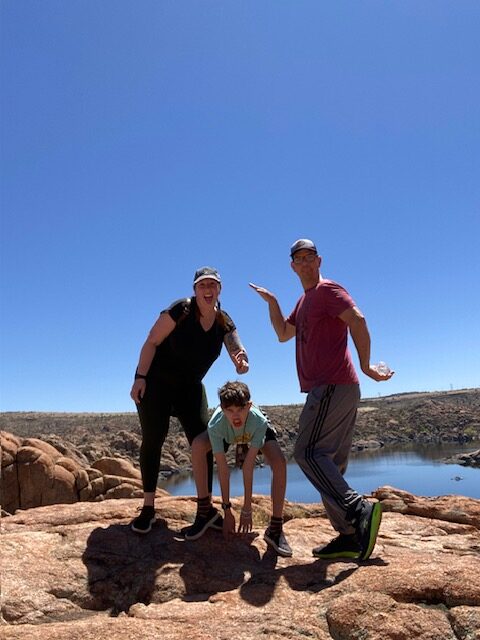
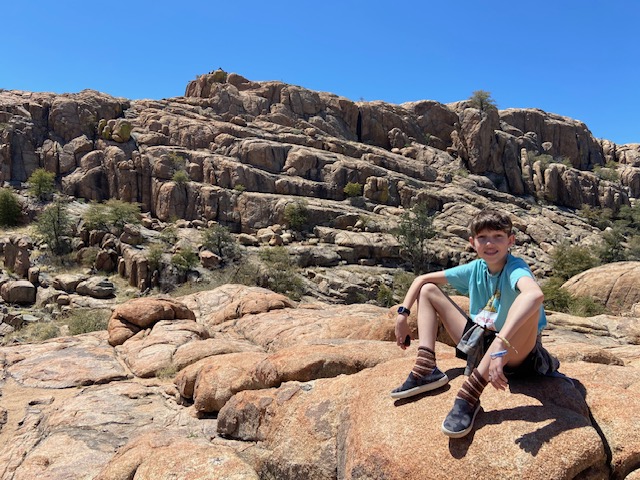
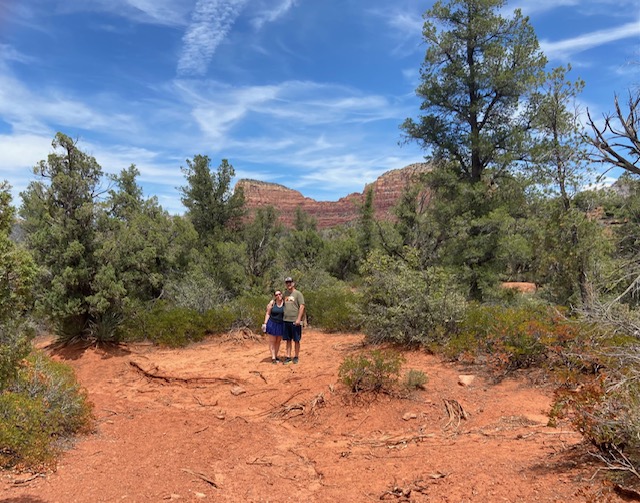
Day 4: Hiking The Granite Dells at Watson Lake
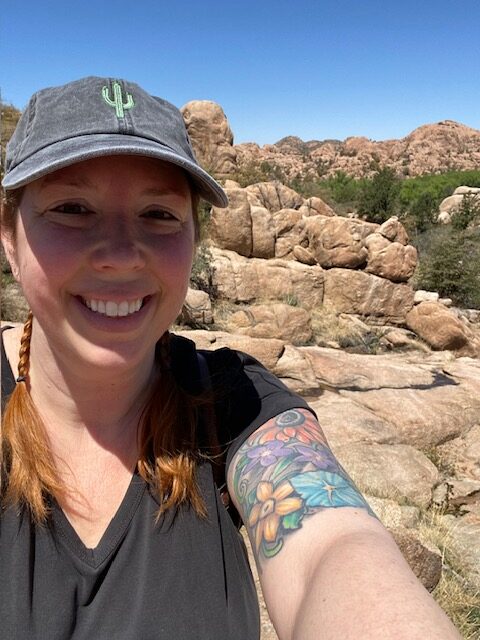
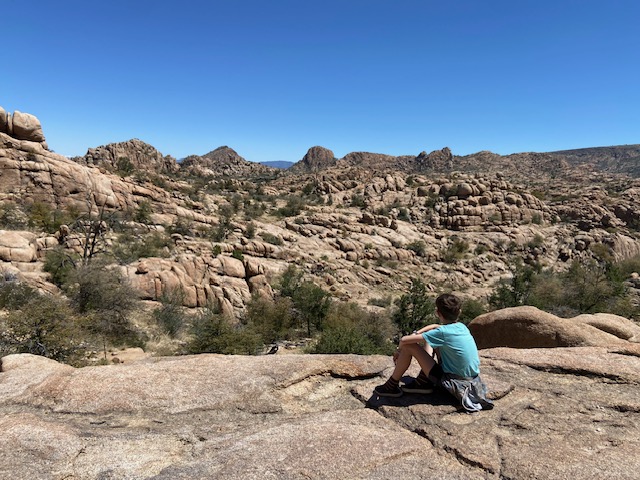
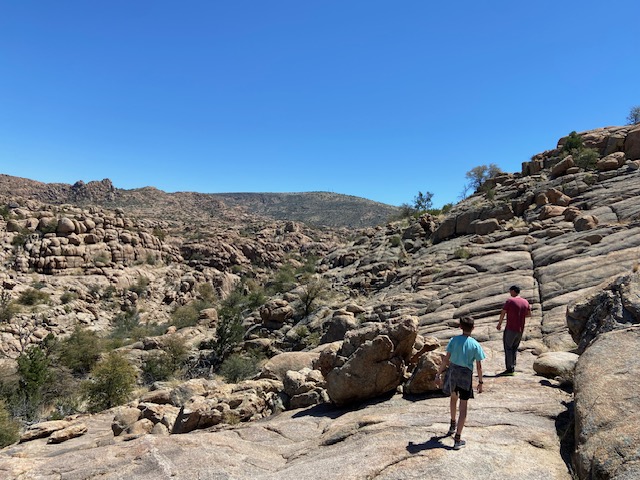
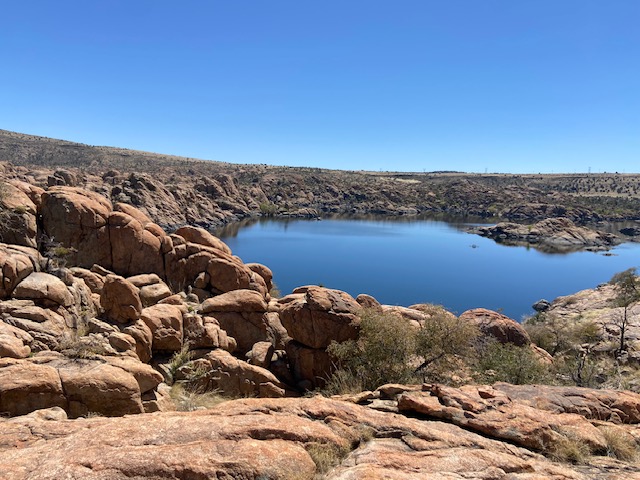
Day 4 was Easter and I knew that we wanted to stay away from the ‘touristy’ areas like the Grand Canyon or Sedona, so we planned to have a Prescott hiking day. I was really excited to see the Granite Dells at Watson Lake, and the hike did not disappoint. In fact, it may be one of my favorite hikes that I’ve EVER done!
We parked at the Flume Trailhead and then hiked the Flume Trail to the Watson Dam Trail. Basically, on our way out every time we got to a split in the path we would stick to the right. The path was marked extremely well with white dots to follow. Some of the hike was sticking to a path, but then other parts were climbing over gigantic rocks or up the side of a mountain. It was surreal and it felt like we were on another planet. We saw less than a dozen people out and about while we were hiking and it was absolutely beautiful. Once we got to the top of the trail, we were able to look down into the Watson Lake.
I cannot stress how much I loved the hike. In fact, when we were trying to decide what to do on Day 5 (Sedona or another Granite Dells hike on the South side of the lake), I was kind of leaning towards a second Dells hike.
Since that evening was Easter, we didn’t want to depend on a restaurant being open to feed us, so we stopped by Trader Joes to pick up some more food and ended up having some delicious home cooked steaks for Easter dinner.
Take a ball and throw it around on the courthouse lawn. Jack had an oversized hacky-sack and had a great time stretching his legs on Day 5 after the ride home from Sedona.
Bigger kids/teens – Jack LOVED the Granite Dells hike. I mean, there was not one complaint from him the entire time!
Here are some photos from hiking the Granite Dells at Watson Lake:
This is the end of my three-part series on our Arizona Family Adventure – Grand Canyon, Sedona and Prescott. Let me know if you have any questions or need any other tips!
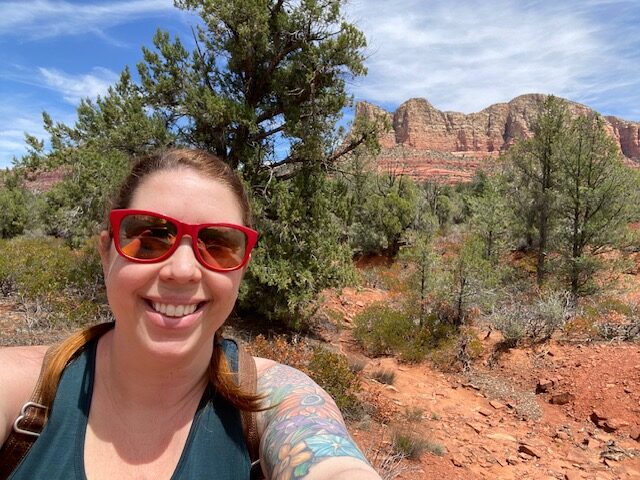
For part two of our Arizona Family Adventure series, we move on to Sedona. We first visited back in January 2023 (All About Our 4-Day Family Trip to Arizona) and felt like we didn’t spend enough time there and needed to return. This time around, we squeezed in two separate Sedona adventures on day three and day five of our trip. Rather than make you bounce between a bunch of posts, I’m rolling all the fun, activities, and recommendations into one spot.
Day 3: Sedona – Food, Shopping and Views
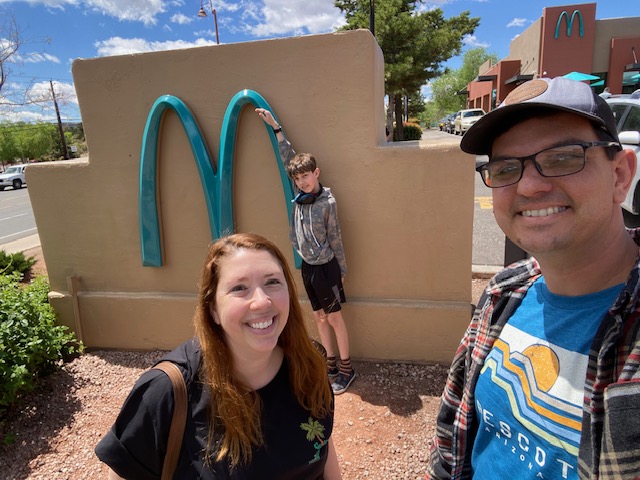
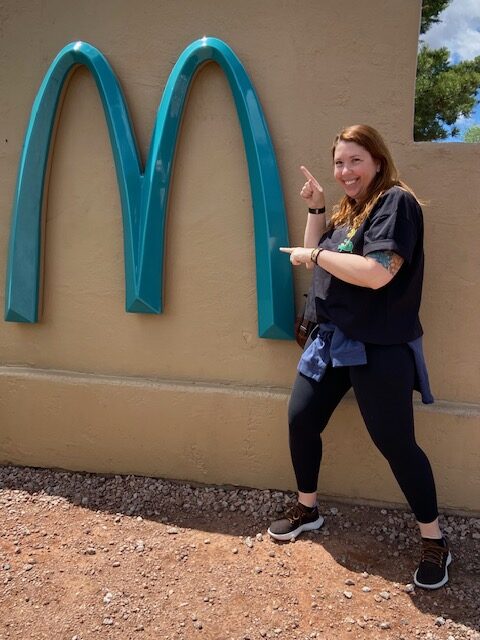
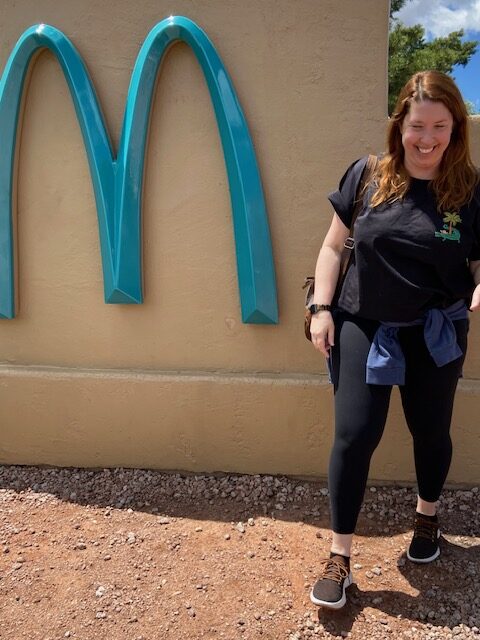
We started the day with a lazy morning and then had breakfast at the house before hitting the road. The drive from Prescott to Sedona is about 1 ½ hours, with some amazing views as you drive into the red rocks area. We ended up getting into Sedona just after noon, which was a bummer because we wanted to enjoy some Sedonuts… but they had just closed. Instead, we had a mediocre brunch at a place in the same shopping center and walked over to take a photo with a McDonalds sign.
And not just any McDonald’s sign. This is the only McDonald’s in the entire world with blue arches instead of the classic golden ones. Apparently, when they built it back in the ’90s, the city wasn’t having any of that bright yellow clashing with their gorgeous red rock views — so they made them tone it down with a turquoise color instead. And of course this marketing guru needed to take a photo with it, since I missed it on our last visit!
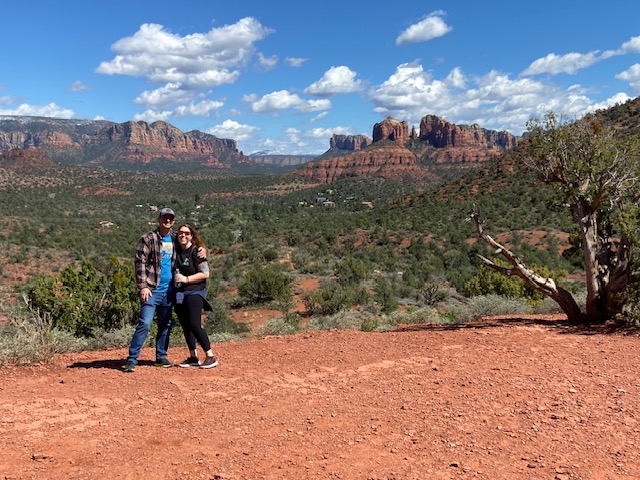
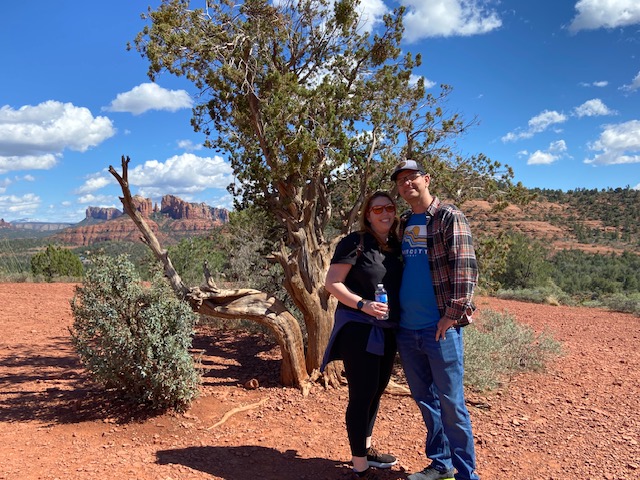
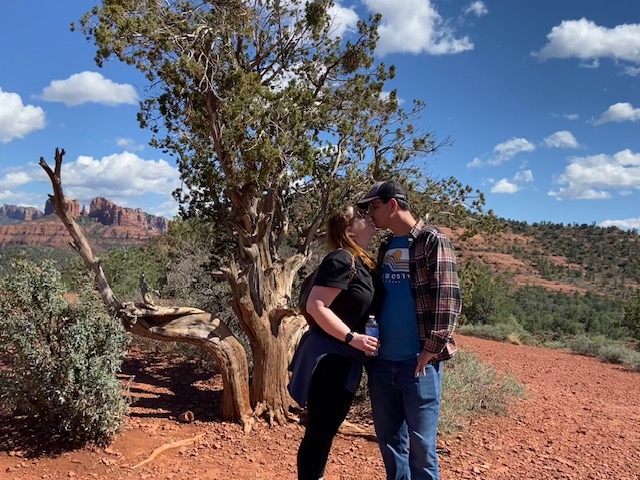
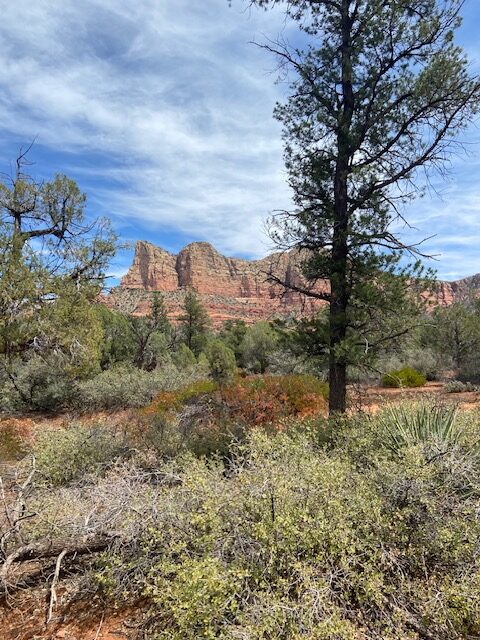
From there we meant to go do the Bell Rock Loop trail hike, but unbeknownst to me my iphone gps changed my entry to the Red Rock Loop Trailhead and we ended up there. We walked around a bit, but then jumped back in the car to find the correct trail… and got distracted by some nearby viewpoints. It turned out pretty great anyways, even though I can’t tell you where to go to enjoy the same view.
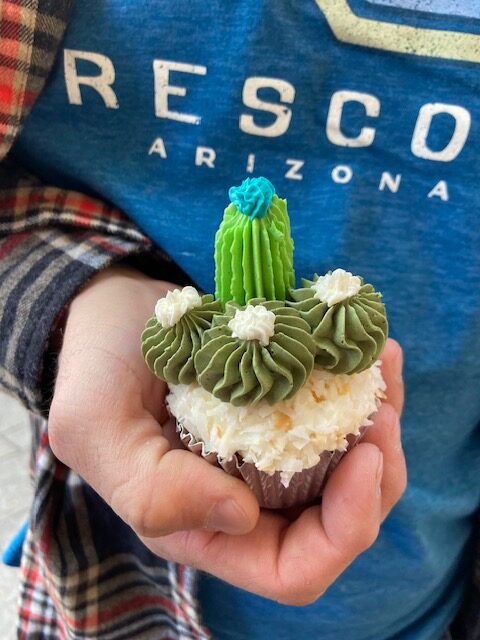
After doing some oohs and aahs at the mountains, we decided to check out the Tlaquepaque Arts & Crafts Village. Last time we visited Sedona, we had a very short amount of time there before it closed, so we wanted to spend a longer time looking at all the local arts and crafts. We spent about 2 hours there, which honestly was plenty of time for us to see everything. We also had an afternoon snack of ice cream and a cactus cupcake.
From there, we decided to hit up a Sedona Goodwill for some thrifting, which is where I found my fabulous secondhand cowboy boots (you can see my full Arizona thrifting post here). From there, we walked across the parking lot and had dinner at Fiesta Mexicana. The food was great and the meals were huge (mine was so big that I shared with Jack). It was a fantastic end to our day!
Day 5: Sedonuts and the Bell Rock Trailhead
On our second day in Sedona, we made sure to leave early enough that we could revisit Sedonuts!
This time, I did a little extra research to figure out the best place to park to access Bell Rock Loop Trail. According to my buddy, ChatGPT, there were a few good options including the Courthouse Vista Parking lot, the Bell Rock Trailhead South, and the Yavapai Vista Point. For any of these three options, you need a Red Rock Pass to park ($5 for one day or $15 for seven consecutive days), or an America the Beautiful pass.
So, we worked our way out there, planning to try the Courthouse Vista first and it was completely full. We got lucky and found a spot at the Yavapai Vista Point parking lot. We have the America the Beautiful pass and you are supposed to put it on your front dashboard. But, we didn’t. Oops. Luckily, we didn’t get a ticket.
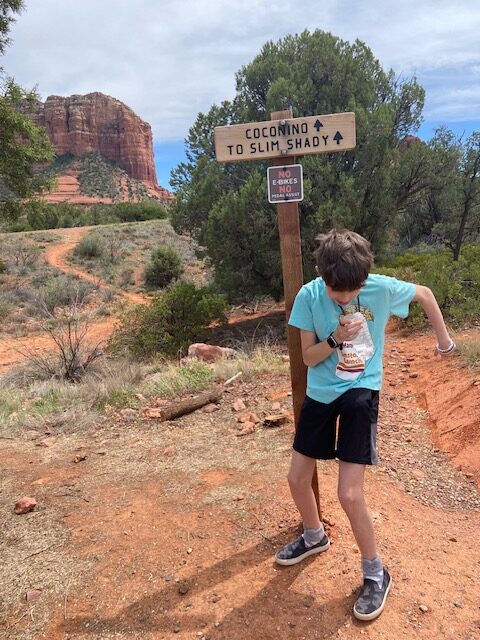
From the parking lot, we accessed the entrance for the Kaibab Trail, which connects to Slim Shady and Templeton. We hiked through to an underpass and then turned around to hike back.
Jack thought it was hilarious that there was a trail called Slim Shady… and I thought his ‘rap’ moves were quite hilarious.
Even if you aren’t planning to do any of the bunches of hikes in this area, the Courthouse Vista, Bell Rock Vista and Yavapai Vista are all great places to pull over and enjoy the views. Honestly, you can’t go wrong just driving around and enjoying the Sedona scenery.
After our hikes, we stopped by a couple thrift stores, but honestly nothing great that I would recommend. We did find the Sedona Artist Market and Gallery and loved looking around at the dozens of different artists represented in the space.
From there, we walked over to Pisa Lisa and had some truly yummy wood fired pizza. I got the Margherita pizza with their olive tapenade and it was absolutely delicious. I had the leftovers the following day and… still delicious. So, if you’re in a pizza mood I highly recommend them.
If your kid isn’t super interested in hiking, it helps to alternate hikes with food or fun stores. That way, they feel a bit more ‘bite sized’ and not ‘here’s our plan for the entire day’. While Travis and I are happy to do much longer hikes, for us a fun family trip is worth the compromise.
Jack LOVES rock shops and typically they have items at a huge range of prices, so we like to give him a shop budget. For the Sedona Artist Market, I gave him a $15 budget and he happily checked out all the rock shop stores, while Travis and I perused the jewelry and pottery stores.
Let your kid be your photo director – even if he’s getting bored with a hike, I can usually get him back into it if I give him my iphone and ask him to pose us. And the pictures usually end up ridiculous, which is just our jam.
Stop back tomorrow for Arizona Family Adventure Part 3: Laid-Back Days and Hidden Gems in Prescott!