DIY Embroidery: Snazzing Up a Cardigan

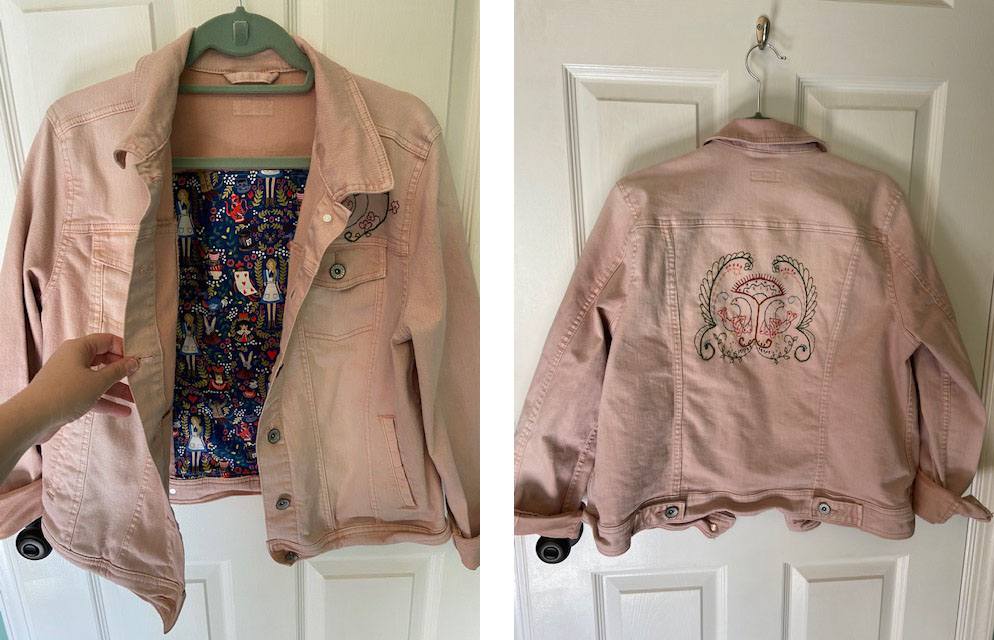
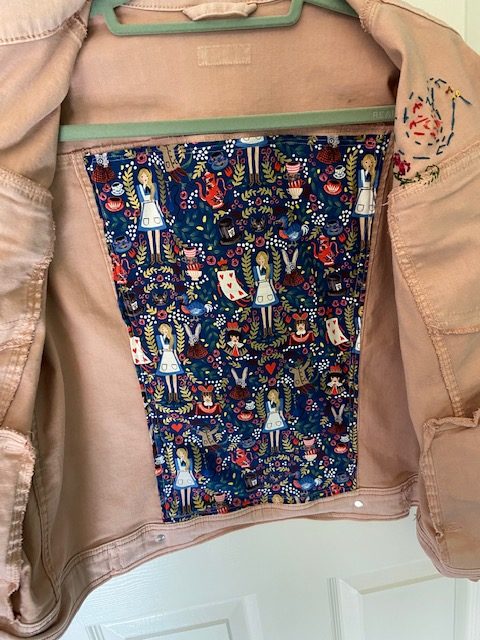
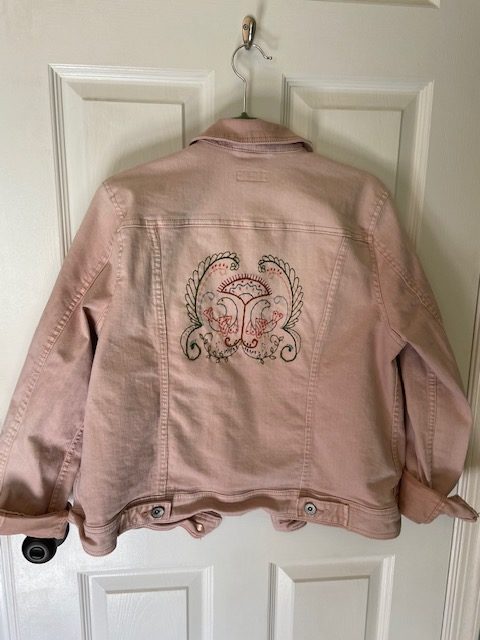
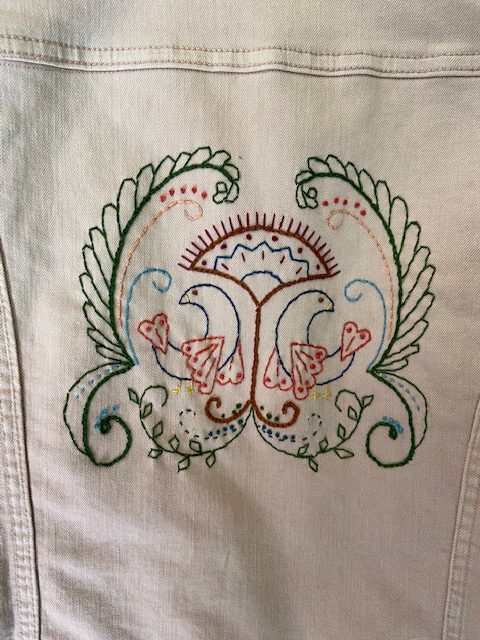
Back in August, I shared an embroidery project where I embroidered a pink thrifted jacket (you can find it here) Once I was done with that project, my fingers were still itching to do some more embroidery… so I searched my closet for a solid cardigan and got to work!

I bought this cardigan secondhand off Poshmark for just $10 last year because the color looks nice with a few of my dresses. However, I tend to reach for more *interesting* toppers that have beading on them. So, why not embroider this one… to make it more interesting?

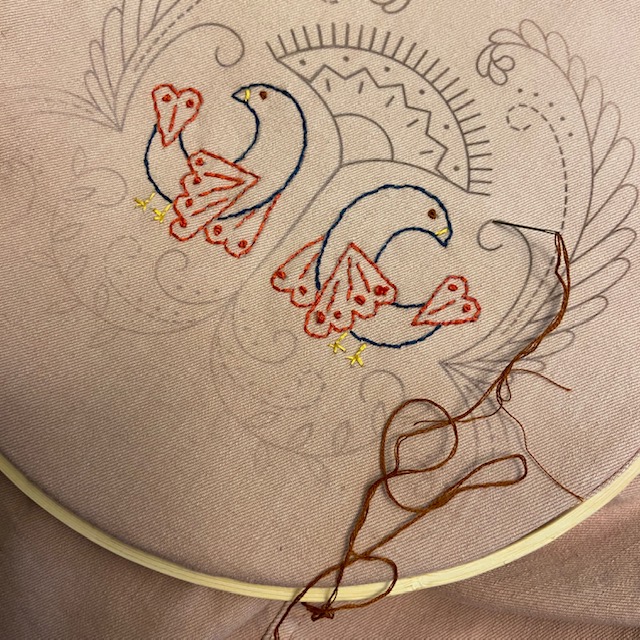
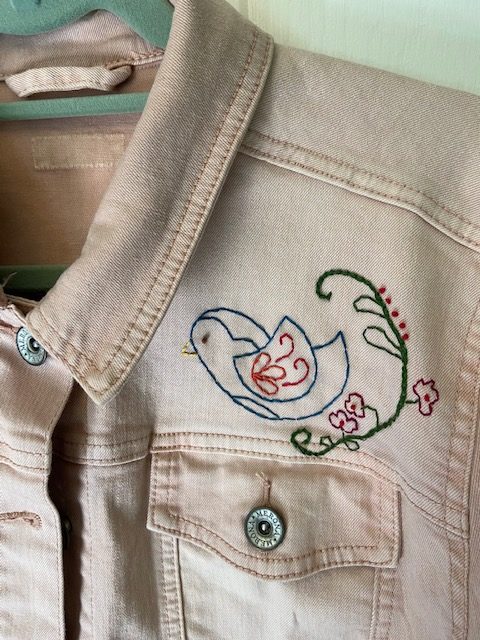
I didn’t purchase anything new for this project. I had the Stitcher’s Revolution Bird’s Transfer pattern left over from my jacket project, so I picked a bird and cut out some of the writing to make it a bit more simple (I think it previously said ‘Peace’ underneath with some leaves).

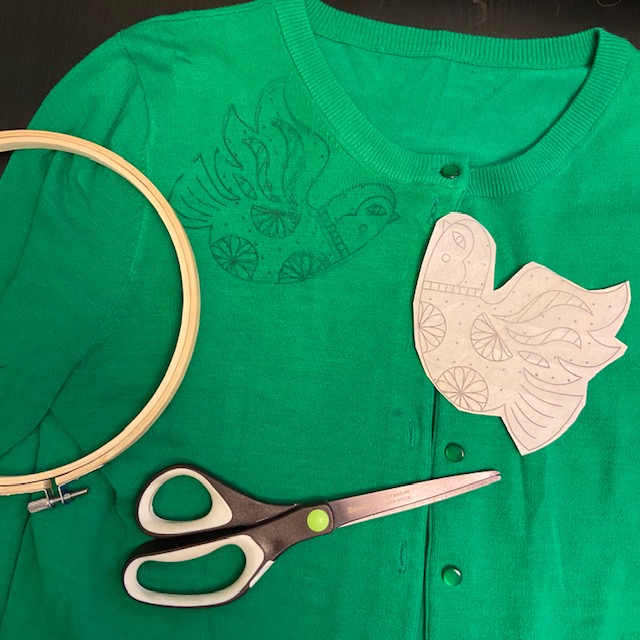
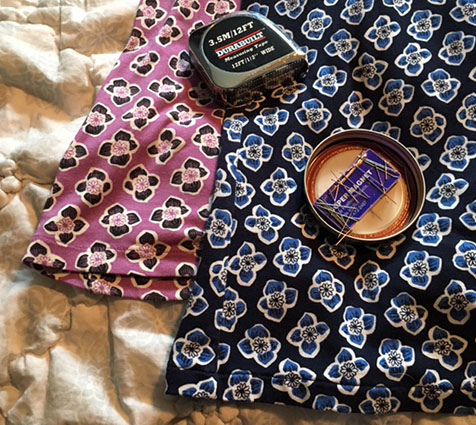
I have plenty of embroidery floss in my kit, so I picked some subtle colors and a few that would pop against the green fabric. I probably should have sewn on a backing, but the embroidery went on pretty easy without pulling at the fabric, so I just went for it. Even if it was a mistake, it was only a $10 mistake… so I wasn’t too concerned about it.

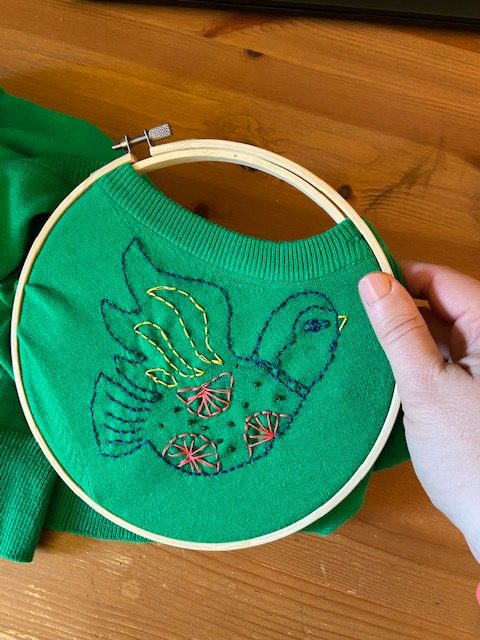
I really wish I had timed myself, because this was quite a quick and easy little project. It turned out super fun and I love that it’s a fun, handmade and original item just for me!

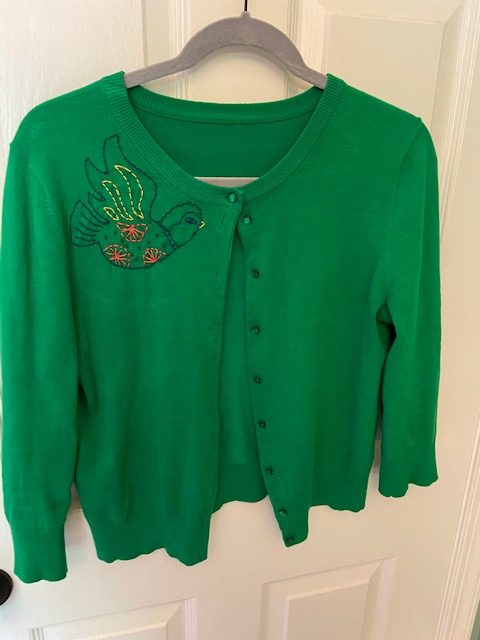
And there you go, a hand embroidered cardigan that adds a little extra pizazz to an outfit! Of course, now I’m out of stuff to embroider… but I’m thinking about maybe personalizing one of my canvas shopping bags, or adding a little fun to a blanket…

Disclaimer: This post contains an Amazon affiliate link. This means that clicking on a link may help me earn a small commission at no cost to you.

DIY Embroidered Jacket Project

In last week’s Thrift Haul post, I shared the washed pink jean jacket that I thrifted for $12. While I’m typically not a pink kinda girl, I thought the muted clay color was really interesting and that it could be a fun backdrop for a little DIY project.

My initial thoughts were that I’d try some embroidery, similar to Johnny Was pieces… but without the $300 price tag. I also thought I’d try adding in a super fun fabric as lining to cover up the ‘wrong side’ of the embroidery that would have been visible.

I popped over to Joann Fabrics to see if they had any fun embroidery options and found a few Stitcher’s Revolution Iron-On Transfer Patterns that were close to what I was looking for. I purchased a few to try out, but ended up using this one for this project: https://amzn.to/31zFgpP

I started with the back and ironed on one of the larger designs.

I had never done embroidery before, only cross-stitch, so I watched a couple YouTube tutorials to teach myself the backstitch, French knot and chain stitch. I had a bunch of embroidery floss on hand from other projects, so I just picked each color as I went and ended free-handing part of the design for funsies.

After I finished the back, I decided to add a little bird to the front as well… so I sliced and diced an existing bird into what I was looking for and ironed the guide on. This one went much quicker, since it was smaller.

Once I finished the front bird, I then thought I’d sew in a lining. However, I didn’t get too crazy with lining sewing, since I’m not a very experienced sewist. I basically cut the lining to the shape of the middle back placket, folded and ironed each raw side down, and then sewed it along the seams. It was relatively easy and turned out great. Not only does the Rifle Paper Co Wonderland fabric cover the ugly side of my embroidery… it’s is also fun pop of pattern when I take the coat off!

All in all, I’m pretty excited that this project basically jumped out of my imagination into real life!

Disclaimer: This post contains an Amazon affiliate link. This means that clicking on a link may help me earn a small commission at no cost to you.

4 Ways to Personalize Your Clothes

Since shopping secondhand is my preferred way to shop, many times I’ll find something that’s close… but not exactly what I was looking for. Or maybe I’ll see something out at the store that I love… but the distressing is *too* distressed for me. Or maybe the fit and fabric is fabulous… but the color looks terrible on me.

Through thrifting I’ve learned to look at an item for what it CAN be, rather than what is currently is. Which brings us to my favorite 4 ways to personalize your clothes.

Change the Color

If you love a piece of clothing but don’t love the color, it is super easy to dye it! I’ve done this many, many times, including: T-Shirt DIY, Tie Dying with Toilet Cleaner, and Using a Tie Dye Kit.

I recently was searching Poshmark for a linen tank top and found a beautiful one with crochet detail that I loved. However, the oatmeal color was not flattering on me at all. I also didn’t like that the light color allowed my bra to show though a bit. So, Rit Dye to the rescue! I soaked the shirt in a mix of water and charcoal grey dye for about 90 minutes, threw it in the washer and dryer and BOOM…

The linen turned a rich dark brown hue that I love and I still have half a bottle of dye left for another project. Here it is on me:

Hem Skirts to a Better Length

When you buy a dress or skirt, it is not necessarily going to be the exact right length for every single body in the world. Weird, right? It is so, so, so easy to hem the length of a skirt a little shorter. In fact, I wrote a post a while ago: Sewing is Not Scary.

Once you know what length skirt you like, you can easily copy that in other items. If you see a tiered maxi skirt that would be perfect as a midi or knee-length, go for it! If the brand’s idea of “knee length” is way too long because you’re petite, hem it! By literally sewing just a straight line, you can customize your clothing to your body.

Distress or Fill in Holes

If you have a pair of jeans that need a little something-something, you can always distress them by making a little hole in the knee or using sandpaper to create wear spots. However, you can also fix items that have become too distressed by patching holes! I’ve previously patched holes in jeans Quick & Easy DIY: Patching Some Over-Distressed Jeans and patched holes in jean shorts DIY: Patching Jean Shorts. It’s super easy to do and will allow you to get more wear out of your favorites!

Add Embroidery

I recently came across a super cool denim jacket while thrifting and immediately thought that I needed to add some embroidery. Have I ever embroidered before? Nope. But I’ve done cross-stitch, so how hard can it be?!

I’ll share the full project soon, but here is a sneak peek at how I’m using embroidery to personalize a denim jacket:

Do you personalize your clothing?