AR Workshop: Fall Harvest Box

A few weeks ago, AR Workshop announced on their Instagram account that they had a limited-edition Harvest Box coming out. I was intrigued, so when the boxes went on sale, I took a closer look.

The contents of the box were a surprise, but here are the hints they gave:

  • It’s the perfect way to kick off the Fall Season
  • Retail price is $89 and it has a value of over $160
  • The box will contain a mix of handmade and retail seasonal goodies. “Think exclusive DIY kit, unique project type and fall themed items”
  • We even included season items from a few local makers!

Fall + Handmade + Local Makers…. SOLD!

I wasn’t able to stop by the store on box pick-up day, but Lindsey grabbed it up for me and brought it to me this past weekend. And OH. MY. GOSH. This box couldn’t be more perfect!

I’m not even exaggerating when I say I was squealing over every single item and my husband almost hurt himself by rolling his eyes so much.

Let’s take a look…

Pumpkin succulent by Eclectic Blooms

Fall Candle, hand-poured from Farmer & The Belle

16” x 9” Centerpiece box with Happy Harvest design

Okay, let’s start with the Happy Harvest Centerpiece box. It’s dang adorable and has a little oil-rubbed-bronze handle on each side. The design is on just one side, so you can totally turn it around and use it the other way throughout the year. I can see this on an entrance table, on our dining table, or even outside with some pumpkins in it by the front door. The pumpkin succulent is freaking incredible and I assumed the pumpkin was ceramic, so I was shocked when I realized it was a real hollowed-out pumpkin with succulents planted inside. It’s perfect for the season! As for the candle, it is “harvest” scented which has a bit of spice to it and I love the jar too.

I paired the three items together and added them to the middle of our dining table for a pretty fall display.

Layering Rug buffalo check pattern

The layering rug is super cute and will be a fun addition to underneath my ‘welcome’ rug at our front entrance. We are actually about to have some work done on our walkway this week, so I’m holding off until that dust settles to put the rug outside.

8” x 8” Framed Mini sign with Give Thanks design

This little sign was totally hiding behind something in the box. When I pulled it out, I just thought it was the cutest thing. Someone from the AR workshop made it (it’s stamped on the back) and it’s the perfect size to fit in some of our book shelves in the living room.

DIY Tea Towel Kit with Hello Fall design

I love that they included a project for me to do in this box! The tea towel project includes the towel, the Hello Fall stencil, paint, and a little sponge to dab the color on. I did the project over the weekend and it turned out super cute (you can see it here — click the arrow to see each step).

Apple Pie Caramel Apple by Oh My Chocolate

Yeah, it was eaten within probably 30 minutes of seeing it. The apple was dipped in white chocolate and then rolled in this sugary apple spice stuff. It was SO GOOD and I’m not even ashamed a bit that I ate it all without offering it to anyone else…

I could not be happier with the AR Workshop Harvest box and I will absolutely be ordering a winter version if they release one!

Disclaimer: This post is not sponsored.
DIY Embroidery: Snazzing Up a Cardigan

Back in August, I shared an embroidery project where I embroidered a pink thrifted jacket (you can find it here) Once I was done with that project, my fingers were still itching to do some more embroidery… so I searched my closet for a solid cardigan and got to work!

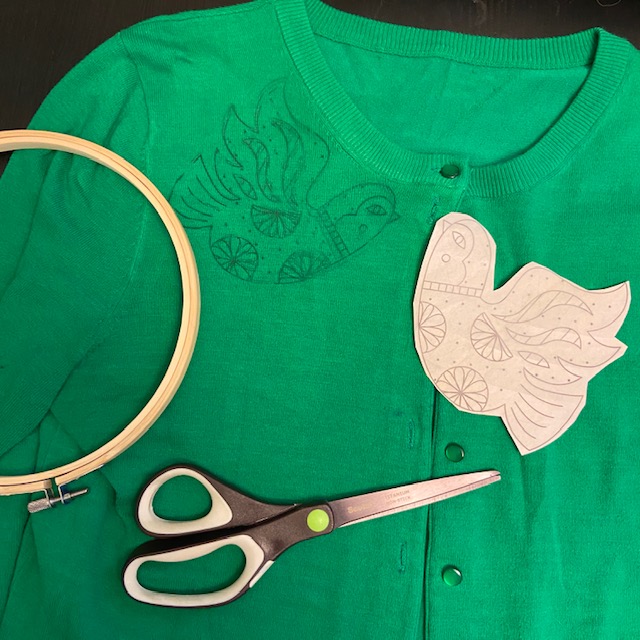
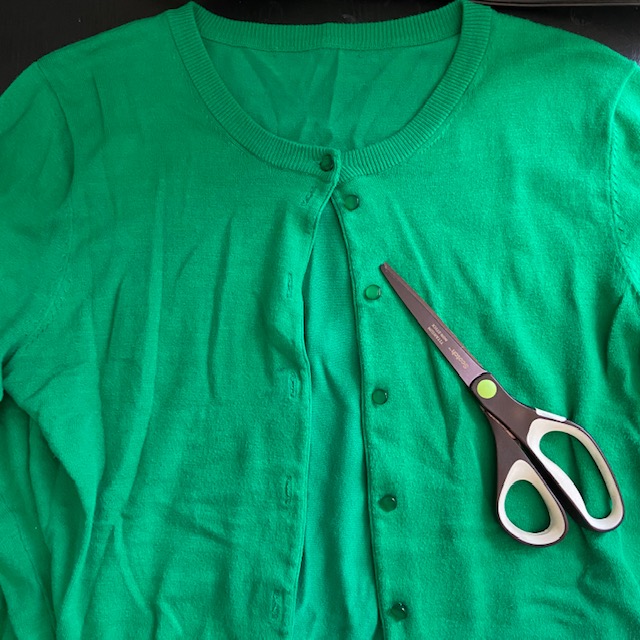
I bought this cardigan secondhand off Poshmark for just $10 last year because the color looks nice with a few of my dresses. However, I tend to reach for more *interesting* toppers that have beading on them. So, why not embroider this one… to make it more interesting?

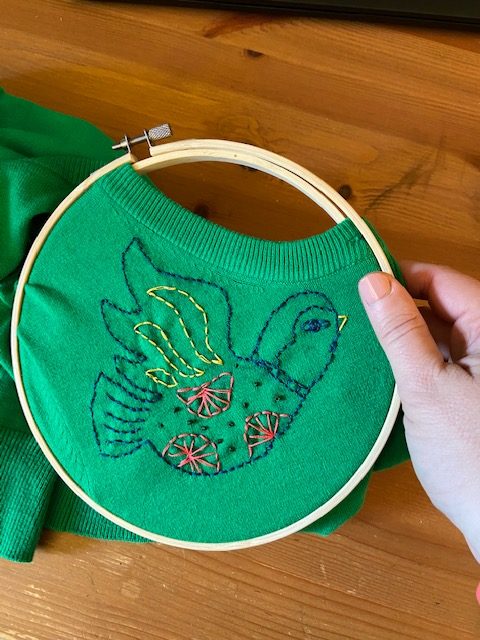
I didn’t purchase anything new for this project. I had the Stitcher’s Revolution Bird’s Transfer pattern left over from my jacket project, so I picked a bird and cut out some of the writing to make it a bit more simple (I think it previously said ‘Peace’ underneath with some leaves).

I have plenty of embroidery floss in my kit, so I picked some subtle colors and a few that would pop against the green fabric. I probably should have sewn on a backing, but the embroidery went on pretty easy without pulling at the fabric, so I just went for it. Even if it was a mistake, it was only a $10 mistake… so I wasn’t too concerned about it.

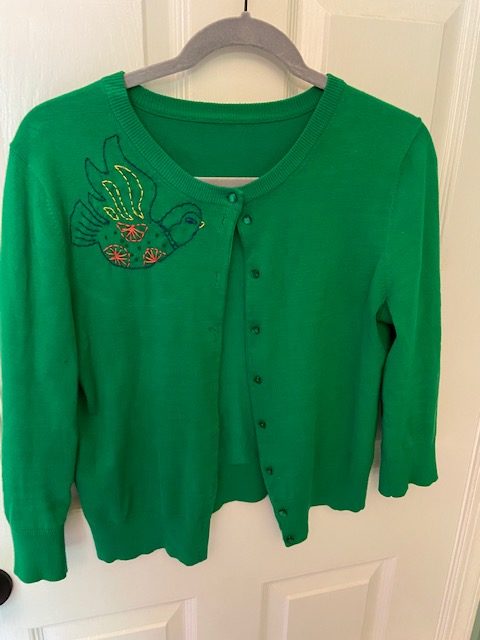
I really wish I had timed myself, because this was quite a quick and easy little project. It turned out super fun and I love that it’s a fun, handmade and original item just for me!

And there you go, a hand embroidered cardigan that adds a little extra pizazz to an outfit! Of course, now I’m out of stuff to embroider… but I’m thinking about maybe personalizing one of my canvas shopping bags, or adding a little fun to a blanket…

Disclaimer: This post contains an Amazon affiliate link. This means that clicking on a link may help me earn a small commission at no cost to you.

DIY Embroidered Jacket Project

In last week’s Thrift Haul post, I shared the washed pink jean jacket that I thrifted for $12. While I’m typically not a pink kinda girl, I thought the muted clay color was really interesting and that it could be a fun backdrop for a little DIY project.

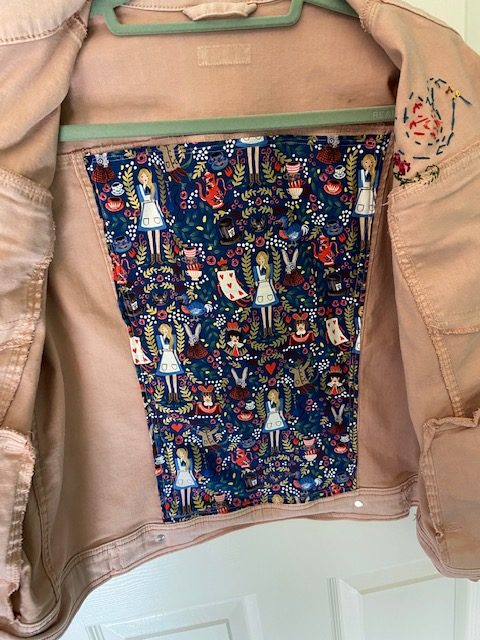
My initial thoughts were that I’d try some embroidery, similar to Johnny Was pieces… but without the $300 price tag. I also thought I’d try adding in a super fun fabric as lining to cover up the ‘wrong side’ of the embroidery that would have been visible.

I popped over to Joann Fabrics to see if they had any fun embroidery options and found a few Stitcher’s Revolution Iron-On Transfer Patterns that were close to what I was looking for. I purchased a few to try out, but ended up using this one for this project: https://amzn.to/31zFgpP

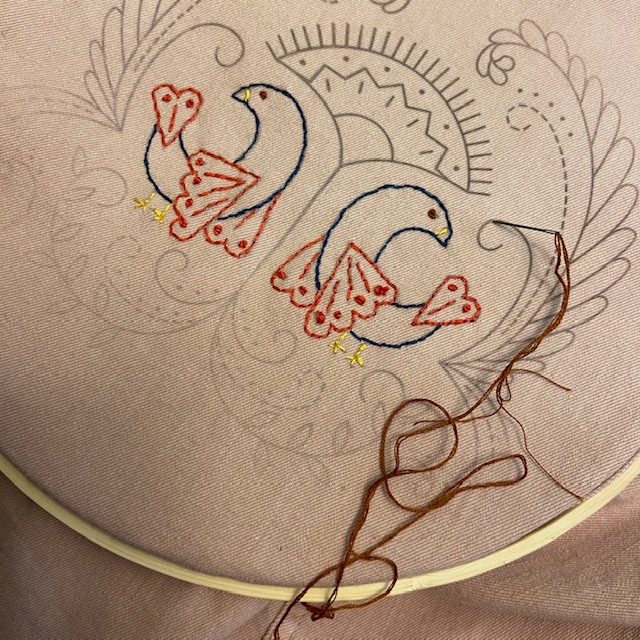
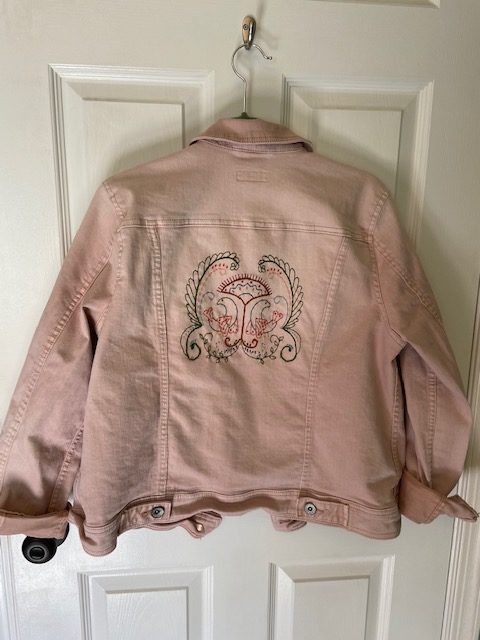
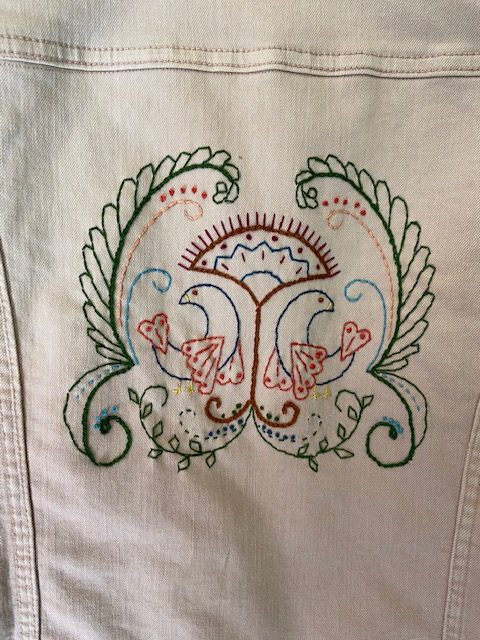
I started with the back and ironed on one of the larger designs.

I had never done embroidery before, only cross-stitch, so I watched a couple YouTube tutorials to teach myself the backstitch, French knot and chain stitch. I had a bunch of embroidery floss on hand from other projects, so I just picked each color as I went and ended free-handing part of the design for funsies.

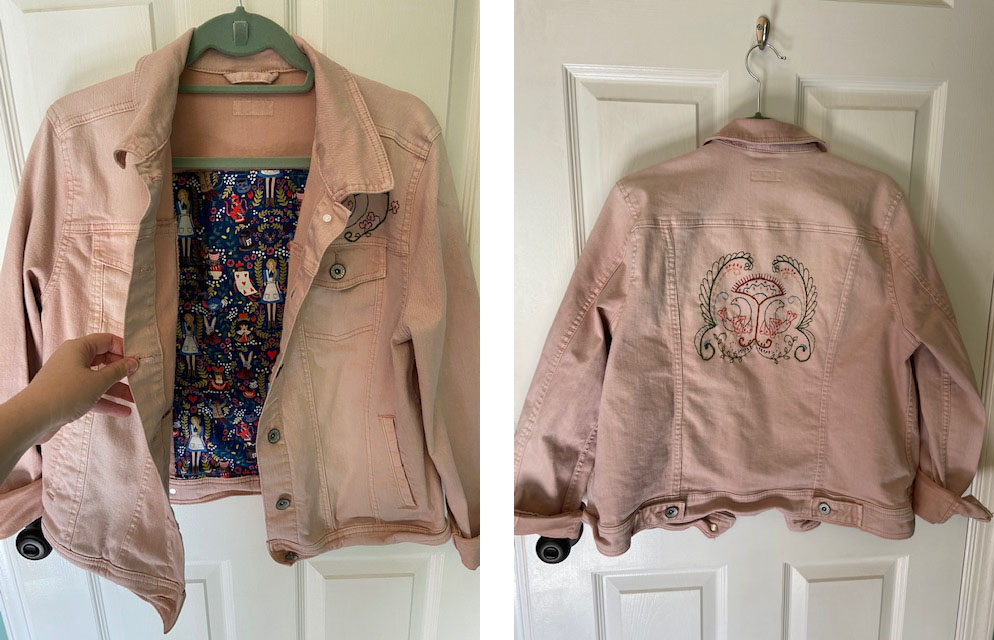
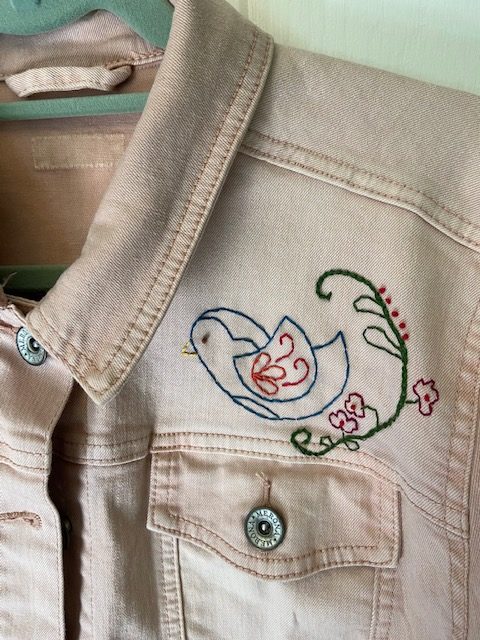
After I finished the back, I decided to add a little bird to the front as well… so I sliced and diced an existing bird into what I was looking for and ironed the guide on. This one went much quicker, since it was smaller.

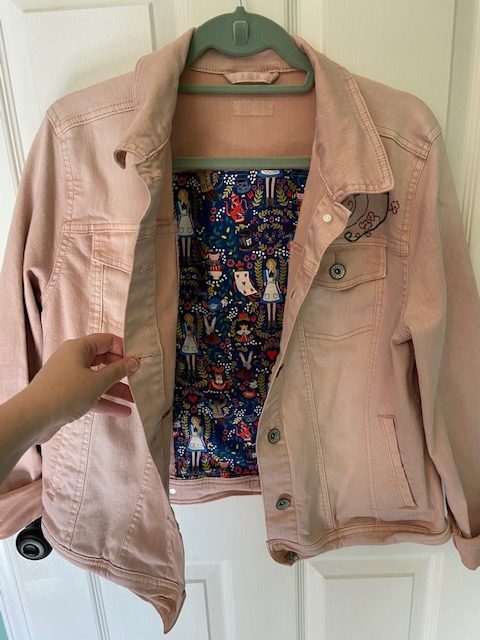
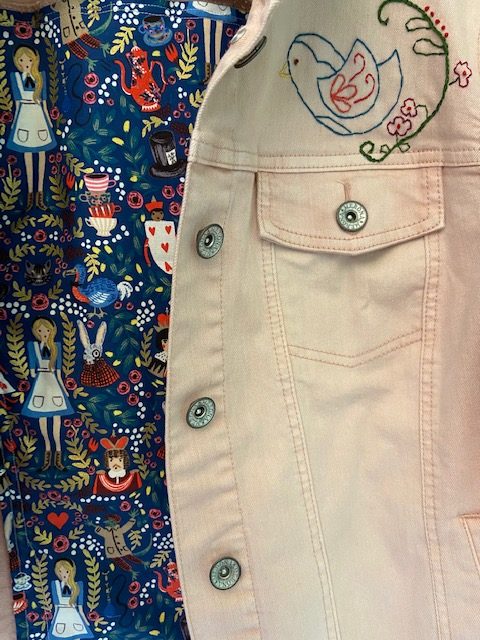
Once I finished the front bird, I then thought I’d sew in a lining. However, I didn’t get too crazy with lining sewing, since I’m not a very experienced sewist. I basically cut the lining to the shape of the middle back placket, folded and ironed each raw side down, and then sewed it along the seams. It was relatively easy and turned out great. Not only does the Rifle Paper Co Wonderland fabric cover the ugly side of my embroidery… it’s is also fun pop of pattern when I take the coat off!

All in all, I’m pretty excited that this project basically jumped out of my imagination into real life!

Disclaimer: This post contains an Amazon affiliate link. This means that clicking on a link may help me earn a small commission at no cost to you.