
4 Ways to Personalize Your Clothes

Since shopping secondhand is my preferred way to shop, many times I’ll find something that’s close… but not exactly what I was looking for. Or maybe I’ll see something out at the store that I love… but the distressing is *too* distressed for me. Or maybe the fit and fabric is fabulous… but the color looks terrible on me.

Through thrifting I’ve learned to look at an item for what it CAN be, rather than what is currently is. Which brings us to my favorite 4 ways to personalize your clothes.

Change the Color

If you love a piece of clothing but don’t love the color, it is super easy to dye it! I’ve done this many, many times, including: T-Shirt DIY, Tie Dying with Toilet Cleaner, and Using a Tie Dye Kit.

I recently was searching Poshmark for a linen tank top and found a beautiful one with crochet detail that I loved. However, the oatmeal color was not flattering on me at all. I also didn’t like that the light color allowed my bra to show though a bit. So, Rit Dye to the rescue! I soaked the shirt in a mix of water and charcoal grey dye for about 90 minutes, threw it in the washer and dryer and BOOM…
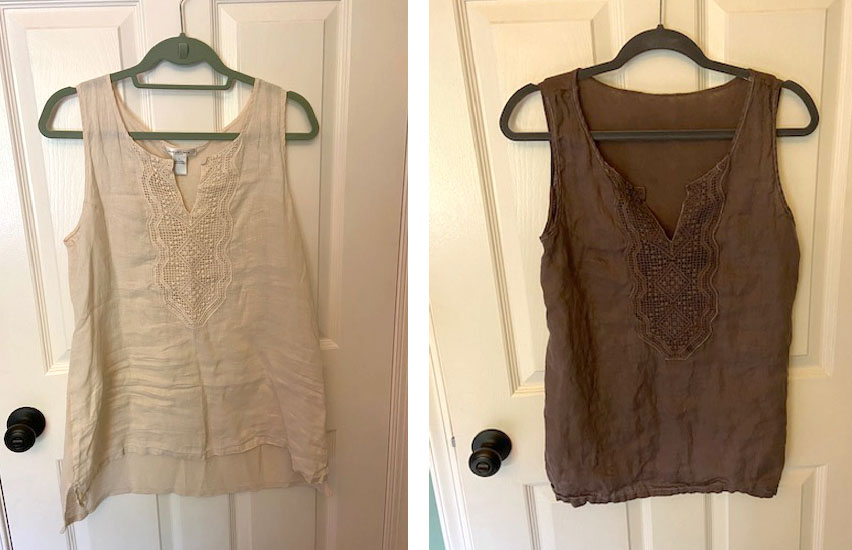
The linen turned a rich dark brown hue that I love and I still have half a bottle of dye left for another project. Here it is on me:

Hem Skirts to a Better Length
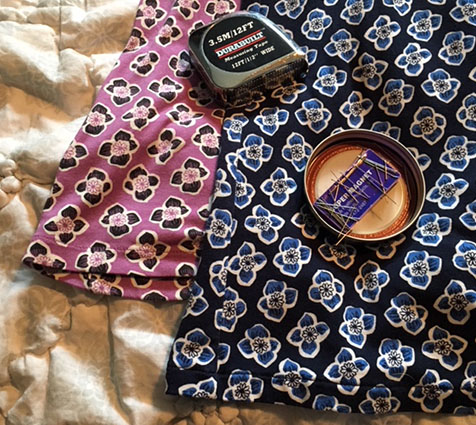
When you buy a dress or skirt, it is not necessarily going to be the exact right length for every single body in the world. Weird, right? It is so, so, so easy to hem the length of a skirt a little shorter. In fact, I wrote a post a while ago: Sewing is Not Scary.

Once you know what length skirt you like, you can easily copy that in other items. If you see a tiered maxi skirt that would be perfect as a midi or knee-length, go for it! If the brand’s idea of “knee length” is way too long because you’re petite, hem it! By literally sewing just a straight line, you can customize your clothing to your body.

Distress or Fill in Holes
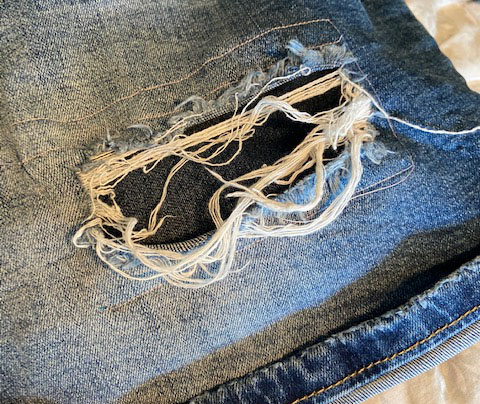
If you have a pair of jeans that need a little something-something, you can always distress them by making a little hole in the knee or using sandpaper to create wear spots. However, you can also fix items that have become too distressed by patching holes! I’ve previously patched holes in jeans Quick & Easy DIY: Patching Some Over-Distressed Jeans and patched holes in jean shorts DIY: Patching Jean Shorts. It’s super easy to do and will allow you to get more wear out of your favorites!

Add Embroidery

I recently came across a super cool denim jacket while thrifting and immediately thought that I needed to add some embroidery. Have I ever embroidered before? Nope. But I’ve done cross-stitch, so how hard can it be?!

I’ll share the full project soon, but here is a sneak peek at how I’m using embroidery to personalize a denim jacket:

Do you personalize your clothing?

Quick Change: Switching our Front Door from Clover to Paradise Landscape

Way back in 2013, I decided I couldn’t stand my 90’s evergreen front door a moment longer and I painted it clover green (Come and Knock on my Door). And it was a fabulous update to take our front door into 2013. However, after 7 years of our bright green door I was ready for another change.

Last time to decide on a door color, I gathered a bunch of swatches, taped them to the door and stared at them for a while.

I did NOT do that this time.

This time, I walked into Home Depot, stared at the swatches for about 60 seconds and picked out the color that matched the one I had imagined in my head.

And the color was Paradise Landscape from Behr.

When I bought the paint, I also grabbed a mini roller and disposable paint pan. The paint is a paint and primer all in one, so I figured it would only take a couple coats to get even coverage. As it was, I used a brush for the first two coats and then I used the roller to do a third coat over the flat areas to ensure that no brushstrokes were visible.

All in all, it took just a couple hours for such a fun change. Like last time, I painted both the inside and outside of the door… so it has really updated the look for both our foyer and the front of our house!

Check out this fun slider… you can slide from the old color to the new color!

I’m so happy with how this little project turned out. Since we’ve been stuck at home for months on end, I’m using this time to really take a look around our house and see which areas need a little updating… and this was 2 hours of time I’m glad I spent!

AR Workshop: Take & Make DIY-To-Go Kits

I have visited the AR Workshop in Annapolis a bunch of times before and created really fun projects at their storefront. However, with the ongoing pandemic they launched a new Take & Make DIY-To-Go Kit option, so I decided to give it a try!

I’ve had my eye on one of their projects ever since they shared it on social media early this Spring, so it was an easy choice. They provided my piece of wood, the stencil, sponges, and primary colored paint.

The sample project that I chose had a white painted background, so I guess they assumed I’d want to paint mine white too. However, I like the look of stained wood better… and luckily Lindsey had some on hand for me to use. Once the stain dried, I attached my stencil and got to paint mixing! Since they only provided red, yellow, blue, black and white I had to mix some colors to cover the entire rainbow.

Mixing the colors myself was a fun way to have an absolutely original and customized project. I’m really happy with how it turned out, but I’m not sure if I would do a take-home project with them again, as there were some drawbacks. First, the colors were much more limited and there were no stain options. Also, they didn’t provide me with hanging supplies (perhaps they forgot to throw it in?), but luckily Lindsey had an extra pack for me to use.

If you don’t mind the fact that it’s a bit more DIY than their typical sessions at their storefront, it is a fun way to spend some time at home.

{Pssst, this isn’t a sponsored post, but if you want to find an AR Workshop you can find them here: https://www.arworkshop.com/}