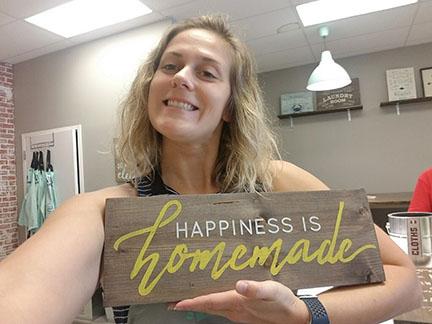
Reviewing the HGTV DIY Across America Workshop at the AR Workshop

I love me some HGTV, so when my friend told me about an upcoming HGTV DIY Across America workshop I immediately signed up. The workshop was part of a partnership with AR Workshop Annapolis and Lindsey and I signed up to create our own plank wood signs.

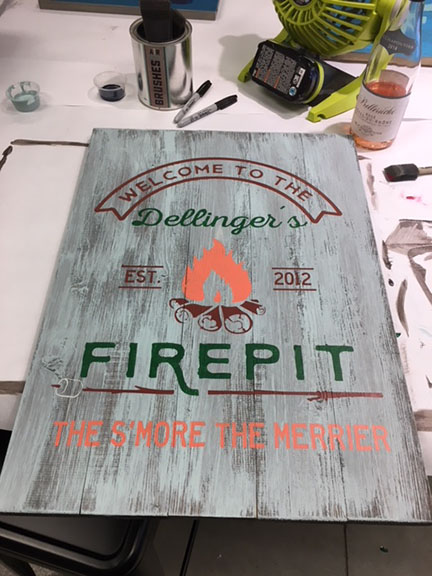
We had tons of options to choose from, so I want for a “Welcome to the Firepit” sign which would incorporate my last name as well as the year that our family moved into our home. The cost for the event was $65.50 for the 17.5 x 24” plank sign and it covered all of the materials we would need for the day.

My thoughts were that the sign would be perfect for our new redesigned sunroom – we have a blank wall in need of decoration AND it even has a view of our outdoor firepit! Lindsey’s project was a personalized sign for her grandparent’s anniversary party.

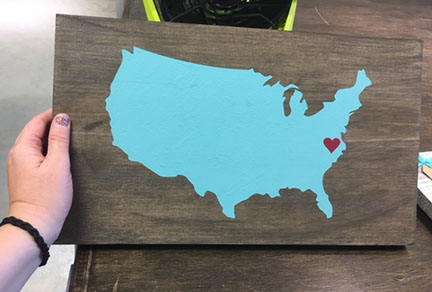
Since it was a HGTV event, we also were gifted the opportunity to do a second project! I picked one with a map of the US and Lindsey picked a “Happiness is Homemade” sign. We also received gift bags which contained the latest copy of HGTV magazine, a tape measure and painters tape.

Oh… and there were cupcakes! And it was BYOB, so we both had bottles of wine!

Each station was all set up for us with wood, tools and the personalized stencils of our designs. There were four people total in this particular workshop and one workshop leader.
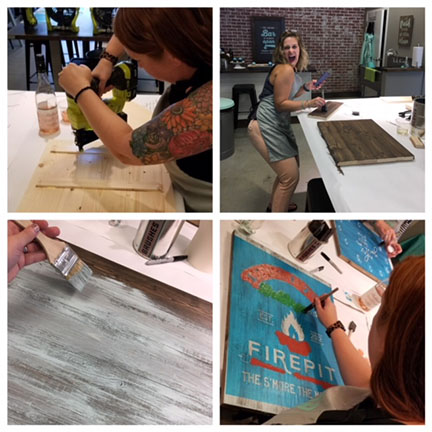
I’m not going to do a whole boring step-by-step tutorial, so here’s the short version: we picked our paint colors, sanded the boards, used a nail gun to make our pallet, stained them, did a dry brush treatment on top of the stain, cut out and attached the stencils, painted the letters, took the stencils off and did any touch-ups needed.

Since we were doing two projects, we would let one dry while working on the other and then switch back and forth until they were both done.
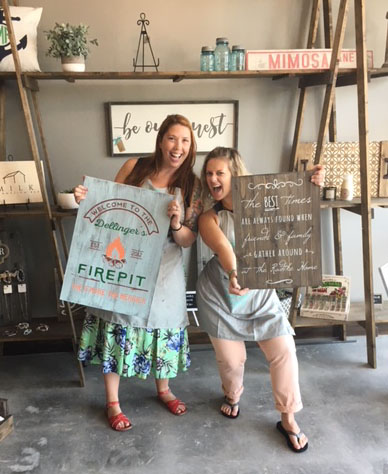
We had SO MUCH FUN with this workshop and I already started eyeing other projects that we can go back and make. We are both so happy with how our projects turned out… here are some close up pics:
There are lots of AR Workshops across the US, so check to see if there is a location near you here: https://www.arworkshop.com/workshop-locations/ I highly recommend grabbing a bottle of wine and checking them out!

Disclaimer: This is not a sponsored post. I paid for my workshop cost and the HGTV perks of the goodie bag and extra project were available for anyone who signed up!

How to Make Your Own Fabulous DIY Facinators

And yes, I know the title of this post is a bit redundant… but I wasn’t sure whether to go with make your own facinators or DIY facinators, so I went with both! And why are we talking facinators at all? Well, my sister had a tea party themed bridal shower!

For those keeping count, there are four of us: Me, Jason, Katie and Kelsey (twins). Jason got married in September, Katie got married in December and Kelsey is getting married in May!

For Kelsey’s bridal shower, Katie and my mom put together the sweetest little tea party themed event. There was beautiful china, pots of hot tea, lots of little finger sandwiches, and pretty little desserts! My job was to be in charge of the facinators.

For those unfamiliar with the idea of a fascinator, it’s a fun little headpiece – similar to a small hat – that is made from feathers, flowers, beads, etc. They are artistic and the best ones are rather obnoxious. So yeah, they are right up my alley!

I started by ordering a couple packs of plain metal headbands (I got these from Amazon) They were only $10 for a pack of 12, which is pretty reasonable. I ended up buying 2 packs to make sure we had enough.

Then, I made a trip to the Dollar Store and FILLED my basket with handfuls of tulle ribbon (white, sparkle pink, sparkle blue, bright blue and bright purple), some wire wrap, sparkly green hats (yay for St Paddy’s Day!), and lots of packs of little flower/butterfly ornaments. All in all, I ended up spending $35 at the Dollar Store on supplies.

My last stop was the fabric store (I went by JoAnn’s) where I bought a couple packs of glue dots, some black tulle (it had a wider grid, which I liked) and a pack of feathers. I think I spent about $15 at that stop.

I made a couple fascinator samples at home, grabbed a few pairs of scissors from Jack’s craft table and spread it all out on a table at the bridal shower:

I purposefully provided the wire wrap and glue dots to secure everything together, because I didn’t want anyone burning themselves (or ripping out their hair) with a glue gun. Everyone had a great time and we came up with some super obnoxious fascinator designs!

My total for supplies was just about $70 and we had plenty of supplies for the 15 facinators made at the party. I also have lots of leftovers… so for the next year or so I’ll have some really nicely wrapped gifts!

What do you think… do you want to have your own DIY Facinator party?

Disclaimer: This post contains an Amazon affiliate link. This means that clicking on the link may help me earn a small commission at no cost to you.

A Wedding Portrait for my Sister

If you remember all the way back to last month, I shared all about my sister’s fabulous wedding cruise. Once we returned, I planned to make her a special wedding portrait (like the one I made my brother) and I kept putting it off for a bit. I finally sat down and sketched out the plan based on her beautiful wedding photos.

I love that you can personalize every bit of the portrait so for Katie and Craig, I made sure to mirror their hairstyles, height difference, styles and colors of their wedding outfits, and Katie’s bridal bouquet. I was terrified that I was going to run the whole thing by trying to freehand a bouquet, but their wedding was held at a botanical garden… so I really wanted to include the flowers if I could.

I’m so happy with the finished project!

And here it is compared to my brother’s wedding portrait. It’s it amazing how distinctive you can make the little guys?!

I’m already looking forward to doing another one for my sister Kelsey after her May wedding!