I saw it on Pinterest: S’mores Pockets

So far in my Pinterest adventures, I’ve tackled a braided bun , made some fire starters and tried to unclog a sink drain and making a t-shirt bag.

You all know how much I love marshmallows and s’mores, so when I saw this pin’s recipe for how to make s’mores pie pops I pinned it on my ‘yummy foods’ page and promptly forgot about it. As you do, obviously.

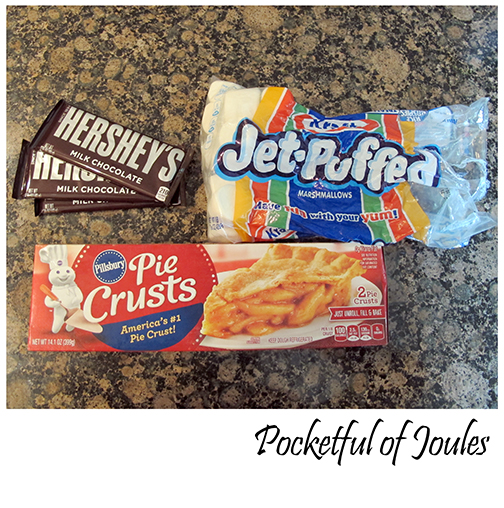
A couple weeks ago I was looking through my old pins for inspiration and decided to finally try this recipe out at home. You really only need three things for this recipe: Pillsbury pie crusts, marshmallows and chocolate bars. Sounds pretty easy, right?

Smores pops - 1

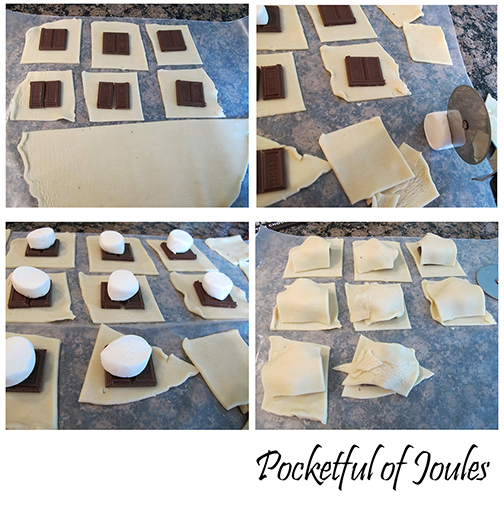
I didn’t follow the pin’s instructions exactly – Instead of using three chocolate pieces for each pocket, I used two. I also cut a normal sized marshmallow in half for each treat, instead of using mini marshmallows (because I didn’t have any small ones on hand). Other than that, I followed directions… but my little s’mores raviolis didn’t look as pretty as the ones on the baking website. Which probably surprises no one.

Smores pops steps

I baked my finished s’mores pies for 15 minutes at 375 degrees and here’s the finished product:

Smores pops - 7

Looks pretty okay, I guess. But the proof is in the pudding. Or, I guess the s’mores. And there was one big problem. The marshmallow disappeared. In fact, if you look closely at the picture you can see that the little puff is practically empty.

I was warned in the original recipe that the marshmallow would melt, but I guess I expected some part to be left behind. I mean, these didn’t even taste like a marshmallow had been by to visit the chocolate AT ALL! Basically, the finished treat tasted like a bit of warm chocolate in a pie crust. Which isn’t bad… but it’s NOT s’mores.

I think I did pretty well in following the directions, but I won’t be making this again. I like my s’mores treats to taste like chocolate AND marshmallow, so I’ll be sticking to the old school version over a bonfire.

Do you have any yummy s’mores recipes I should try? Would you have been disappointed about the lack o’ marshmallow in the finished recipe?

I saw it on Pinterest: Making a T-Shirt Bag

So far in my Pinterest adventures, I’ve tackled a braided bun, made some fire starters and tried to unclog a sink drain.

For today’s post, I decided to follow this pin’s instructions to make an old t-shirt into a grocery bag without using my sewing machine. I like the idea of upcycling a t-shirt that was no longer being worn into something useful. Also, I know a lot of people don’t know how to sew, so I thought it would be fun to try a ‘no-sew’ version to show you all if it was actually easy to do!

Here’s the shirt I started with… super old cotton shirt from Loft. I know it looks kind of cute in this picture and you are wondering why I decided to cut it apart, but in real life it definitely looks like it’s been worn about 10,000 times.

Pinterest - t-shirt bag 1 - Pocketful of Joules

Following the steps on the pin, I sliced off the neckline and sleeves.

Pinterest - t-shirt bag 2 - Pocketful of Joules

Then, I used one of the black stripes for measuring and cut the hem in little strips.

Pinterest - t-shirt bag 3 - Pocketful of Joules

To tie the fringe, I flipped the shirt inside out and then started at one side and just tied each pair of strips (one from the front and one from the back) into a knot. Then, I moved onto the next two strips. When I got to the end, I just flipped it around and tied each coupled knot to the one next to it. It sounds harder than it was.

Pinterest - t-shirt bag 4 - Pocketful of Joules

I then stretched the handles out a little with my hands and flipped the shirt back to the right way (so the fringe lives inside, instead of being seen).

Pinterest - t-shirt bag 5- Pocketful of Joules

Super cute, right? And it really WAS as easy as it looked in the pin. Oh wait, you want to see how much this little bag can actually hold? Well, here….

Pinterest - t-shirt bag 6 - Pocketful of Joules

Pretty darn useful, too!

I could see this as being a really good ‘keep busy’ summer project for a kid or teenager. It really isn’t hard at all, as long as you are careful not to slice a finger open with the scissors. I think this could be a great use for those ‘brand’ t-shirts that we end up getting for free! The best part is that you keep a few in your trunk for groceries and just throw them in the washing machine when they get a little icky!

Have you tried making a bag from an old t-shirt? Did it work well for you?

Finding Shorts I Don’t Hate

I think I hate shorts shopping even more than swimsuit shopping.

I know, I know. That’s QUITE a statement because nobody likes swimsuit shopping…but every time I try to find a new pair of shorts it seems like my two choices are either super long or super short. If I find a pair that looks okay, there will inevitably be a gap in the back of the waist or that fun little surprise when you sit down and your thigh is doing its own special version of a muffin top.

For the longest time I just had a few pairs of knee-length cargo shorts, but I finally ditched them because I realized that they don’t actually look very good on me. Instead, I kind of looked like a camp counselor. After purging them out of my wardrobe, I was left with just two pairs of shorts (not including running shorts for working out or lazing around the house).

Joules - long and short versions

The knee-length pair are from Martin & Osa (a store that went out of business in 2010…) and while I find them super comfortable, the longer style gets so hot when the weather warms up. Also, I’m thinking they are total “mom” shorts. Am I right?

The second pair are my favorite shorts from last year, here’s this year’s version on the Gap website. I love these shorts and wore them pretty much every single day that I wasn’t working. However, when I pulled them out this year, they just seemed awfully short on my haven’t-seen-the-sun-since-last-fall legs. I feel like I kind of need to work my way up to them…

What I really wanted was a pair of shorts that falls somewhere between the two pairs that I have. I could just cut the longer pair down, but I like having them around and I’m afraid I’d miss them. So, I decided to go old-school and make my own cutoffs.

Now, in the old days I’d peruse the thrift store to find a pair of $2 jeans to cut up. However, my issues with jeans are that it’s really hard for me to find a pair that fits my waist, butt, hips AND thighs. So, instead of getting a super cheapo pair, I went to Nordstrom Rack and tried on a bunch from my two favorite denim brands, Democracy and Kut from the Kloth.

I ended up getting a pair of “Equality Skinny Boyfriend” jeans from Democracy (I’m pretty sure they were these) for $45. And YES, I realize that seems like a lot for jeans that I’m going to cut apart but I’d happily pay $45 for a pair of shorts to wear all summer so I’m okay with it.

I picked this particular pair because they already had some distressing at the top (which I love), the waist fit perfectly and they made my butt look good. Because that is obviously super important. {wink, wink}

When I got them home, I used my longer shorts as a template and cut them to that length. I figured, that by time I folded the newly cut shorts up a couple times, they’d be just about where I wanted them to fall.  Then, I wore them for a few days to make sure that the length was working for me. I like that I have two ways I can wear them — with one fold so that you can see the distressed cutoff part, or with two folds like my other jean shorts.

Joules - new cutoffs

If I decide that I want to commit to the double-fold, I can do a quick little sewing job on the side seams to keep them where I want them. I’ll probably end up doing that in a few weeks, but right now I’m kind of digging the ‘lived in’ look on the left.

All-in-all, I’m pretty darn happy with my new shorts. The stretchy denim is super comfortable and the custom length is exactly where I wanted it. YAY for bringing it back old school. I’m thinking that next time I see a pair of cute colored jeans on sale, I’m going to have to buy some to chop up!

Are you a cut-off fan when the weather warms up? Do you just butcher jeans that are already living in your closet or do you buy some at the store with the intentions of cutting them?