DIY: Not Your Grandma’s China Cabinet

I’ve always wanted a china cabinet. Like a REAL, grown up china cabinet.

I was given my paternal grandmother’s china years ago when she passed away and I’ve never had a place to display it. So, for almost exactly 10 years it was wrapped in newspaper and stored in the backs of closets, in my parent’s basement and then finally moved into my own basement when we did our last move about 2 ½ years ago.

Well, I finally have my very own china cabinet! It was in terrible shape when I first got it – the top portion needed some hard scrubbing, three coats of Old English cleaner and two more coats of Orange Clean dusting spray – but now it’s gorgeous!

I mean, it still smells a little, but it really is quite a hottie:

china cabinet - before

Once I had it set up in my kitchen and anchored to the wall (I highly recommend these: Safety 1st Furniture Wall Straps) I wasn’t really sure what to do with it.

Mixer

I knew I wanted to store my mixer inside, because it’s cute and I like it to be on display. But other than that, all I knew is that I didn’t want some boring old set up of china that could have been taken straight from my grandma’s house. I imagined something fresh and eclectic that looked like it belonged with the rest of our house… so here’s what I came up with:

First I gathered all the china and some other stuff that I thought might work in the cabinet.

stuff spread out

Then, I started playing with different stacks of stuff. I wanted to include some silly stuff, some color and also make it balanced to the eye.

book stack


teacups


yellow owl


silver owl

I had to move things around a few times to make sure that it looked ‘right’ to me… I tried different stacks of plates, adding in random vases and trinkets, and at one point considered including a small painting or picture. When I thought I’d found the perfect setup, I realized that the door wouldn’t close with the large plates stacked by it, so I basically had to move everything around all over again.

Here’s a close up of where I ended up:

finished cabinet

Here is a wider view that shows you how my big, handsome china cabinet looks with the rest of the room:

after - wide shot

Also, here is what Jack was doing while I was moving things around in the china cabinet:

Jack angel

However, before you think he’s a little angel playing nicely with his grill… here is the other side of the room:

mess

What do you think of my china cabinet? Am I weird for including my flying pig with my grandmother’s Millefleurs by Franconia china set? Do you assume that bloggers all have clean houses because of how they crop their photos?


Disclosure: Pocketful of Joules is a participant in the Amazon Services LLC Associates Program, an affiliate advertising program designed to provide a means for sites to earn advertising fees by advertising and linking to amazon.com.


5 Tips for Having an Awesome 4th of July Party on a Budget

We’ve been talking about having our friends over for an outdoor party pretty much ever since we moved into our house a couple years ago. We even added our fire pit with the hopes that we could have some fun ‘couples nights’ sitting around a bonfire with marshmallows and wine.

Work and life kept getting in the way though and we keep putting it off. However, our neighbor’s annual fireworks plans nudged us in the right direction. Every year he has spectacular fireworks that rival the county’s show, right in our backyard. This year, we decided to take advantage of the free entertainment and have a party!

We didn’t want to go CRAZY though and end up with something that was just going to stress us out. See, I LEARN from my mistakes… After swearing off Pinterest and keeping it ‘easy’ I think I’ve come up with the perfect plan. If you’re planning to have an Independence Day party, or any get together this summer, you may benefit from these tips too!

#1. Keep it Easy AND Tasty
You don’t have to be a master chef to invite people over to your house. We’ve decided to keep it simple by grilling hotdogs and hamburgers the day of the party. I’ll make my easy pulled pork recipe in the crockpot that morning, so that I can pretty much forget about it until people start showing up. Add in a couple bowls of potato chips, a watermelon and a store-bought sheet cake, and we’re good to go.

For drinks, we are going to stock up on bottled water at Costco and have invited our guests to BYOB or BYOW (for my wine loving friends). I’ll start the party off with a few bottles of wine chilling in ice. Oh, and we can’t forget the s’mores makings! I plan to have marshmallows, graham crackers and chocolate bars on a tray near the fire pit. It doesn’t take a bunch of time or money, but I think that everyone will have something to enjoy!

#2. Ask for Help
You don’t have to do everything yourself. If you have a couple friends who love to cook or bake, see if they’d like to bring something. If your brother is a strong and helpful guy, ask if he can come over early to move some chairs outside. Maybe your sister has a super awesome corn hole set? Remind her the day of the party to bring it over with her.

Remember, there are no bonus points for running yourself ragged to do it all on your own!

#3. Don’t Check Pinterest
Look, I love Pinterest too. There are a bazillion fun ideas for pretty much every aspect of your life. However, in the interest of keeping your party SIMPLE and not driving yourself nuts… just stay away.  Otherwise, you’ll end up buried in mason jars, glitter and a glue stick and want to just call the whole damn party off! I just keep telling myself that in order to have a successful party it is NOT required to have fresh squeezed lemonade with sassy homemade ice cubes and hand picked twigs…

#4. Hit up the Dollar Store
I stopped by the Dollar Store over the weekend and got the MOTHERLOAD of party supplies for a fraction of what it would have cost anywhere else. Here are some of my scores:

flags

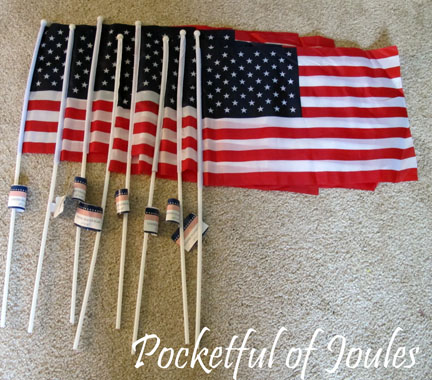
I grabbed 8 flags ($8 total) to put by our mailbox and next to our driveway so that people know that they’re at the right house. The best part is that after the party I can just stick them in the basement until next year.

plates

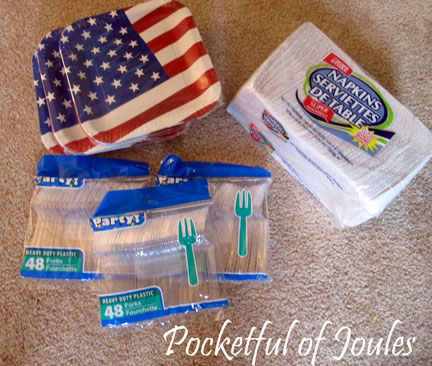
Plates, plasticware and napkins were $7 total for EVERYTHING. Just for comparison basis, I checked Party City’s website and an almost identical set of forks was $4.99. So in just plasticware, I saved almost $12.

all lanterns


lantern - lit

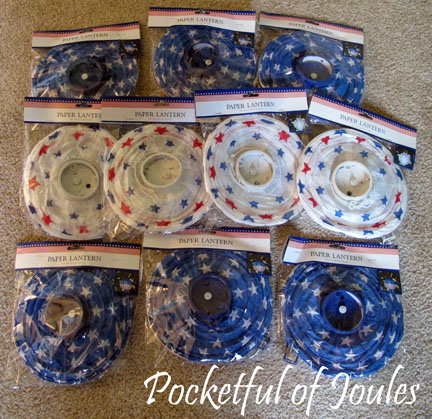
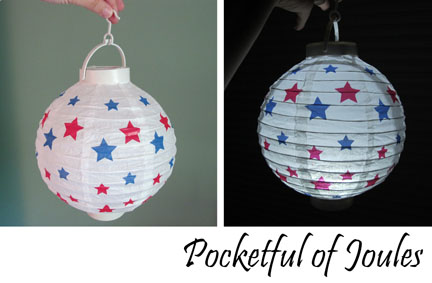
Okay, I saw these cute lanterns and snapped them up! Only $1 each and they even LIGHT UP!? I’m probably going to spend more in batteries than I did on the lanterns, but I don’t care because I’m in LOVE. I’m going to throw some of these up in the trees outside so that after we watch the fireworks we can follow the glowy trail back to the house.

glow stuff

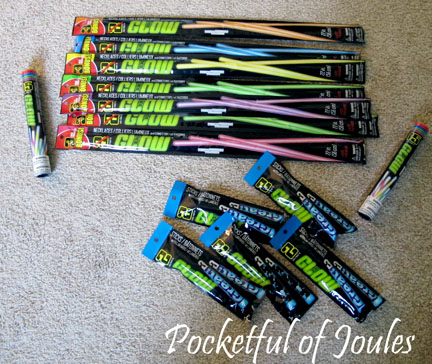
I’ll admit, I might have gone a little crazy with the glow sticks, necklaces, and bracelets ($14 total). But when I was a kid I remember ALWAYS wanting to get the glow necklaces at the fireworks and they were like $5 each and my parents would say no. So GLOW NECKLACES for EVERYONE! I might end up hanging the smaller glow sticks on the edge of our fence so that people can see where to go.

If you’re planning a party, RUN to your local Dollar Store RIGHT NOW because they are a treasure trove of awesomeness!

#5. Mismatched = Eclectic
I don’t know about you, but we don’t have a matching outdoor seating set for 20+ people. So, mismatched is the way to go! We’ve got some Adirondack chairs, a set of porch furniture stolen from our sunroom, a hammock, random outdoor chairs, some wooden indoor trays that we’re going to drag outside, etc. I also have a bunch of picnic blankets that I’m going to spread out on the ground for seating. Nothing matches and that’s totally okay. Because the word of the day is ECLECTIC!

I’m super excited for fireworks. And cake. And s’mores. Oh, and wine. I’m trying hard not to over-think things or stop by Pinterest for just a couple minutes (because we all know Pinterest sucks you in for at least an hour). I have a little anxiety about the number of people coming over, but I think that the plan for everyone to stay outside helps a lot!

How about you – do you have tips for throwing a low key party that doesn’t drive you nuts? Are you also obsessed with the Dollar Store? Would it be weird if I kept those lanterns up year-round, because they are SO freaking cute?!


A Toddler Pillow to Make EVERYONE Happy

Today is part two in my mini-craftinista* series and it starts with a little story…

Have you heard of sleep regression? Apparently it’s a wonderful time in a child’s life where after months of going right to sleep and sleeping through the night, suddenly they don’t like to sleep anymore.

For Jack, this happened a few weeks ago – after sleeping like a champ we had to coax him into bed with a tiring combination of reading, rocking, milk in a sippie cup, snuggling with mommy, snugging with daddy and some more rocking. He even ended up in bed with us for a couple nights, only to be kicked out when he kept KICKING ME in the back all night long. I mean, I’ll take that crap from an 8 pound rescue dog… but NOT a 30 pound little man!

It was exhausting.

Which is funny because JACK was exhausted and just would NOT go to sleep.

So in a fit of brilliance (or just overtired madness) I told Jack that I had a SPECIAL pillow only for Big Boys to use. This SPECIAL pillow would go into his crib, but ONLY if he was a Big Boy who would lay down on it and go to sleep.

Can you believe that this worked?

Suddenly Jack stopped fighting sleep and would go right into his crib to lie on his special Big Boy pillow.

I’m a genius. A parenting genius.

Send your checks today to get your very own SPECIAL Big Boy pillow. Also available in Big Girl…

Just kidding. The secret is that I grabbed the closest pillow I could find, which was an old accent pillow that I had made for our couch ages ago. After living on the couch for a while, it somehow ended up in Jack’s room on his rocking chair. It was so well-worn that it’s quite flat… which makes it perfect for Jack since he can’t smother himself on it.

After Jack slept on it contently for a couple weeks, I figured I should make a pillow case for it so that I can keep it clean. So I grabbed an old pillowcase that we’ve probably used for 10 years or so and made it fit:

Toddler-pillow-before-updatedCheck this out… it’s a magical pillow. Which is actually just a pillow I made a bunch of years ago from an old pillow case from Crate & Barrel.

First, I stuck the throw pillow in our old pillowcase and pinned around it with straight pins. I pulled it in and out a couple times to make sure that it wasn't too snug.First, I stuck the throw pillow in our old pillowcase and pinned around it with straight pins. I pulled it in and out a couple times to make sure that it wasn’t too snug.

I then removed the throw from the case and stitched around all three sides, removing the pins as I went so that I wouldn't stab myself and yell out bad words.I then removed the throw from the case and stitched around all three sides, removing the pins as I went so that I wouldn’t stab myself and yell out bad words.

Once I finished sewing, I cut off the extra fabric. You can use normal scissors or be all fancy like me with my pinking shears. Is it weird that I have no idea how pinking shears came to live in my house?

The finished magical SPECIAL Big Boy pillow. Mr. Bunny Rabbit approves.

Super cute, right?! And basically free.

And the best part is that I can sleep again!

* If TJ Maxx can call someone a Maxxinista… I can certainly call myself a craftinista!