Walk-In Closet in Progress: The Before & My Plans

Well, I am one step closer to launching my walk-in closet plans… but like many projects it has already started to snowball.

As I mentioned back in July, our plan for our extra bedroom is to one day turn it into a fabulous master bathroom/walk-in closet combo. For now, it’s serving as my exercise room.
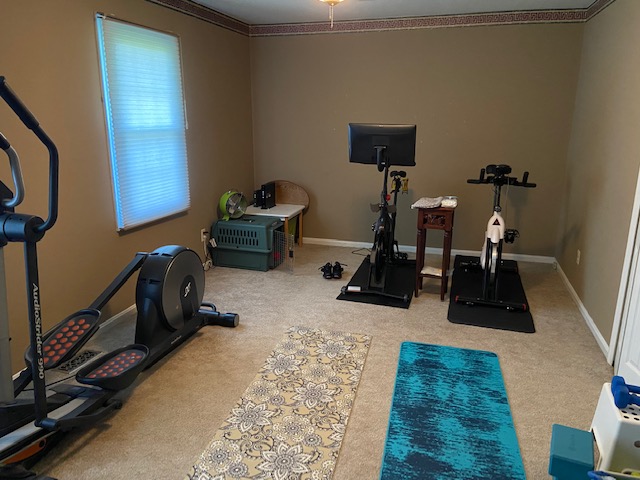
Anyways, a few months ago I had the idea to start working on my walk-in closet plans by starting with one wall. That way I can start using it NOW and also pay for it in little chunks, rather than do it all at once with the master bathroom renovation project.

I decided to move forward with my Ikea Pax plans (you can find them in this post, but I did end up changing a few things due to store availability). I taped off the area so that I could envision it:
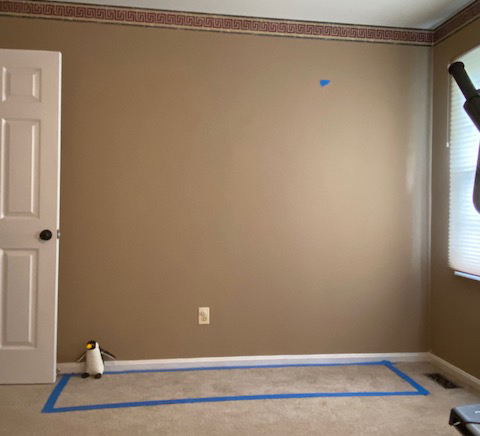
The blue painters tape on the wall is the height of the wardrobe and the square on the carpet is its exact footprint.

With that plan in mind, we drove up to Ikea on my birthday so I could oooh and ahhh and touch all the things. We bought everything we needed for the project and dragged all 18 boxes up to our second floor so I could look forward to building it.

My plan was to rip down the wallpaper border, install the closet and live with it like that for a few months until my dad is able to get to our bathroom project. Our current plan is to start the full renovation this winter (he says December, which I interpret as early-Spring).

On my lunch break at home on Monday, I decided to give the border a little tug to determine whether its removal would be an easy project or a pain in my butt.
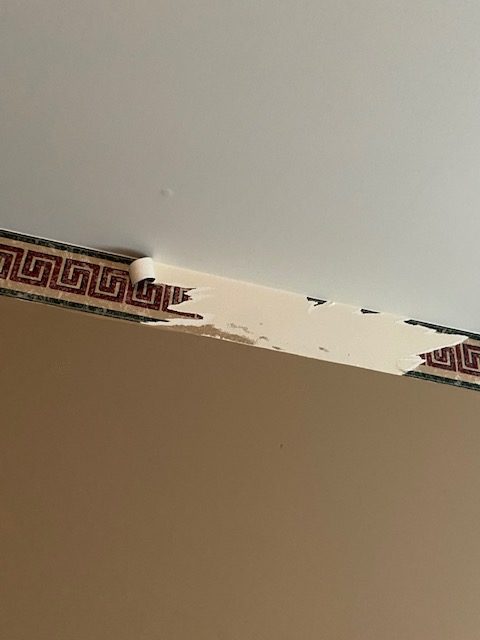
The good news is that the border is peel-and-stick and mostly comes off in larger chunks. The bad news is that the previous owner put the wallpaper up before painting the wall. So now I have a nice thick unpainted white border.

Sigh.

I guess it’s fine though. I mean, I always hated the poop brown color. I might as well repaint the whole room. Even though half of it will one day be a bathroom. Hmm… maybe I’ll repaint just most of the room? Actually, the Pax wardrobe will cover most of the wall. Perhaps I’ll repaint just some walls. DANG IT. Okay, I’m currently undecided on how much painting I’ll be doing… but there will be paint.

My new ‘to do’ list for this room is:

  • Remove border
  • Pick out paint color
  • Sand tops of walls so you no longer feel a ridge between the unpainted and painted area
  • See if I can move my cable/modem setup to a different room
  • Paint the walls
  • Get rid of everything that I don’t want to live in the room anymore (an old hallway carpet, the small TV area with exercise DVDs that I never use, etc)
  • Build the Pax system
  • Live out all my organizing fantasies

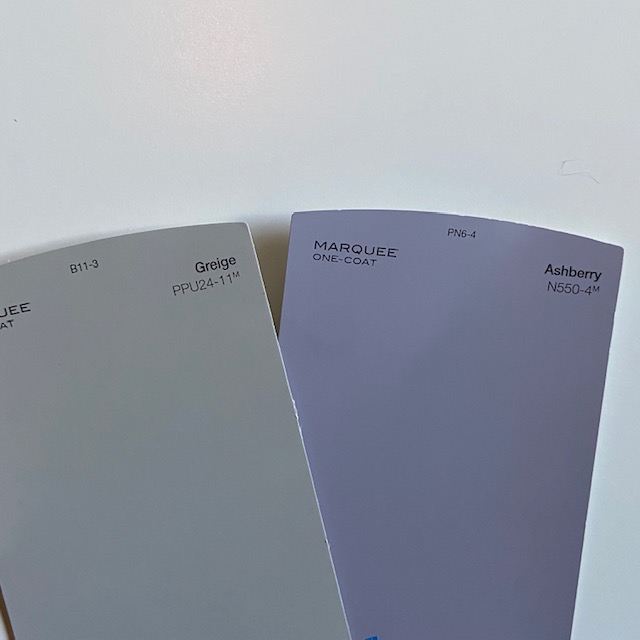
Let’s talk paint colors! The room will eventually be filled with the white wardrobe built-in systems, so you won’t really see a lot of the wall color. So, I wanted something that looked good with the white of the wardrobe and the tan of the carpet (which is thankfully in good condition).
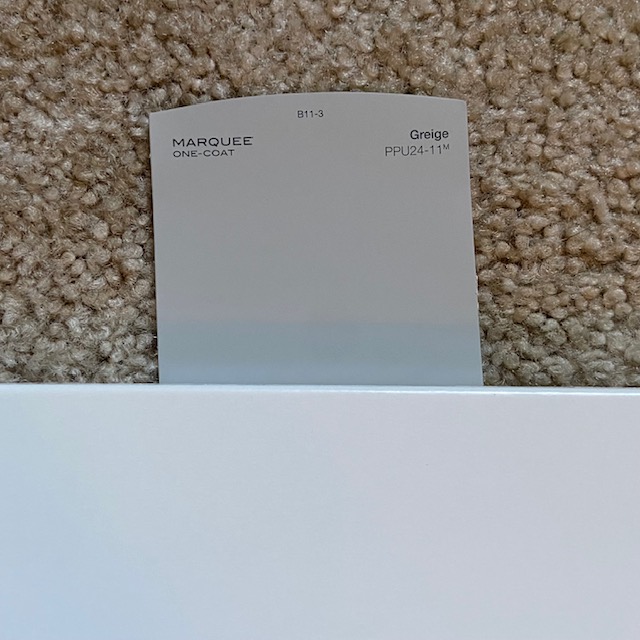
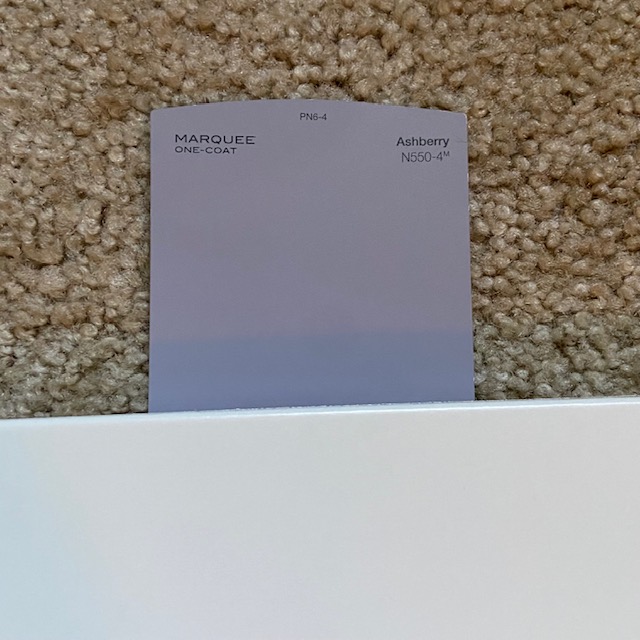
I’ve narrowed it down to Greige or Ashberry. Both colors look good in the natural light that comes in the windows. They also look nice next to the white of the Ikea wardrobe and the tan of carpet. I think I’m leaning towards the Ashberry. But as soon as I say that, I start looking at the Greige.

Current Project Timeline:

I pulled about half of the border down on Monday night and I’m hoping to finish that project tonight after work. Then, I’ll give the walls a quick sanding to smooth out any bumps. The old hallway carpet is going to the curb for trash pickup tonight and I already dragged the small TV organizer into the basement.

I’m going to poke around and see if I can move my cable/modem to a different room tonight or tomorrow after work if I have the energy. I think there may be an unused cable jack in the living room, but I need to dig around for it.

So maybe a Home Depot run at lunchtime on Friday to pick up the paint. If all goes according to plan, I’ll be painting on Friday night or Saturday with the goal to start building the wardrobe on Sunday!
Dream Closet Brainstorming: HELP Me!

The long-term plan for our extra bedroom is to one day turn it into a master bathroom (with a huge shower, lots of counter space and two sinks) that leads to a walk-in closet. I’ve wanted a walk-in closet my ENTIRE life and have never had the opportunity to have one. Instead, I try to organize my regular sized closet as much as possible with my ‘on season’ clothes and my office closet holds my ‘off season’ stuff.

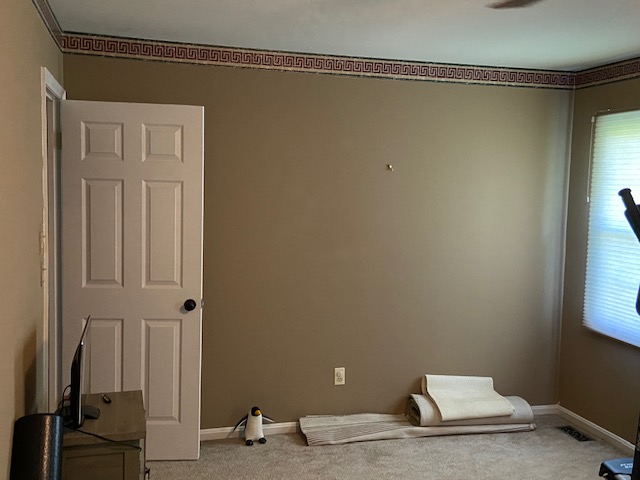
Over the years, we have used the extra bedroom as a playroom for Jack and now as an exercise room for me. And it is a pretty huge room – right now it holds an elliptical, 2 exercise bikes, 2 yoga mats fully stretched out and a bunch more random stuff. Oh, and the walls haven’t been updated since we moved in 9 years ago — it came with that wall color and the ugly border at the top of the walls.

I was recently thinking, maybe I should start working on my walk-in closet plans NOW, rather than doing it all at once. That way, I can start using it and also pay for one wall of a wardrobe before we build a bathroom, which is much less painful.

So, I’m thinking of starting with this wall:

There is about 8 feet of space (96 inches) without blocking the door or the window. I thought I could start looking for wardrobe organizers for that space and then build out when we get to the bigger project.

There are SO MANY options though and I could really use some feedback! Originally, I was thinking of having open closets but then I started thinking about having something with doors that could close.

Here are some of my inspiration photos:

Source: Ikea.com

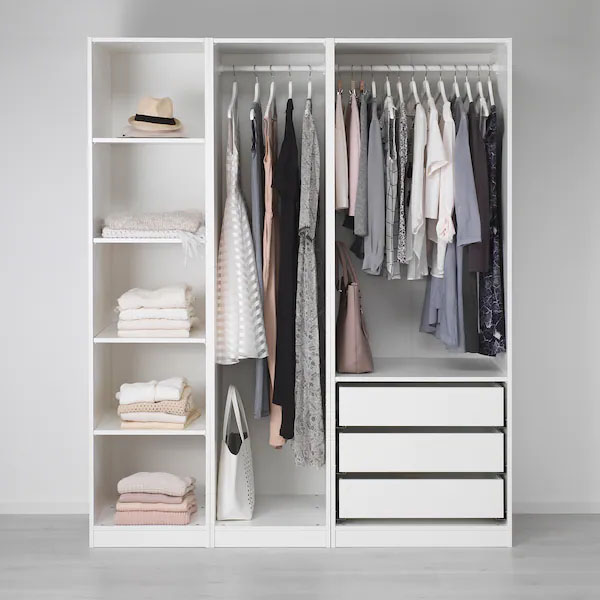
This is one of the Pax wardrobe options from Ikea (you can find it here). It is 68” wide so I could certainly go wider than this one. It costs $465 and I like that it includes hanging area, shelves AND drawers. The downside is that this is out of stock at both of my nearby Ikea stores and they do not deliver to my zip code.

Source: Ikea.com

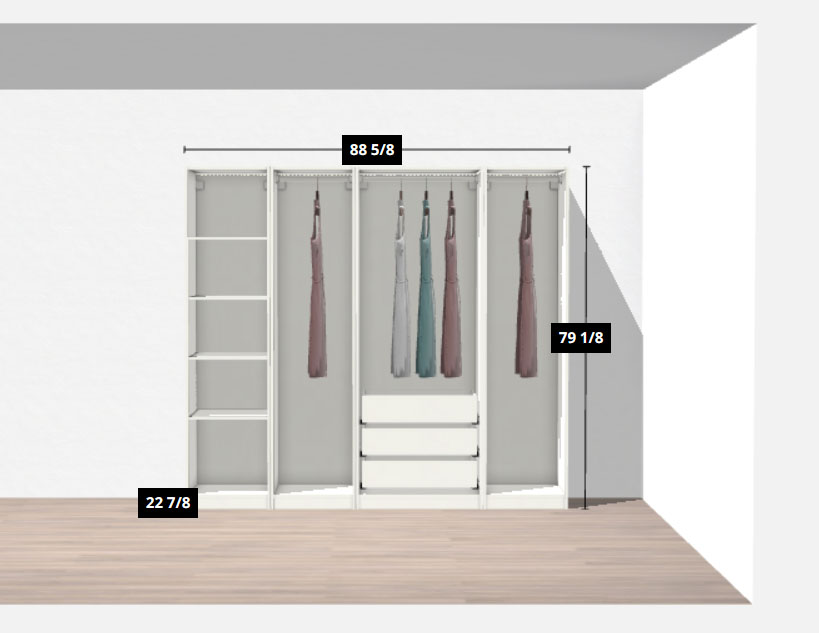
With that being said, there is a Pax Designer Tool on the Ikea website where you can build your own closet from Pax pieces. I made this version which is like the one I found, but with an extra hanging wardrobe bit on the end to make it 88 5/8 inches wide so it will fit better on my wall. This version is $550.

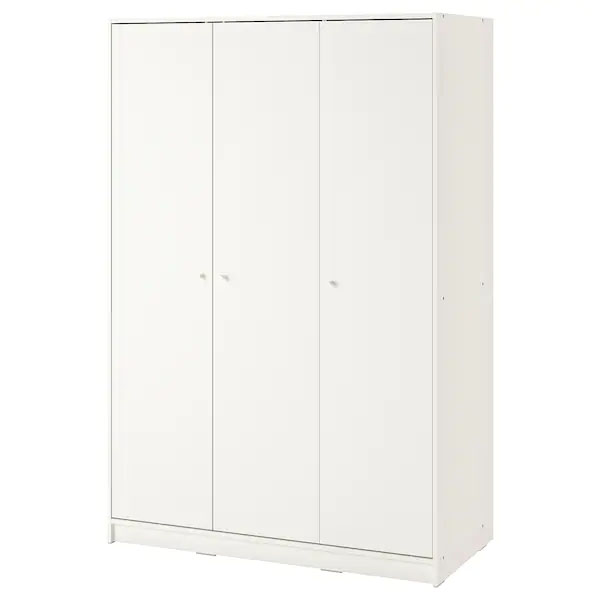
Then, I started looking at less expensive options and came across the KLEPPSTAD wardrobe (you can find it here). It has three doors, is 46 inches wide and costs $129.

Here it is with the doors closed:

Source: Ikea.com

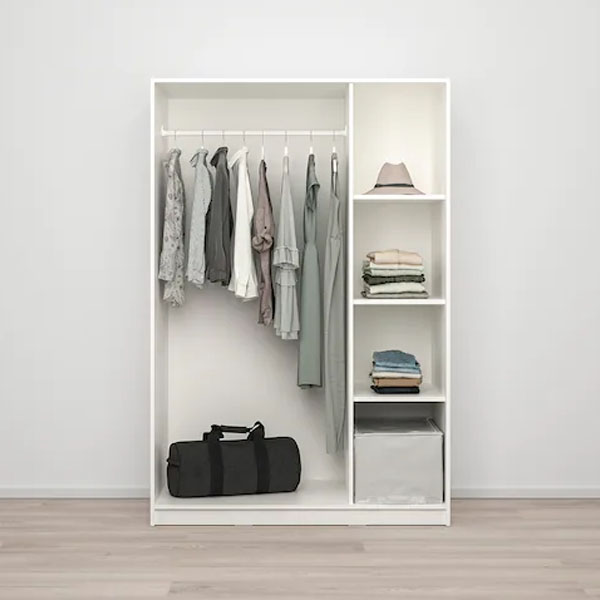
And here it is with the doors open:

Source: Ikea.com

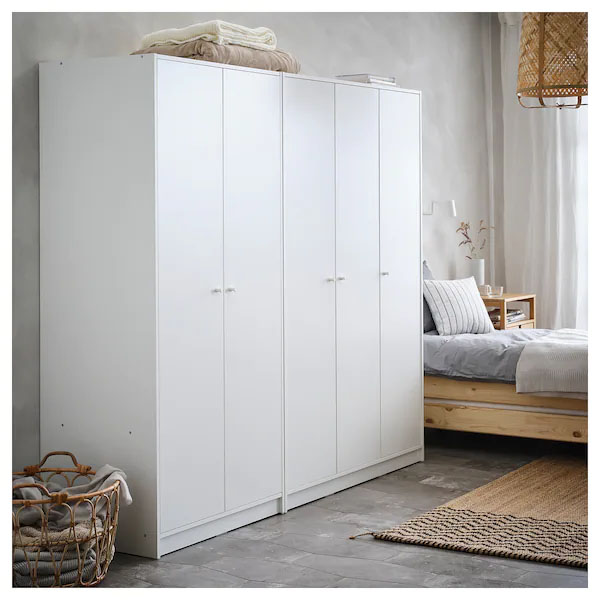
It is similar to the Pax, but doesn’t include the drawers. However, since it is 46” wide, I could get two of them for a total of 92” of space and it would cost $258, which is less than half of my custom-built Pax version.

When put together, it would look similar to this but a little wider:

Source: Ikea.com

I’m not sure if I want doors or not though. Once it’s an actual walk-in closet, it might be nicer to be able to see everything. Or would it be nice if things were tucked away? Or… maybe I could build it and just not put the doors on?

Of course, I didn’t just shop the Ikea website. I also looked at Home Depot, The Container Store and Amazon. The Container Store was WAY too expensive for a very similar look. I wasn’t finding anything I liked that was freestanding on the Home Depot website. But I did come across something interesting on Amazon.

Source: Amazon.com

This is the Tribesigns Freestanding Closet Organizer (you can find it here). It is 79 inches across for $330. It has four pockets of areas for hanging clothes, shelves and it even comes with the four cubby boxes.

And I’m torn. I feel like any of these would be a great option for clothing storage. However, because they are all great I’m not sure what would be the best option for me. I’m not sure if I want something without doors or something with doors?

I’m kind of overwhelmed with choices! Do you have strong feelings on doors vs no doors? Do you have a closet situation that you love or hate that you’d like to share? Help me!

Disclaimer: This post contains an Amazon affiliate link. This means that clicking on a link may help me earn a small commission at no cost to you.

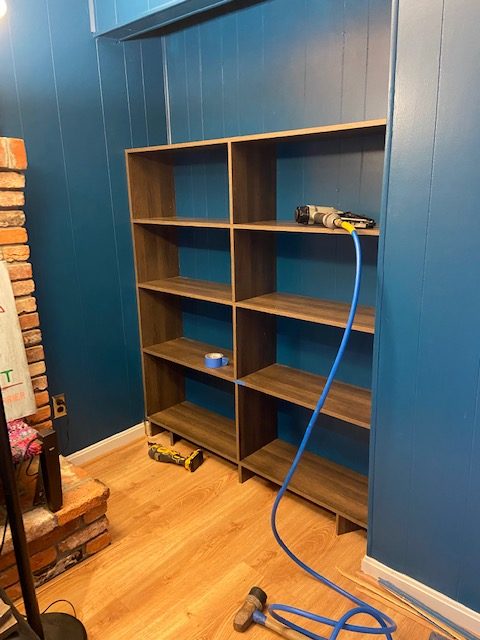
My Very Own Built In Bookcase

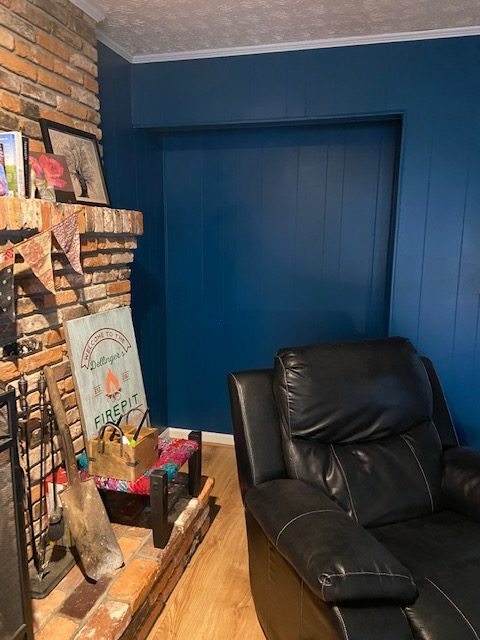
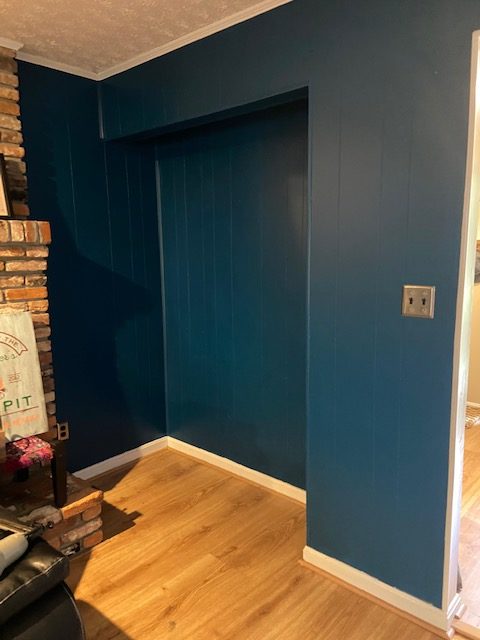
We’ve lived in our home for over 9 years now. And for 9 years I’ve stared at this random little indented wall in my den and thought that I should add a bookcase.

Over the years, the little indent has been the home to our Christmas tree and lately I’ve had some hanging lights in there. However, it never really looked quite right. So, I took everything down and cleared it out in anticipation of this project.

I had a plan, which I sketched out with some ideas. But once we got to Home Depot to see what kind of wood options we had, the whole plan was thrown out the door. The problem was that we needed long pieces of wood (the indent was 58.5 inches across), but also wide enough that I could use them as bookshelves.

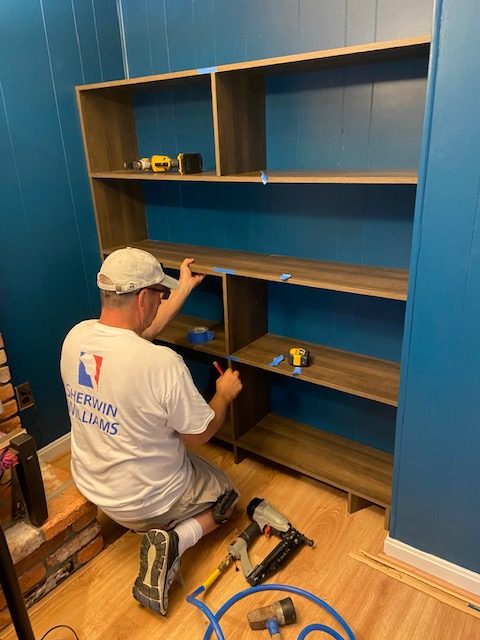
After looking through the whole store, we found a winner in the closet department: Rubbermaid Chestnut Oak Laminated Wood Shelves in a 12” x 72” size for $15 each. I started by grabbing 5 of those, because I knew I wanted 5 shelves. But then, we also bought a bunch of the smaller sizes to use on our project as the shelf supports.

I’m not going to go through the whole process, because frankly it was an absolute blur of sawdust, sweating, more sawdust, and a nail gun. My dad is the master craftsman… while I was his humble assistant that ran all over the place, checked measurements, held boards while he cut them on his miter box, and pounded things into place with a rubber mallet.

My dad and I work really well together, in that I’m always open to trying things in different ways. And if something isn’t working, we can typically figure out another way to get to the same end-goal. With that being said, this project went MUCH quicker than I anticipated. My dad and I met at Home Depot at 9am and we were totally done and cleaned up at noon.

Pro Tip: buy EVERYTHING you think you might possibly need for your project the first time, as it’s much more fun to return unneeded stuff when you’re done then to have to run back out to the store in the middle of a project

On our morning trip, I spent $188 at Home Depot. When we were done, I went back to the store and returned $59 worth of stuff we ended not needing. So, the whole bookshelf project totaled $129.

Here is the slide show, but I also made an adorable little video with THE BEST song ever that you can view here (click through and turn on the sound):

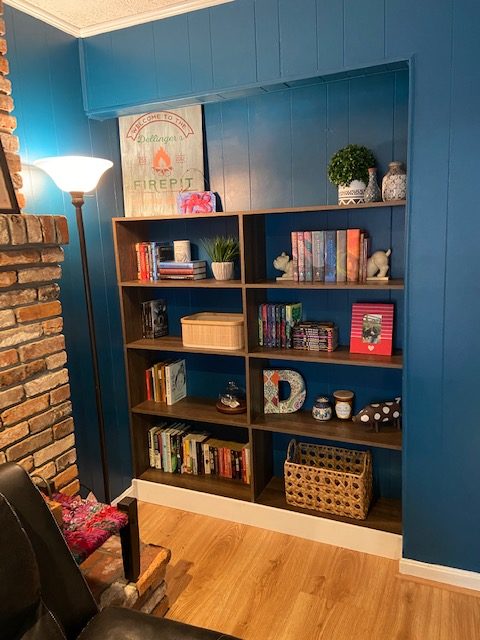
Once we were done building and I had vacuumed up the sawdust. My dad left and it was time for me to do the fun part of ‘styling’ the shelves. I gathered up all the books that previously lived on my mantle, grabbed some more from my office and then went around the house stealing fun trinkets like photos, art projects and vases. I also took a quick trip to Homegoods to buy a couple more fake plants and two baskets.

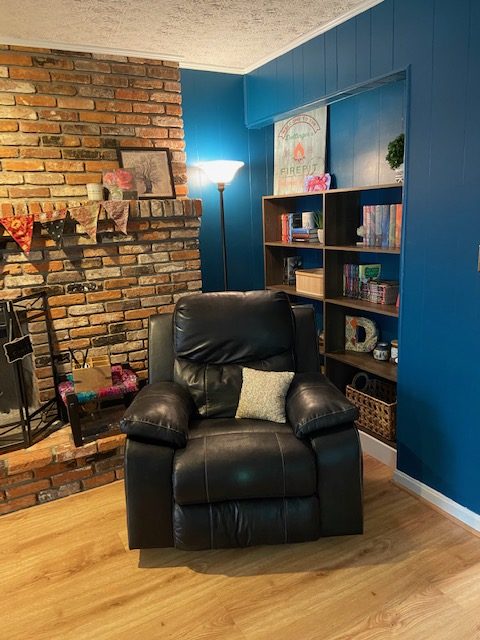
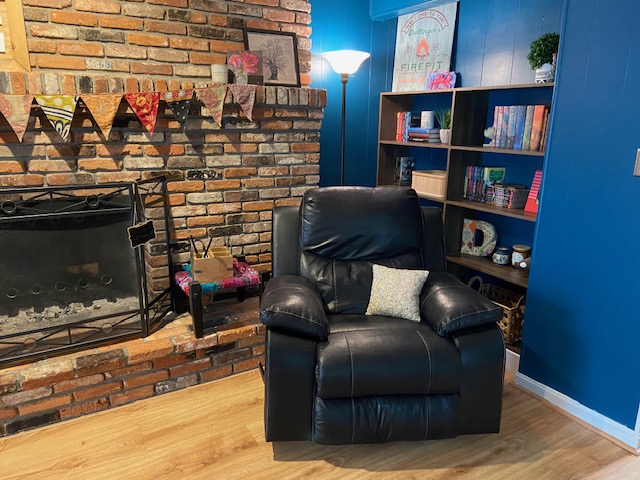
And I LOVE the finished product!

Now the little den indent looks like it’s supposed to be there. The bookcase is custom, so it fits perfectly and with the light and the recliner, it makes a great little spot to snuggle up with a book.

All in all, I’m kind of annoyed that I THOUGHT about the project for 9 years… and it only took 3 hours.

Disclaimer: This post contains a ShopStyle affiliate link. This means that clicking on a link may help me earn a small commission at no cost to you