One of the things that annoys me most on episodes of House Hunters (to which I’m hopelessly addicted), is when someone walks into an otherwise perfect house and complains about the stupid stuff. If I hear, “Oh, I just couldn’t live with this paint color” one more time, I’m going to throw something at the TV. Same goes for a woman looking into a huge walk-in closet and saying, “This works for me, but where are you going to put YOUR stuff?! {insert awkward chuckle here}.” Oh yeah, and any couple EVER talking about a man cave. Blegh.
Anyways, back to the point – easy changes.
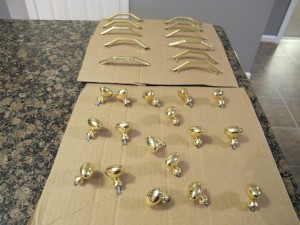
One of the things that I totally hated about our kitchen when I first saw it was the cabinet hardware:

The cabinets are fine, the granite countertops fantastic and the layout is perfect (now that we moved the island).

But I just couldn’t deal with the gold/brass hardware knobs and drawer pulls. I’m not a big fan of gold in general, and the cabinets looked like King Midas came over and molested them. And honestly, nobody wants to be molested by King Midas.
It would be such a shame to trash it all though, because it was really nice heavy stuff and I even liked the shape of the knobs. Since I hate wasting something that is perfectly good (and spending money when I don’t have to), I decided to change their color.
YHL did a great tutorial of it over the summer here, so I decided to try it out. I’m kind of lazy though, so I knocked out a couple of steps.
First, I grabbed my handy screwdriver and removed all of the knobs and drawer pulls throughout the kitchen. While opening each cabinet and drawer to remove stuff, I found the wine I had put away when I was pregnant. YAY, wine — just what I need to complete this project!

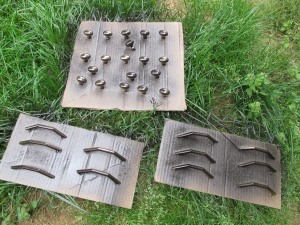
So I filled myself a glass of wine and moved the next stage – poking holes in an old piece of cardboard and sticking all the knobs and drawer pulls through it. As I poked each screw through the cardboard and threaded the knob on, I made sure to only tighten it halfway. This way I can shift everything back and forth in between painting coats to ensure I don’t miss any spots.
Once all the knobs were connected to the cardboard, I grabbed my trusty Windex and a paper towel. I cleaned the yuck off of each knob and also cleaned the front of each cabinet so that there was no goo left when I went to return them to their original positions. At this point I was supposed to use a deglosser on the knobs, but I read the warnings on the back of the bottle and freaked out about how toxic it was, so I decided to skip that step.

The next phase of the project was to get out my snazzy spray paint – like YHL, I used Rustolium’s oil rubbed bronze primer and paint in one. I took my three pieces of cardboard outside and sprayed the first super thin coat on everything. Oh, and don’t worry it always looks pretty terrible at first.
I let the first coat dry and then went back about 20 – 30 minutes later for a second coat. And then 20 – 30 minutes after that for a third coat and so on and so on. After a couple coats started getting good coverage, I flipped the knobs down so that the other sides were visible for painting. And then I sprayed yet another coat.
I probably applied about 4 coats, waiting for them to dry between each one, before I was happy with the finished product. And then I applied one last coat to make sure I didn’t miss any spots. There is nothing worse than finishing a project, cleaning up and then realizing that you needed to get all your supplies out again to do one more thing.

Once that last coat was done, I left the finished knobs outside for the rest of the day so that they could fully dry. I brought them in at night and left them in the sunroom that night and for the whole next day while I was at work.
And they looked GORGEOUS! Well, as gorgeous as some knobs can look.*
I put them back on the cabinets and admired my handiwork. Well, actually this part didn’t go quite as smoothly as I would have liked.

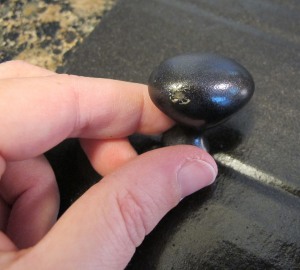
Even though the freshly painted knobs passed the scratch test with my fingernail, I accidently dropped two of them on the granite countertop and it smashed the paint right off of them {insert sad trombone noise here}. No big deal though, I just stuck those two knobs back through the painted cardboard and give them one more coat of paint so they look just as good as their little knobby friends.
Check out the before and after – much better, right? For just $6 worth of spray paint it’s a HUGE improvement. Actually, let’s call it a medium-sized improvement because this is just part 1 of my kitchen changes for the week.
I worked on part 2 all day yesterday and I can’t wait to unveil it here (hopefully) tomorrow. I would have been able to post about it today, but I miscalculated and ran out of supplies before the project was finished {insert grumbling and cursing here}.
Here’s a little hint though…
{Insert end of blog post}
Ps. I’m really liking {inserting things} today.
{insert groan because you’ve just realized that I am a massive dork}
*Does that sound dirty to you? Because it totally sounds dirty to me and I’m kind of snickering at that sentence…


Hey Joules,
What a difference! I like the difference changing the handles and knobs made.
If that’s part 1, where’s part 2, 3….?
Glad you like it! =)
Here’s part 2: http://pocketfulofjoules.com/2012/05/04/kitchen-changes-part-2/