
I was going to name this blog post, “A Place to Eat my Marshmallows” but we all know that I eat my marshmallows EVERYWHERE. So instead, let’s talk about how my husband and I made the best fire pit in ALL THE LAND. And how I can use it to roast my marshmallows.
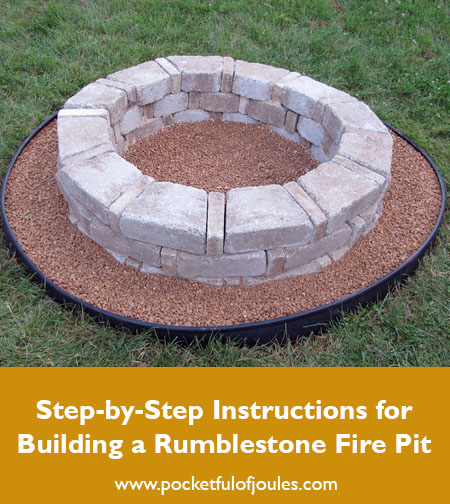
 Our original plan for a fire pit was to just dig a hole in the ground, throw some wood in and light it on fire. But then, on one of our trips to Home Depot we saw that they sold fire pit kits made out of RumbleStone. They had a bunch of different options, but we decided to go for Round Fire Pit No. 1 with a couple of changes.
On our first trip, we picked up the stones we would need (36 mini’s and 36 traps) and a tube of landscaping caulk. We didn’t bother with the insert because we wanted to be able to make larger fires. Also, why pay for an insert if you don’t really need one? The one thing that I found lacking is that there were no instructions included. The brochure pointed us to the Home Depot website to find the RumbleStone instructions… but all I saw was a video.
So, I thought that there might be other people out there who could use some help and put together this blog post.
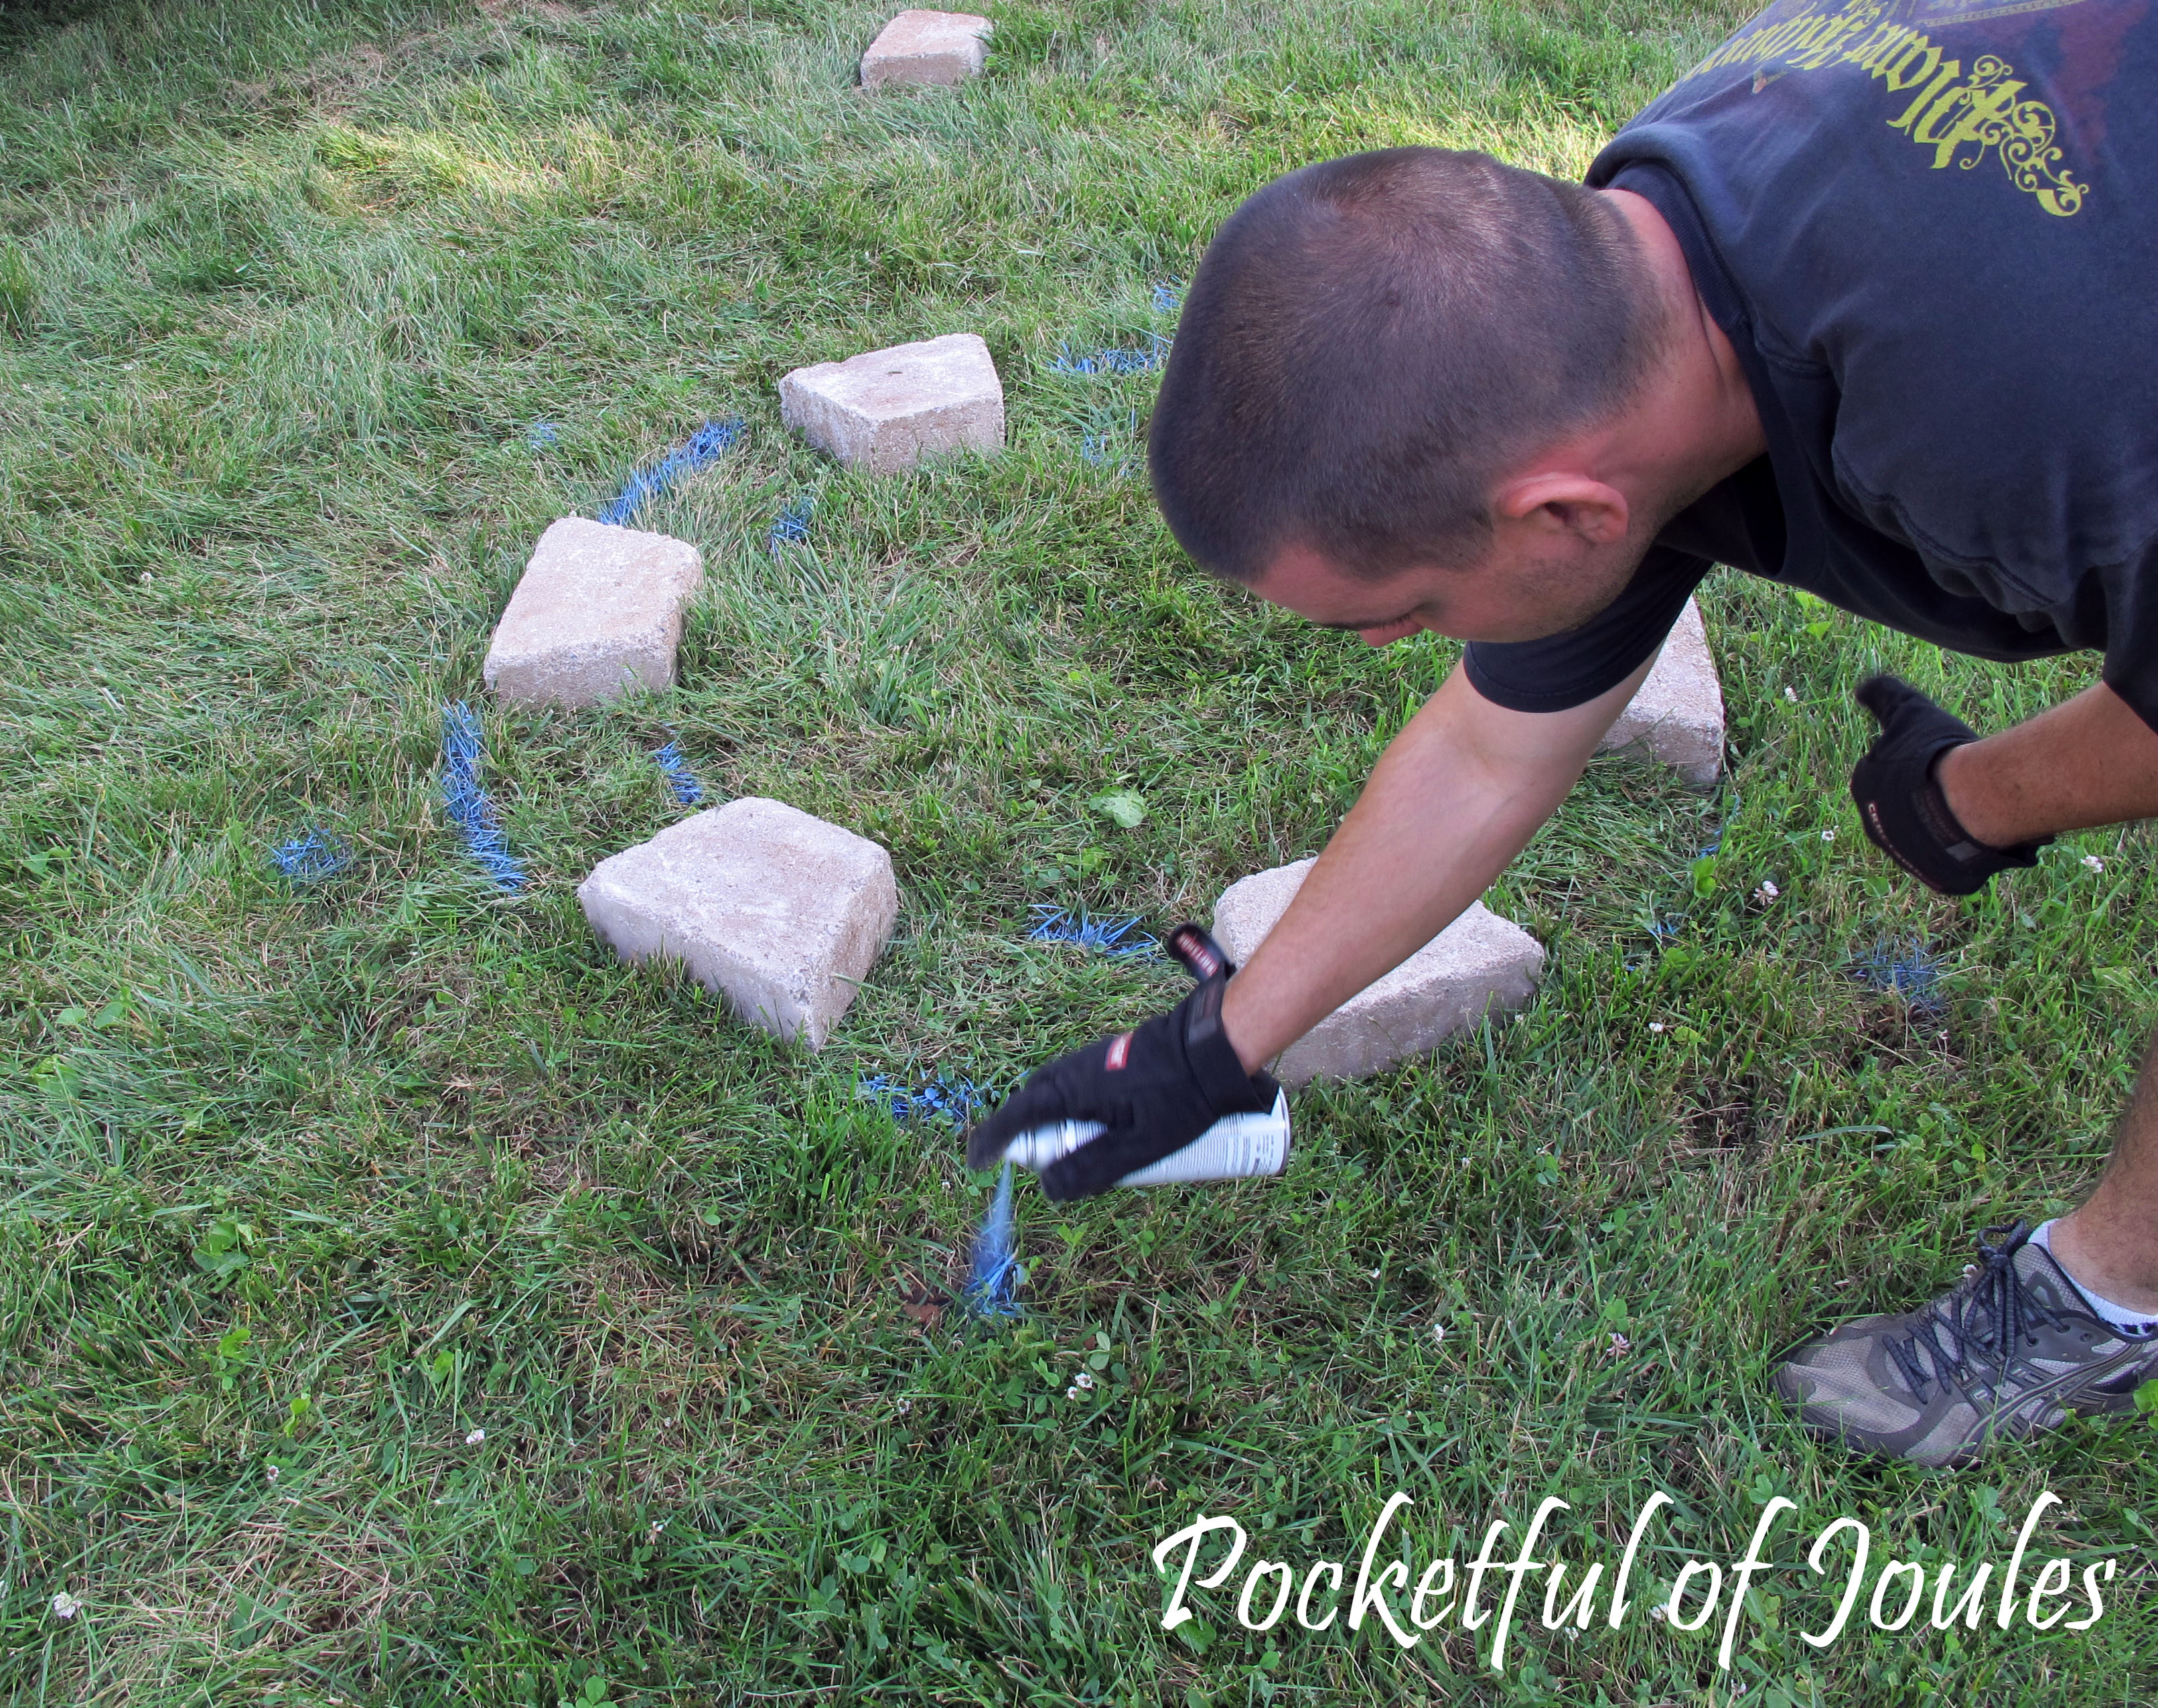
Once we got home, we started by picking a spot in the yard that was a good distance from the house and any trees and set down the first layer of stone to figure out the spacing.

In order to make it easier for us* to mow the lawn, we decided to dig out some extra surrounding area around the stones. This way, instead of using the weedwacker right next to the stones (and having them break down over time) we had a little barrier. We used one of the mini stones to make the spacing even all around.

Travis then used a little spray paint to mark where the stones would sit, before he threw them aside so he could start digging.
And dig he did. The grass and dirt that came out of the hole ended up being three trips with the wheelbarrow!
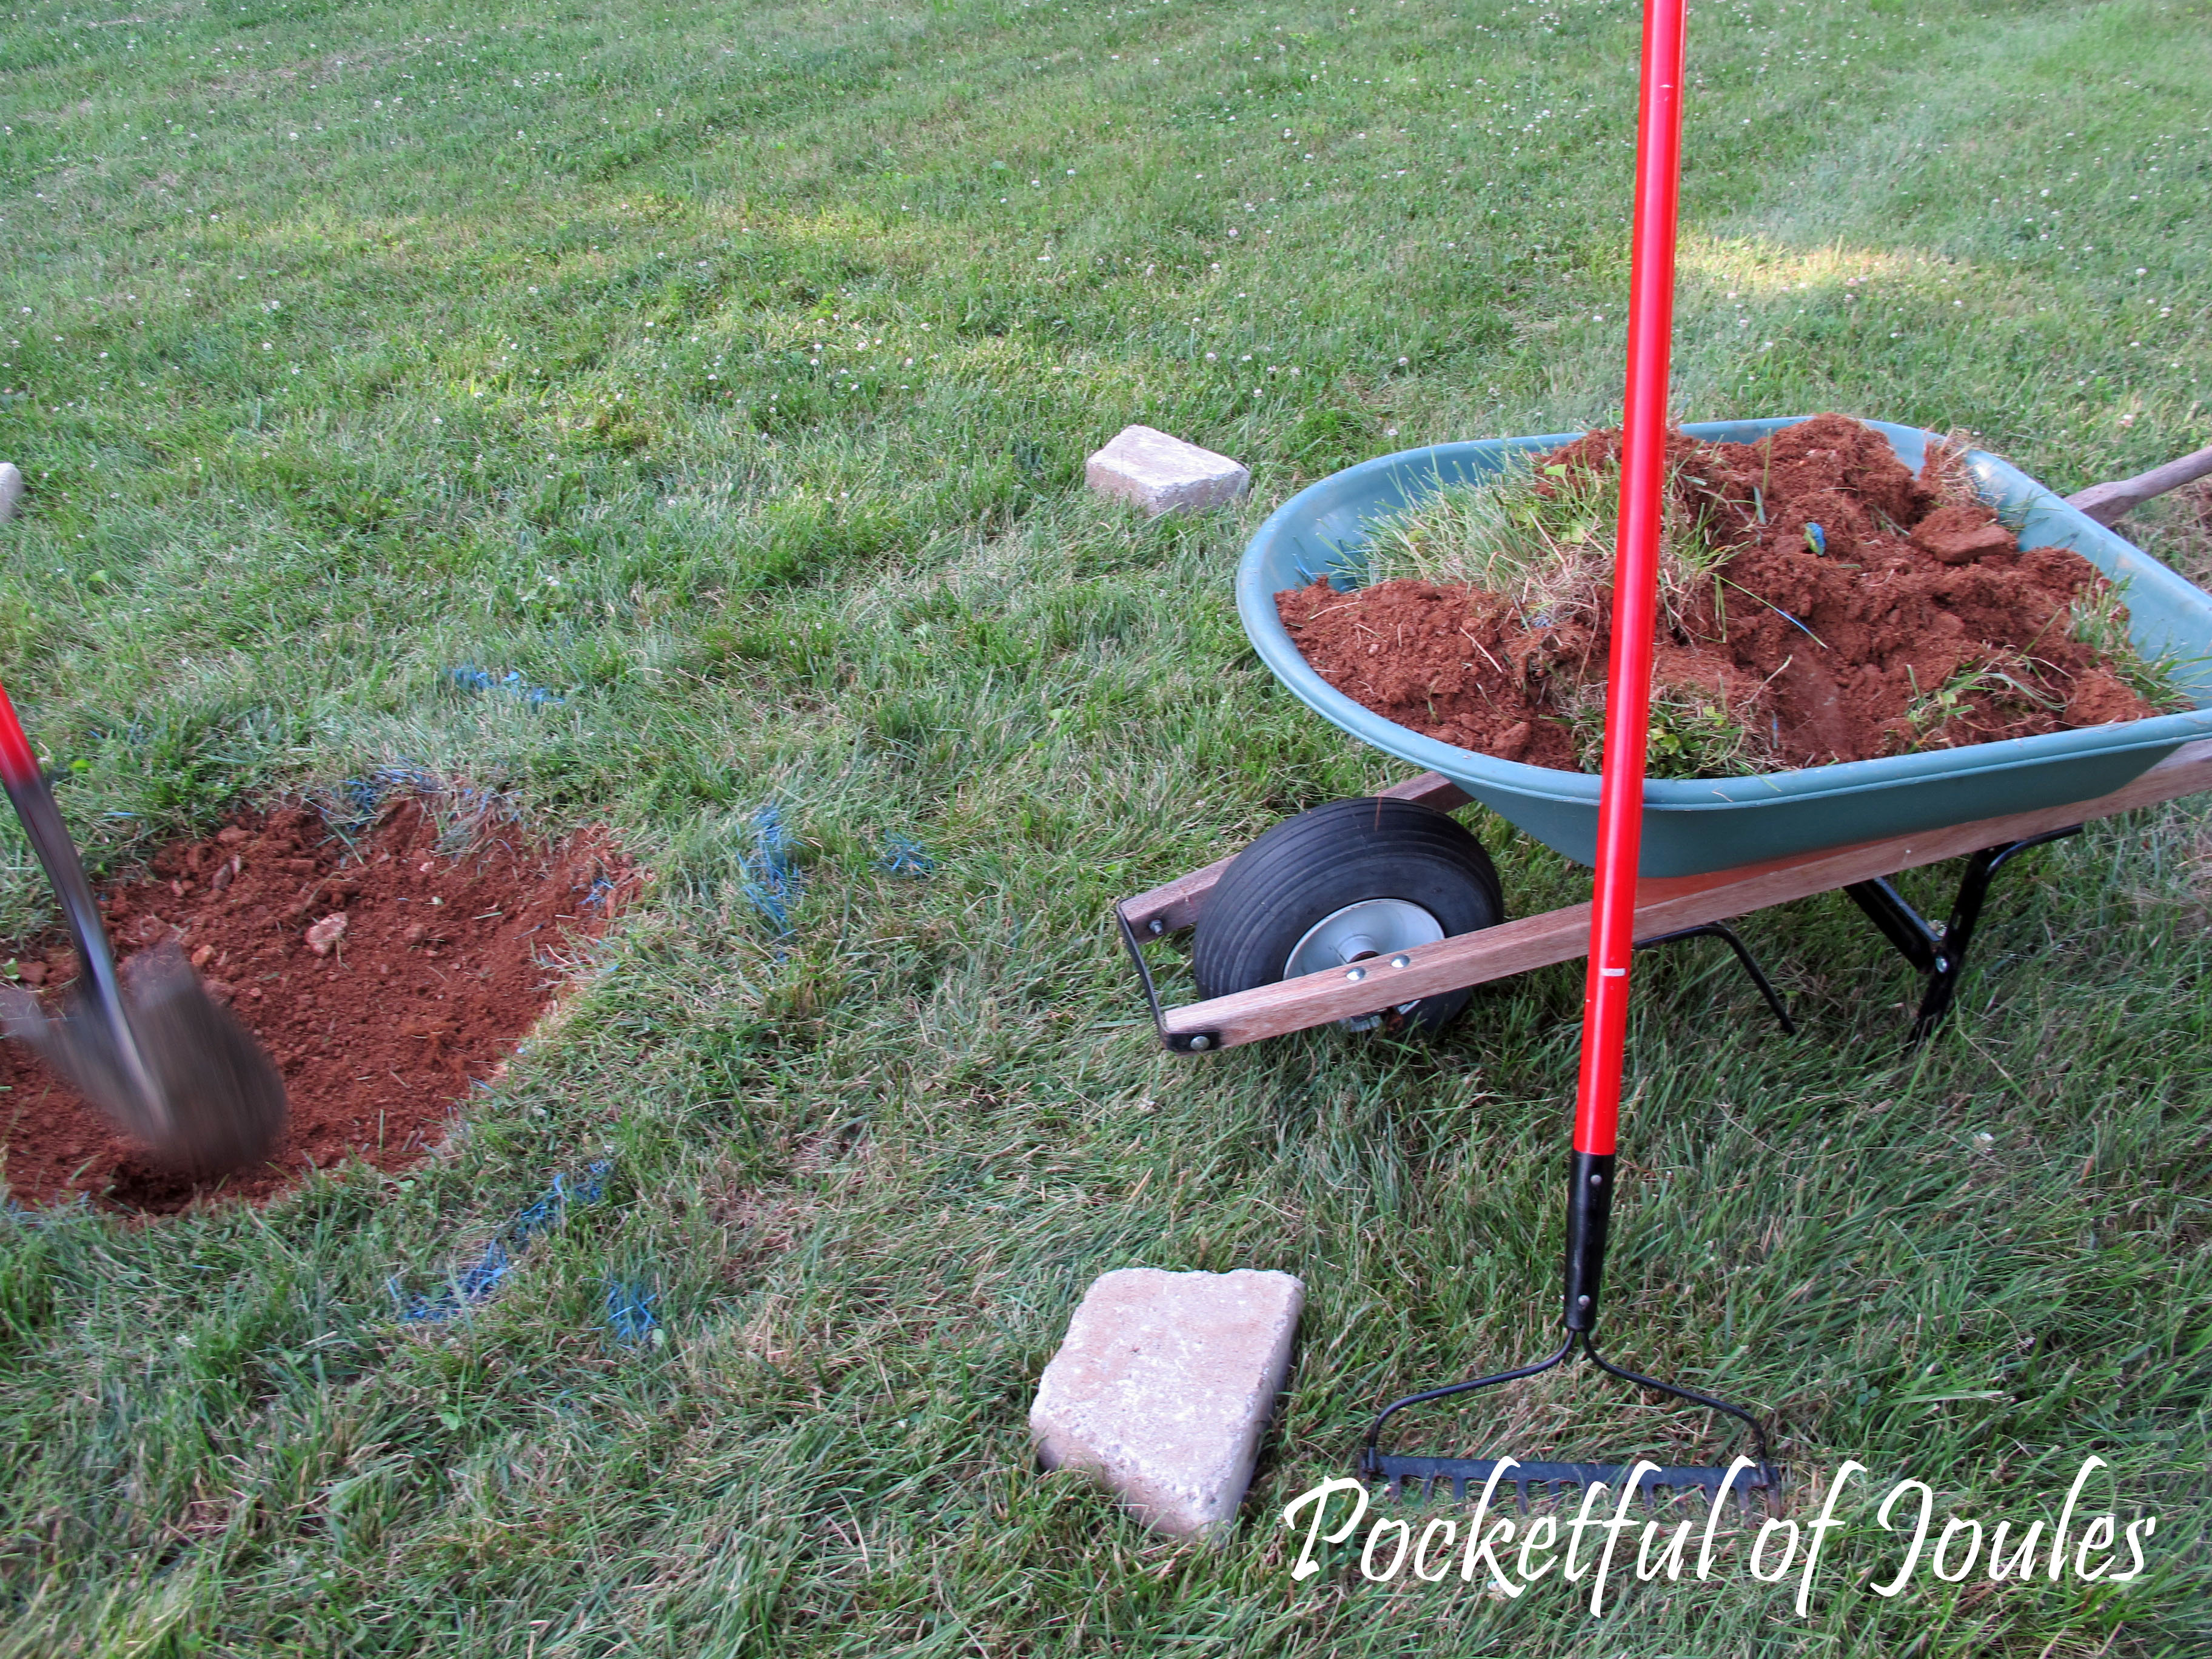
And more digging. This totally wasn’t like it was on TV where the entire project was finished in 20 minutes…

After all the digging was finished, Travis used a rake to brush the dirt around so it was nice and even. Well, even-ish. It was still pretty crooked, but we hoped that the stones would cover that!

Finally, we were able to put the first layer of stones down. Look, it almost looks like a real fire pit!

Then, I came in with my handy-dandy caulk gun and made a zigzag pattern on top of all of the stones.

Travis came behind me and placed the second row of stones into the caulk, giving them a nice little wiggle to make sure that they would stay affixed.

One more layer of caulk and one more layer of stones, and we were done. Well, almost.

Our fire pit didn’t look like the most awesome fire pit in ALL THE LAND… it looked… well. Kind of lame. So the next night, we went out and bought some more supplies: 5 bags of base sand, 5 bags of pea pebbles and some plastic lawn edging.
Unfortunately, I don’t have any ‘in progress’ pictures of this part because I was making a delicious dinner inside while corralling Jack and dealing with a sick dog. While I was playing Supermom, Travis cut the plastic edging to size and smushed it into the exterior circle. Then, he added a thick layer of sand and topped it with a layer of pea pebbles.

Here’s a close up. The pebbles aren’t super pretty, but they were cheap and did the job!

So NOW we do have the prettiest fire pit in ALL THE LAND! After we put Jack to bed on Saturday night, we filled it with wood, grabbed some super-sized marshmallows and bottle of wine, and broke it in!

Here’s the cost breakdown:
- RumbleStone mini’s: $20.88
- RumbleStone traps: $89.28
- Landscape caulk: $4.97
- Caulk gun: $1.97
- Plastic lawn edging: $9.47
- 5 bags leveling sand: $17.45
- 5 bags pea pebbles:$17.40
Total: 161.42
I LOVE having the fire pit in my yard because it’s totally like camping. But not, because I can go inside to use the bathroom instead of squatting in the woods and falling over. In a few years I can imagine us setting up our tent next to the fire pit and having Jack and his friends sleep outside for a fun boy’s party. Heck, I can see us setting up the tent NOW for a fun Mommy and Daddy party!
I do think we’re going to have to take one more trip to Home Depot to pick up a few Adirondack chairs (maybe a small side table too) in order to make the area super comfy for entertaining friends.
I also need to find some fun recipes for cooking food over a bonfire! I’m pretty darn good at making s’mores and also roasting hotdogs. Do you have any favorites that we should try?
*and by “us” I mean, Travis.
That looks amazing!!!!
Great job!
Thank you!
What you need now are pudgie pie pans. They’re iron things that you put bread inside to make sandwiches or desserts over the campfire. Delicious and fun!
Whhhhaat?! I’ve never heard of these things and now must google them!
They’re totally a thing! We did it at Girl Scout camp. Throw some canned pie filling in between two pieces of bread. It should not be delicious, but it so is! Or pudgy pie pizzas! Those are delish.
YUM! I have an amazon.com order to make today and now I need to add one of these! Thanks for the tip Snickerdoodle. =)
We use to call them Hobo pie makers
Enjoy your marshmallows! Looks great 🙂
wow, looks sooo pretty!!! i need to have ethan make me one of these!
I love fire pits. Wish I had the space for one. Great job!
Congrats! I’ve got a fire pit in my backyard and its the greatest thing ever. It’s feels so decadent, especially on a weeknight, to go outside after dinner and sit by the fire (while making s’mores, obviously). My fire cooking as not progressed beyond s’mores in over two years, most likely because s’mores are the tastiest thing on earth so why would I trifle with lesser foods.
Great job! Might consider the new vertical fire pit grate from FIREase. This product makes these fires easy to build and start, minimizes fire maintenance and frees up more time to just enjoy the fire.
that is fantabulous! we have been wanting to build one but have yet to. you are inspiring me!
Awesome! I may have to do this. Thanks so much for posting!
Wow, I love this! Thank you so much for writing it up. I can’t wait to share our build and progress. We’ll definitely site you as the instructional inspiration!
Thanks Damien – I’m so glad it was helpful for you! =)
Hey, Joules! Here’s our fire pit, citing yours as inspiration and guide! Thank you!
http://gaycountryliving.com/2014/05/the-fire-pit-of-slate-egg/
Looks GREAT Damien!!
The only thing I would do different is to remove 2 of the verticle pavers (opposite each other) to allow air to flow from the bottom, it helps the fire to burn better, but what a great job you guys did !!!
Finished the build using your guidance. Turned out great, much appreciated. Even went with the pea gravel for the extra touch. Level is a bit off,but I was never good at that stuff. Thanks a bunch.
I’m so glad it was helpful!
Any problems with the heat from the fires damaging your pavers? Seen some people say you should get fireproof bricks or a metal insert to dissipate the heat.
Have you experienced any brick breakdown from this?
No problems or brick breakdown at all and we’ve used it regularly for over 2 years so far.
I had the same question. We just bought the same materials today to build a fire pit and the gentleman at Home Depot warned us we would need an insert. Is it still holding up well?
Yes, it’s still holding up great with no insert!
Hi! Thanks for sharing. What is the inside and outside diameter of your fire pit? How tall are the stones from top to bottom? Thank you.