Building a RumbleStone Fire Pit

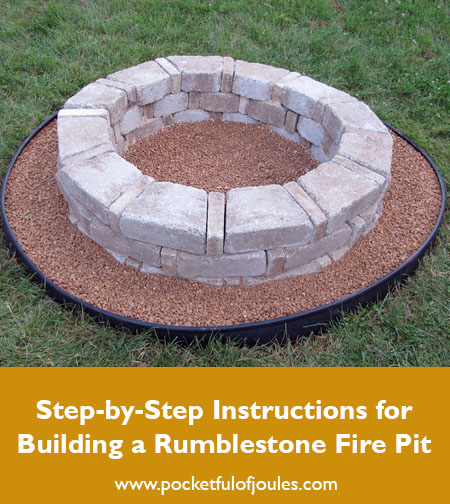
I was going to name this blog post, “A Place to Eat my Marshmallows” but we all know that I eat my marshmallows EVERYWHERE. So instead, let’s talk about how my husband and I made the best fire pit in ALL THE LAND. And how I can use it to roast my marshmallows.

fire pit 1Our original plan for a fire pit was to just dig a hole in the ground, throw some wood in and light it on fire. But then, on one of our trips to Home Depot we saw that they sold fire pit kits made out of RumbleStone. They had a bunch of different options, but we decided to go for Round Fire Pit No. 1 with a couple of changes.

On our first trip, we picked up the stones we would need (36 mini’s and 36 traps) and a tube of landscaping caulk. We didn’t bother with the insert because we wanted to be able to make larger fires. Also, why pay for an insert if you don’t really need one? The one thing that I found lacking is that there were no instructions included. The brochure pointed us to the Home Depot website to find the RumbleStone instructions… but all I saw was a video.

So, I thought that there might be other people out there who could use some help and put together this blog post.

rumblestone fire pit instructions

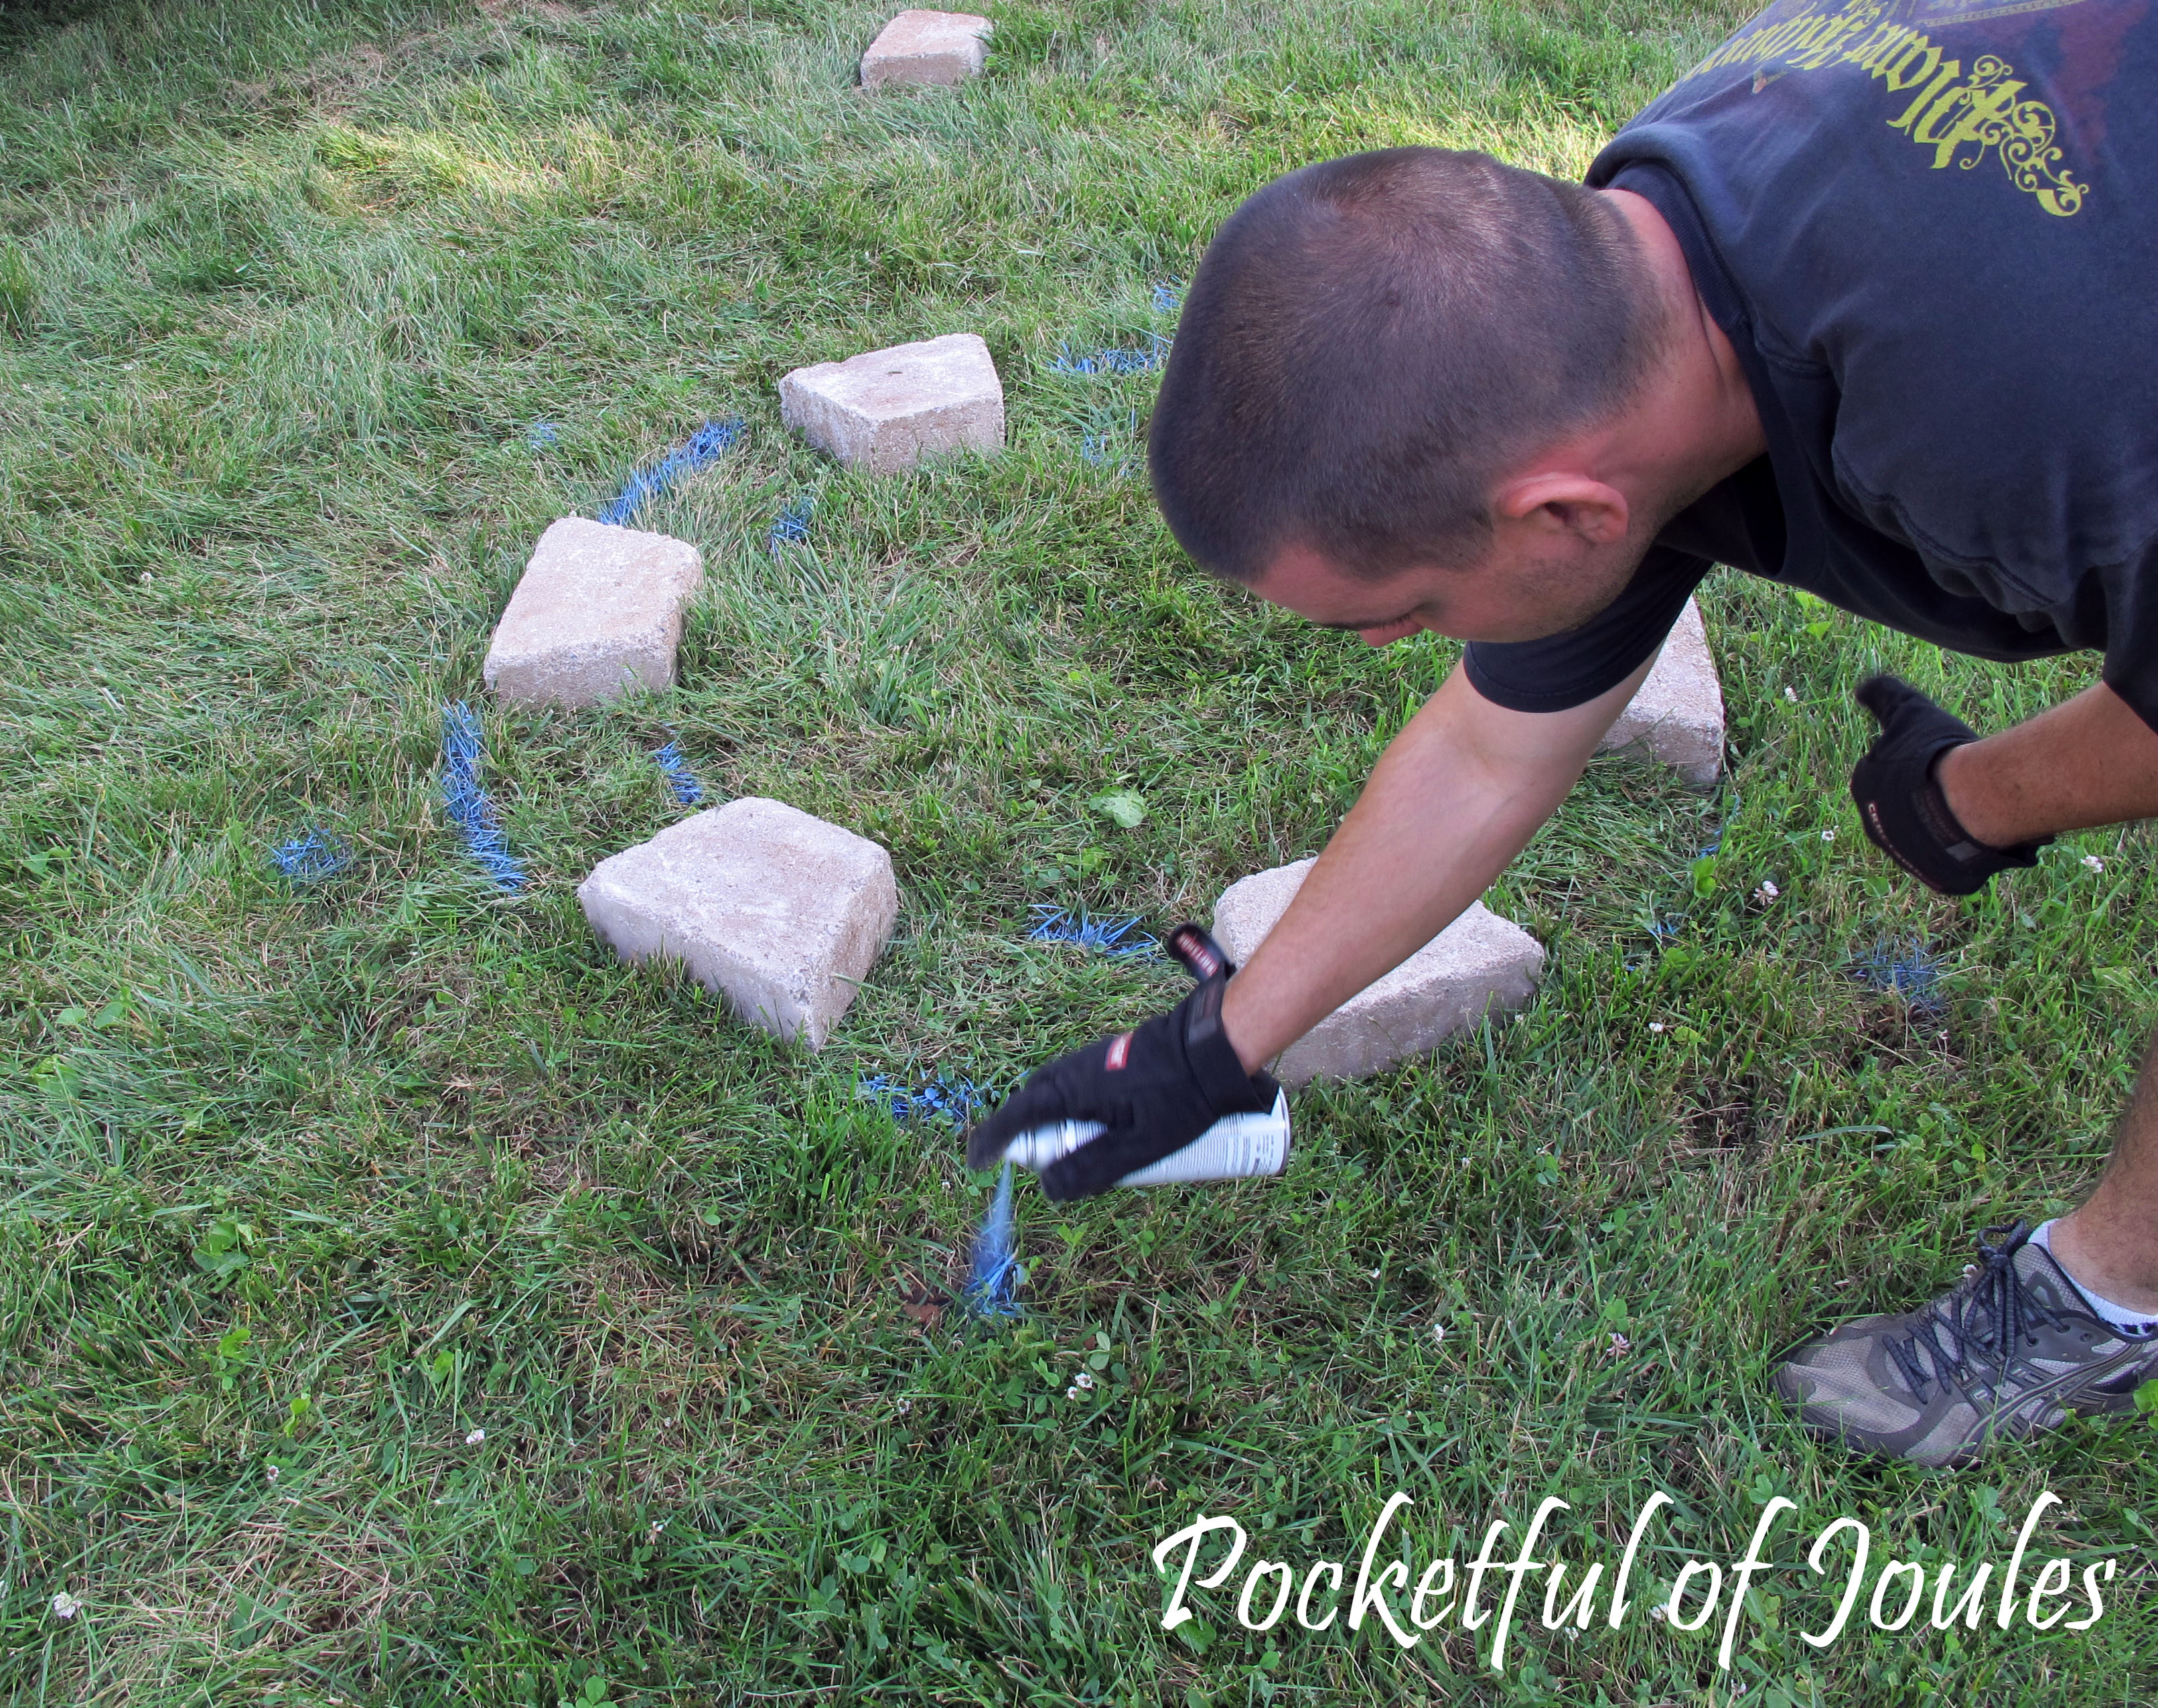
Once we got home, we started by picking a spot in the yard that was a good distance from the house and any trees and set down the first layer of stone to figure out the spacing.

fire pit 2

In order to make it easier for us* to mow the lawn, we decided to dig out some extra surrounding area around the stones. This way, instead of using the weedwacker right next to the stones (and having them break down over time) we had a little barrier. We used one of the mini stones to make the spacing even all around.

fire pit 3

Travis then used a little spray paint to mark where the stones would sit, before he threw them aside so he could start digging.

fire pit 4

And dig he did. The grass and dirt that came out of the hole ended up being three trips with the wheelbarrow!

fire pit 5

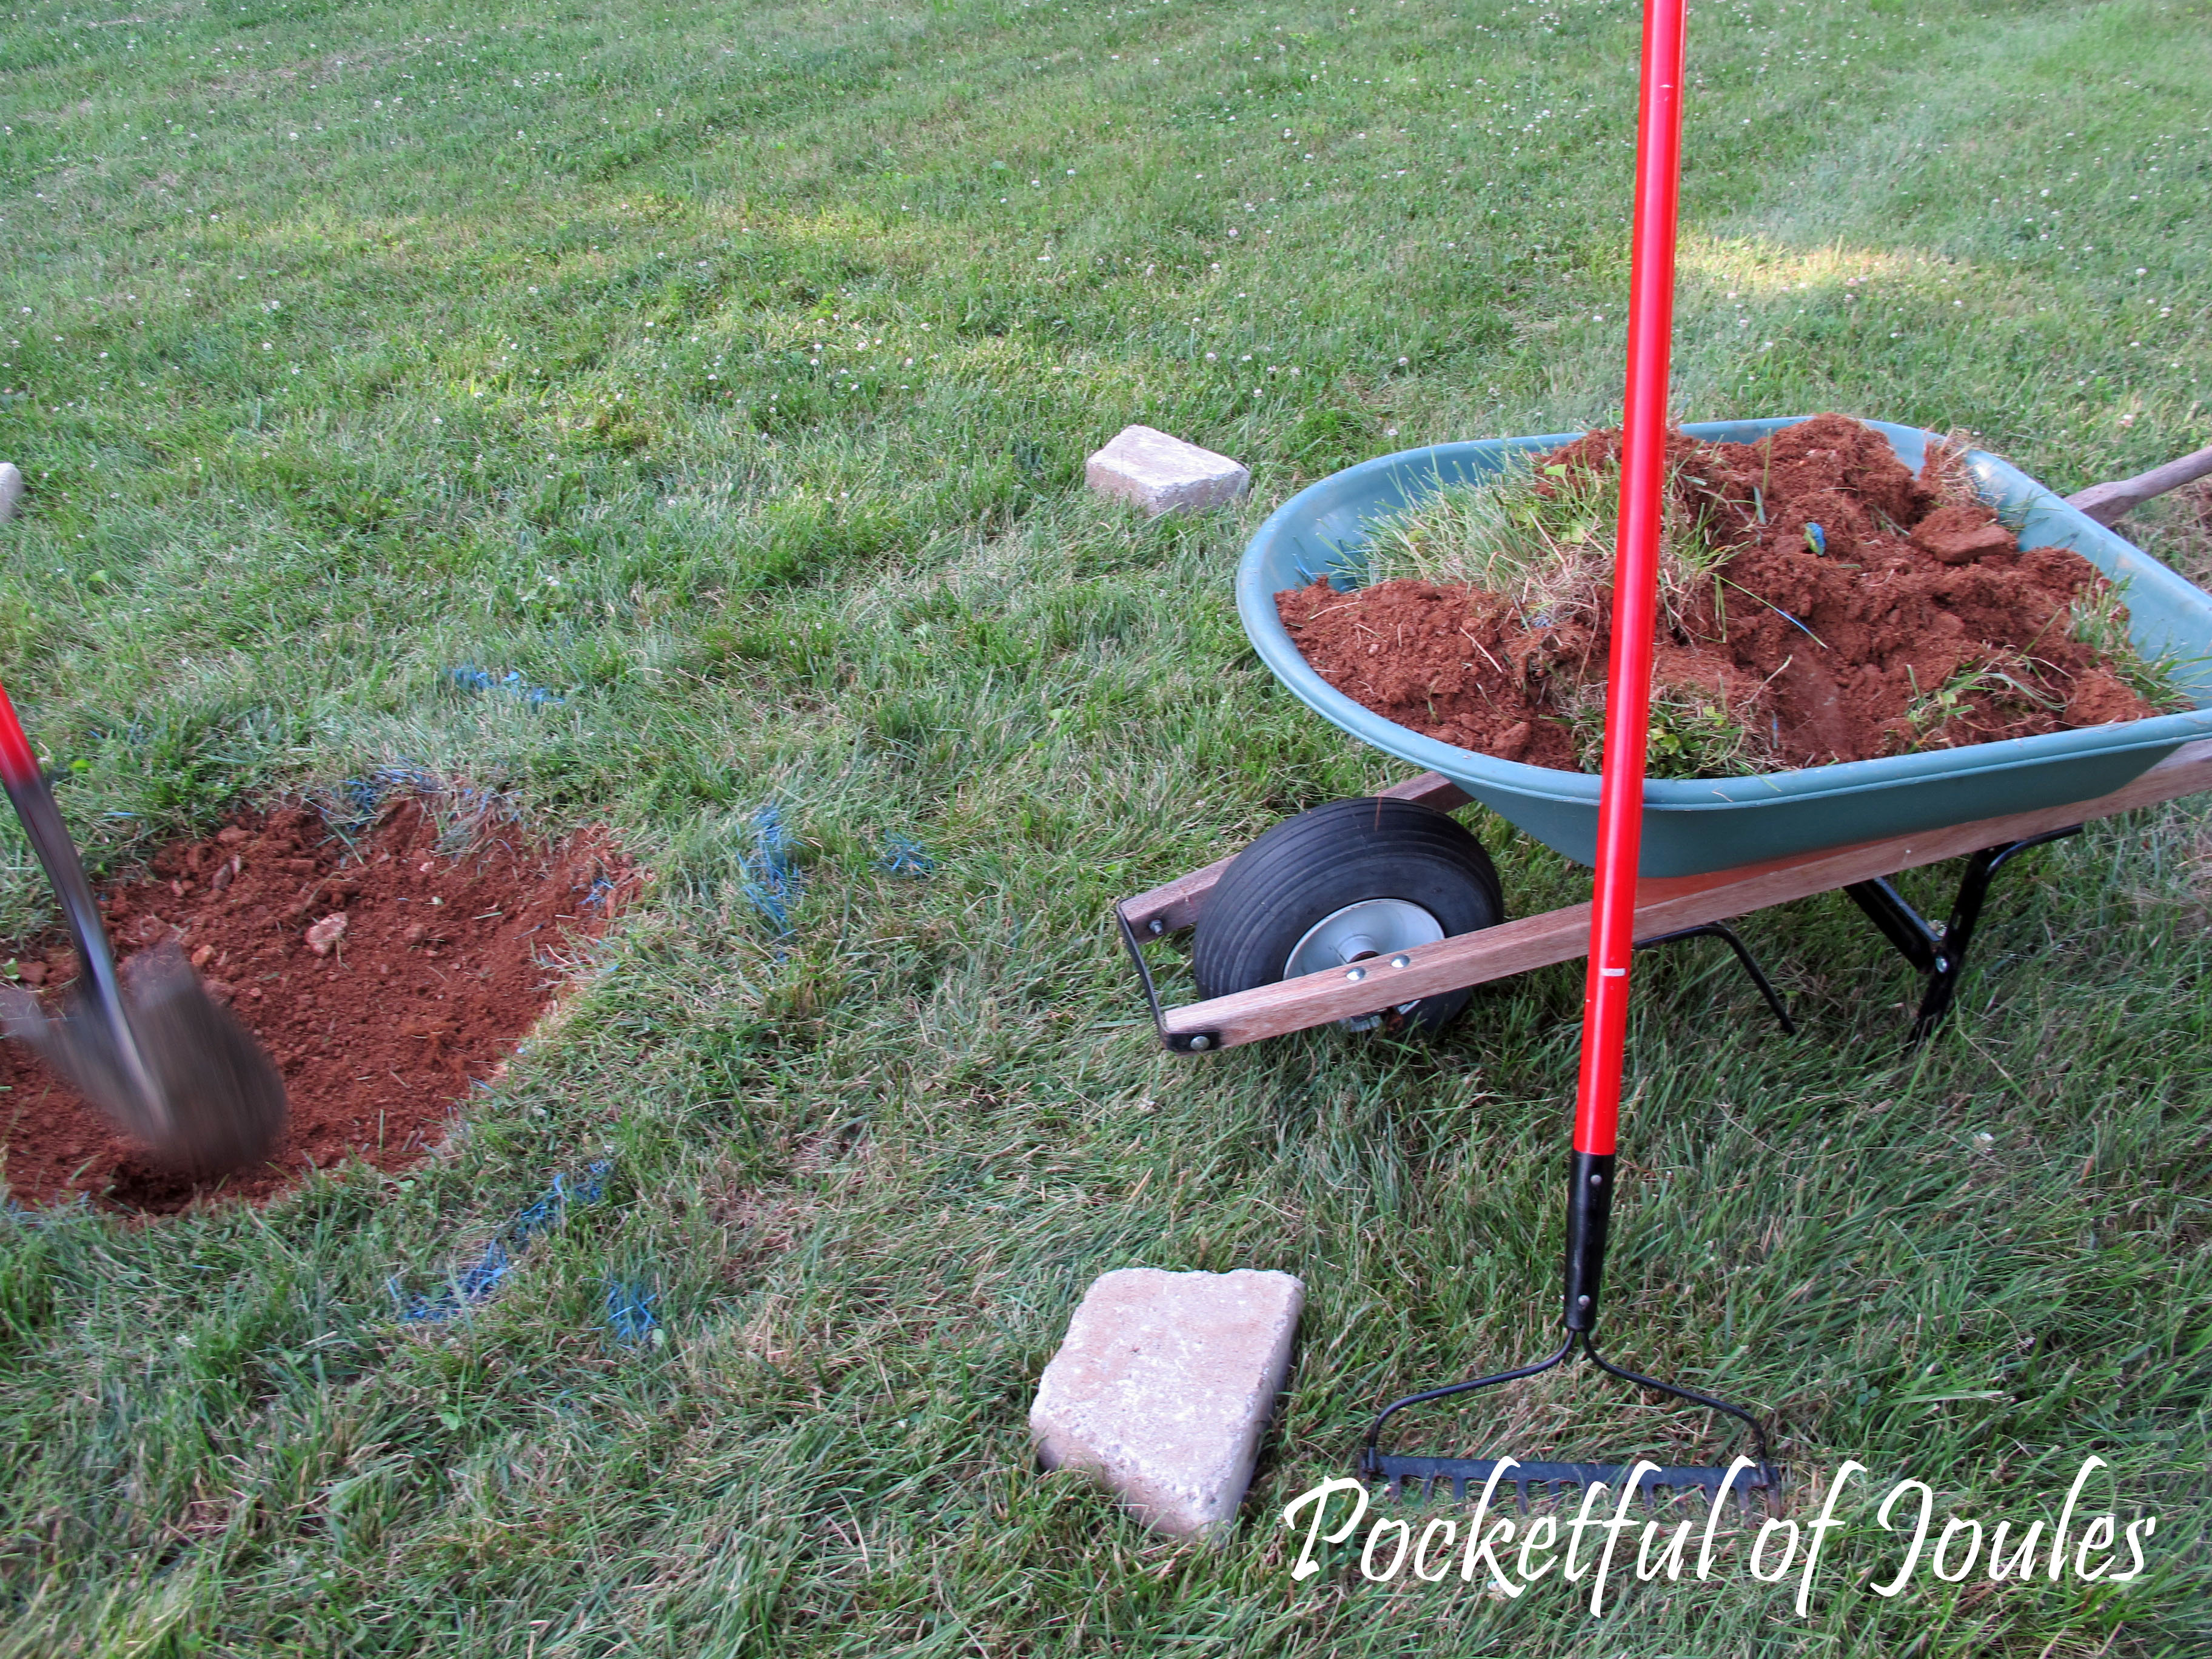
And more digging. This totally wasn’t like it was on TV where the entire project was finished in 20 minutes…

fire pit 6

After all the digging was finished, Travis used a rake to brush the dirt around so it was nice and even. Well, even-ish. It was still pretty crooked, but we hoped that the stones would cover that!

fire pit 7

Finally, we were able to put the first layer of stones down. Look, it almost looks like a real fire pit!

fire pit 8

Then, I came in with my handy-dandy caulk gun and made a zigzag pattern on top of all of the stones.

fire pit 9

Travis came behind me and placed the second row of stones into the caulk, giving them a nice little wiggle to make sure that they would stay affixed.

fire pit 10

One more layer of caulk and one more layer of stones, and we were done. Well, almost.

fire pit 11

Our fire pit didn’t look like the most awesome fire pit in ALL THE LAND… it looked… well. Kind of lame. So the next night, we went out and bought some more supplies: 5 bags of base sand, 5 bags of pea pebbles and some plastic lawn edging.

Unfortunately, I don’t have any ‘in progress’ pictures of this part because I was making a delicious dinner inside while corralling Jack and dealing with a sick dog. While I was playing Supermom, Travis cut the plastic edging to size and smushed it into the exterior circle. Then, he added a thick layer of sand and topped it with a layer of pea pebbles.

fire pit 12

Here’s a close up. The pebbles aren’t super pretty, but they were cheap and did the job!

fire pit 13

So NOW we do have the prettiest fire pit in ALL THE LAND! After we put Jack to bed on Saturday night, we filled it with wood, grabbed some super-sized marshmallows and bottle of wine, and broke it in!

fire pit 14

Here’s the cost breakdown:

  • RumbleStone mini’s: $20.88
  • RumbleStone traps: $89.28
  • Landscape caulk: $4.97
  • Caulk gun: $1.97
  • Plastic lawn edging: $9.47
  • 5 bags leveling sand: $17.45
  • 5 bags pea pebbles:$17.40

Total: 161.42

I LOVE having the fire pit in my yard because it’s totally like camping. But not, because I can go inside to use the bathroom instead of squatting in the woods and falling over. In a few years I can imagine us setting up our tent next to the fire pit and having Jack and his friends sleep outside for a fun boy’s party. Heck, I can see us setting up the tent NOW for a fun Mommy and Daddy party!

I do think we’re going to have to take one more trip to Home Depot to pick up a few Adirondack chairs (maybe a small side table too) in order to make the area super comfy for entertaining friends.

I also need to find some fun recipes for cooking food over a bonfire! I’m pretty darn good at making s’mores and also roasting hotdogs. Do you have any favorites that we should try?


*and by “us” I mean, Travis.

Like what you see? Share me with your friends!

Come & Knock on my Door

Can you hear that?

Listen really hard… hear it?

That faint clucking noise is the sound of smug satisfaction in Joules-town. It’s like Funky Town, but with more failing arms and karate kicks.

Yeah, that’s right – I finished another house project!

One of the first things I added to my house list over a year ago was to paint our outdated evergreen colored door (apparently the previous owners really liked green). The door is a really nice one from Pella, so I really didn’t want to replace it… but the color was just so BORING. And early 1990’s.

old door 2

The door was green EVERYWHERE too – both inside and outside. Oh yeah, AND the inside surrounding trim. Blegh. Just the trim around the door though… the rest of the entrance has white trim. My husband said it best when he assumed they must have been thinking, “Holy crap this door is ugly, maybe we should paint the trim the same color so it blends in more?”

old door 1

With my mission to bring our door into 2013, I grabbed a bunch of fun colored swatches from Home Depot and we taped them up and stared at them for a couple of days…

swatches 1

Then we narrowed them down and stared a little more…

swatches 2

We wanted something that went well with the rest of our house and also worked well with the existing glass door. Finally, we picked a winner (Clover by Behr) and bought a quart of paint. And then… nothing. Life got busy and it sat in the coat closet for a few weeks.

This past holiday weekend was the perfect time for me to get my painting groove on and I finally had a chance to give the door a quick sanding (just the outside because it looked like there was a herd of bugs stuck in the old paint) and throw on my first coat. And yes, the first coat always looks horrible and you run around all confused wondering why you made such a terrible, terrible mistake…

coat 1

Then my second and third coat.

coat 3

Oooh, check out that fresh white trim! Here are some more saucy poses…

new door -1

new door 2

I LOVE the finished door. My husband tentatively liked it but said that it’s totally growing on him. So he’ll probably be joining me in giving it long lingering glances as I pass by it throughout the day. The only thing I’m not crazy about is the hardware, so I’m going to keep my eyes peeled for something fabulous next time we stop by the ol’ HD.

How was your holiday weekend? Did you finally finish a project that has been waiting in the wings (or hall closet) for ages? Do you walk past your front door and give it sexy bedroom eyes?

Like what you see? Share me with your friends!

Bedroom Inspiration

Yay, I’m finally thinking about starting another house project. Well, I mean I’ve been THINKING about all kinds of projects for months and months… but I actually ordered something so that means I’m committed now!

I actually did start ripping things out of my ugly green bathroom, but I’m at a bit of a standstill because I can’t get the {gosh darned} metal bottom part off my {even more gosh darned} ugly green tub. So I need to wait until my dad can come over and help me rip that thing off. The next step in the bathroom project is to purchase a new vanity/sink, toilet and flooring so that when my dad DOES come over, he can watch (aka help) me throw those things together. Crossing my fingers that I can drag the husband out to Home Depot with me on Wednesday night to get a few things.*

So since I have to wait for other people to work on the ugly green bathroom project, I’ve decided to go full steam ahead on the bedroom project!

Basically, our bedroom is just boring at the moment. The walls were a muddy khaki color when we moved in, so we just left it alone and threw our furniture in there. We have some matching furniture from Ikea and a few old pictures I threw up on the wall, but BORING is pretty much the only word that I feel when I walk in there. And that’s kind of NOT the feeling you’d like in your bedroom, right?

So, after stalking a duvet cover on West Elm for months I noticed that one of the colors I liked was backordered until December. YIKES! That was just the kick in the pants I needed to finally go through with my order. The fact that my mom is giving me birthday money helps too!

To celebrate the start of my bedroom makeover, I’ve made my very first mood board. Oh, and if you’d like to follow along with my ideas for this project and others, you can always follow me on Pinterest.

1. Purple/Green Ikat Shower Curtain from World Market — I LOVE this pattern and the 100% cotton curtain is only $25! Using their 25% discount currently running on the website, I got 2 of them for less than $50 to use for curtains.

2. Inspiration quilts — Would like to find a pretty blue quilt to put at the end of the bed for color and added warmth.

3. Gold mirror — this is very similar to a mirror that I already have in my bedroom.

4. and 8. Ikea Hemnes dressers — already owned and loved.

5. Organic Cotton Pintuck Duvet Cover in Soot — lusted after for months and finally ordered from West Elm with my birthday money.

6. Cute yellow owl from West Elm – Also ordered because I love it. I think that the yellow will look great against all the soothing colors.

7. Inspiration bench — planning to put padding and upholstery on our old coffee table to make it look kind of like this bench. Will place at the foot of the bed as a Potter step.

9. Possible wall color — will have a better idea once I receive the curtains and duvet cover.

Also on the project list is to build an upholstered headboard and also figure out some kind of art for the walls. Now that I’ve ordered a few things off the mood board I’ll have to sit patiently and wait for them to arrive so I can make sure I love them just as much in person. Oh, and also descend on Homegoods like a crazy shopping banshee – I could still use some pretty bright colored sheets (maybe more of a turquoise), the blue quilt and a couple fun accessories!

Hopefully I’ll have a full bedroom reveal with before and after pictures within the next month or so. How about you, are you finally getting around to a project you’ve been putting off for months?


*Yes, I’m the one that drags HIM to Home Depot. In our house, I’m the Queen of home improvement projects and he’s the King of vehicle projects.

Like what you see? Share me with your friends!