DIY: Adding Elastic to Track Pants for a Tall and Slim Kid

I’ve written about my quickly growing kid and how he likes to sprout right out of his pants pretty much as soon as I buy them a few times over the years, including here and here. Once again, we had an early fall growth spurt that left all of Jack’s small sized Adidas track pants looking like capris. So, we upgraded to the same exact pants in a size medium and they fit wonderfully in the length… but the waist is huge on him!

These are the ones he likes, the Adidas Iconic Tricot Jogger pants. They are made a bit slimmer than the other athletic brands, and we usually buy them in a couple colors (navy with white stripes, black with white stripes, and black with red stripes).

The joggers have elastic in the waist and a drawstring, but they are still way too big on my kiddo. Sure, we can tie the drawstring as tight as possible, but then he can’t push them down and up for the bathroom. And when he tries to tie them on himself, he just can’t get them tight enough that they stay around his waist (and don’t fall around his ankles). Because this is a problem that every preteen wants when he is going to middle school. Obviously.

So, this year, I had the big idea to tailor his track pants so that they fit him better. And I took photos of each step, so that hopefully this can help some other person out there with a tall and slim kid who needs the length but not the width in their track pants, sweatpants, or joggers!

Here’s what you need:
  • Pants that fit in the length. Actually, if they’re a little too long, that’s even better because maybe the kid can actually wear these pants for more than 6 months!
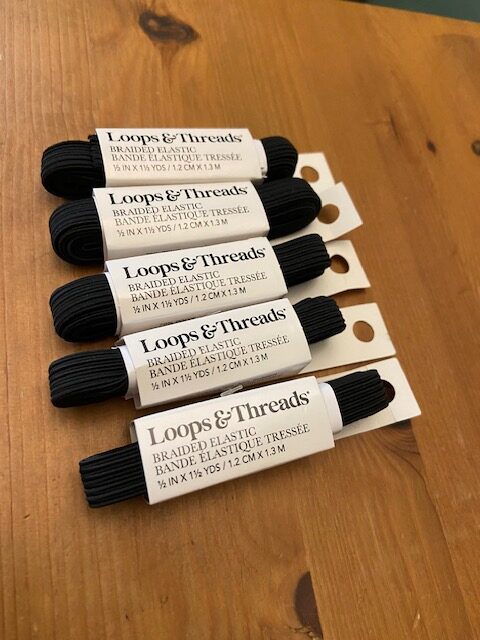
  • Braided elastic. I got Loops & Threads braided elastic in ½ inch width from my local Michaels store (they were $2.49 each) I bought 6 because I had 6 pairs of pants to do and I had some left over from each for future projects. However, this roll from Amazon is a much better deal for price. (If you’d prefer to go the elastic + buttonhole route, this roll and pack of buttons would be great).
  • Either a sewing machine or a needle and thread.

Note: The reason I chose this specific braided elastic is that I took Jack’s pants to the store and then picked the elastic that would be the same width as the drawstring so that I could utilize that exact space in the waistband. It’s a work SMARTER, not HARDER type of situation over here!

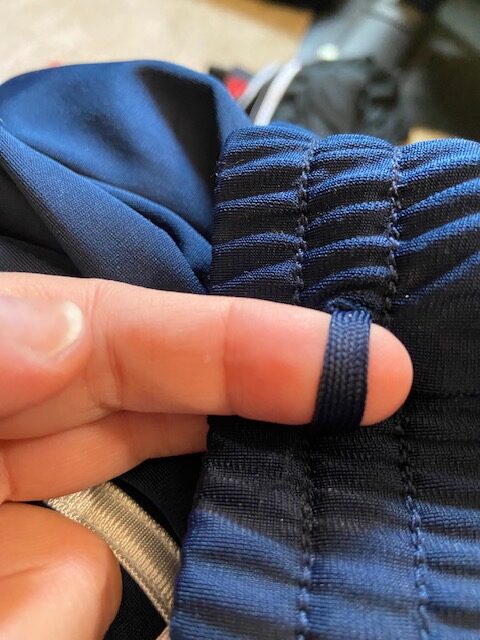
Here’s what the drawstring looks like before I start:
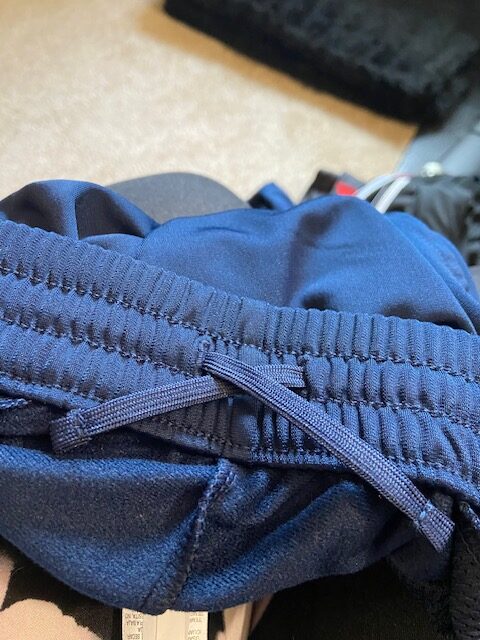
Step 1: Tie the elastic to one side of the drawstring and cut a little flap on each side so that you can shove the knot into the hole.
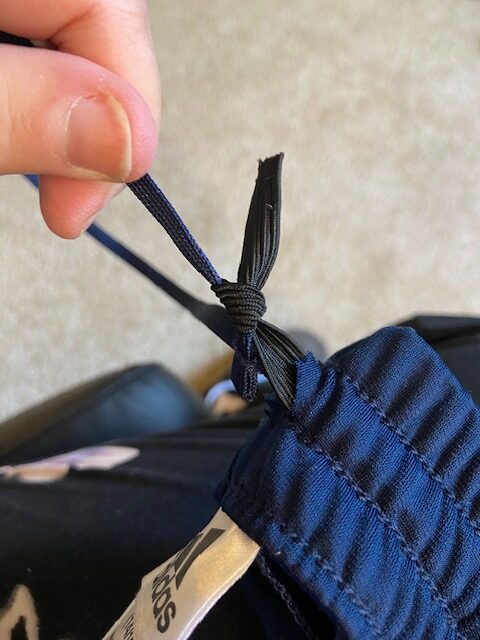
Step 2: Cut a little slit and a flap (you can see the flap better on step 5) on the back side of the waistband where the drawstring is sewn into the pants. I wish that one piece of string went all the way around (because they would have made this so much quicker!), but there are two pieces of string in each pair of pants. Once you cut the slit, yank out a loop of the string.
Step 3: Pull the drawstring OUT of the pants, which threads the elastic through in its place.

Step 4: Sew a line over the elastic in the back of the pants. I got a little nuts with this and went forward and then backward to make sure the stitches stayed in place through an apocalypse. Or a preteen, whichever is harder on clothes.
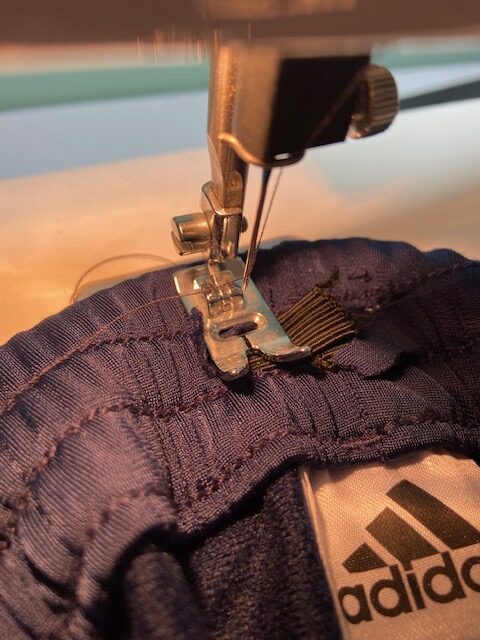
Step 5: Trim the extra elastic and then shove it into the seam, replacing the flap of fabric over the elastic. This will keep it from being itchy for your kiddo. I didn’t sew the flap into place or anything, it just stayed where it was supposed to be with no additional effort.

Repeat steps 4 and 5 for the other side too. So now you have both sides of the drawstring replaced with elastic.

Step 6: Call your kid into the room. There will be lots of moaning and groaning because you interrupted their tv shows and/or video game playing. Make them put on the pants. Then, yank the waistband tight on both sides and tie a very tight bow.
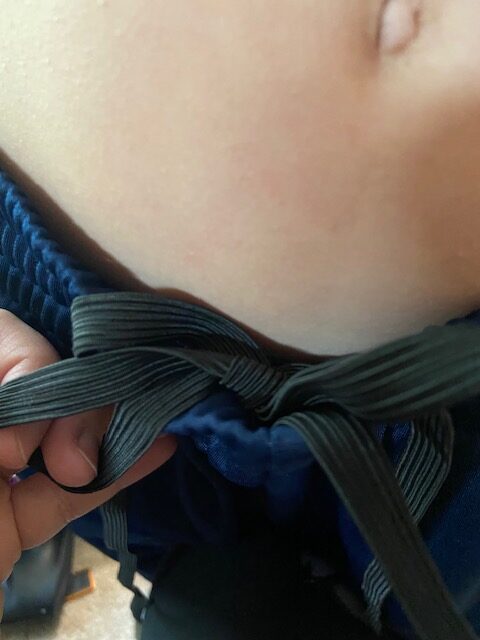
While the elastic is tied, have your kid try to put the pants up and down over their hips to make sure that once they are sewn into place, they can easily tug them up and down. Then, have them carefully take off the pants without untying the bow.

Step 7: Sew either side of the bow (exactly the same as you did Step 4) and then cut off the extra elastic and flip the flap of fabric back over the elastic.

Step 8: NOW you have a pair of pants that actually fit your kid!

The best part is that when you need a little extra room in the waist, you can add elastic as needed, or just snip the threads and completely yank out the elastic you put in there.

I’m hoping this little fix gets me through at least a few months of growth spurts!

Disclaimer: This post contains Amazon affiliate links. This means that clicking on a link may help me earn a small commission at no cost to you.

An Easy How-To Guide for a Coat Closet Cleanout

The front entrance area of our house is typically neat-ish. We have designated shoe areas and we are all good at putting our shoes in the proper places. And then there is the coat closet… which is A MESS. In addition to dozens of coats and sweatshirts, there is also our luggage, hats, gloves, old boots that should have been trashed, multiple picnic blankets, a bunch of retired pillows, dog stuff, and so much more.

A few weekends ago, I’d had enough and decided that it had to be cleaned out RIGHT THAT SECOND. I don’t know if there was a *smell* or if it was in my imagination, but I felt like our front entrance smelled stinky. And the only way to deal with the funk is a full-on closet cleanout!

Step 1: Remove every single thing from the closet and throw it on the floor. The closet should be totally empty other than any sort of organizer system you may have going on. Use this opportunity to vacuum it out and/or wipe down the floor with bleach wipes to get rid of any yuck that might have accumulated.

Step 2: Pick up every single item one at a time and make a ‘stay or go’ decision. That’s right, we’re going full-on Marie Kondo on this stuff. Does it give you joy?? If the item stays, it gets added to the ‘needs to be washed’ laundry basket. If an item goes, pick whether it goes into the ‘consignment/Poshmark sale’ laundry basket or the donation trash bag.

If you’re not sure whether an item stays or goes, add it to a pile to compare/contrast with what you already have. In our case, my husband has a category of clothes called his ‘garage work sweatshirts’. Each time we came across a ‘garage work sweatshirt’ it went into the pile. Then, we picked his three favorites to keep (aka add to the ‘needs to be washed’ basket) and the rest were donated or trashed, depending on how bad they were.

We did the same thing with the pile of gloves we somehow accumulated over the years. And the winter hats. And pillows. And picnic blankets. Every. Single. Thing.

Before too long, we had multiple bags to get donated to the thrift store, one pile to get listed on Poshmark or consigned, and a huge overflowing laundry basket of coats, sweatshirts, gloves and more that needed to be washed.

Step 3: Do ALL the laundry. I swear, the rest of the day was spent doing laundry — I did load after load and washed every single item that went back into the closet.

Step 4: Put the donation bags directly into your vehicle and take them to be donated at the thrift store. Don’t shove the bags in a corner or out of the way somewhere. This is how they get reabsorbed into the house! Donate them and move on.

Step 5: List the items you’re selling on Poshmark or make an appointment to drop them off at the consignment shop ASAP.

That’s it! The main part of the cleanout only took us an hour or so (the laundry took much longer), but now we have an organized hall closet and NO funky smells (imagined or otherwise).

Crafting Your Own Signature Style: A “Me Made” Denim Jacket

I’ve felt the creative bug recently and have a bunch of fun projects on deck — including an embroidered Converse shoe idea, a large thrifted canvas that I can’t wait to paint, and a cool way of upcycling a denim jacket into a one-of-a-kind vest.

First up, the vest! This is actually my third ‘me made’ denim jacket project… and they are all different. There is just something about the joy and creativity of making a personalized denim jacket that calls to me. And by customizing a thrifted item rather than purchasing something at retail prices, it takes away the guilt factor of potentially *ruining* a perfectly good piece of clothing.

Before we jump into my ideas for this project, let’s take a moment to check out my last two ‘me made’ denim jackets:

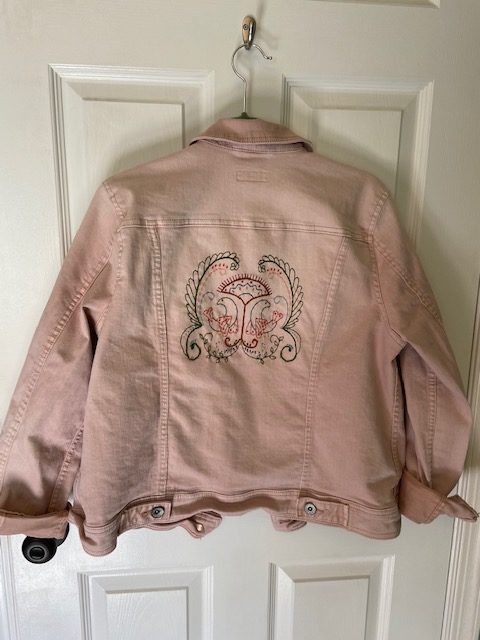
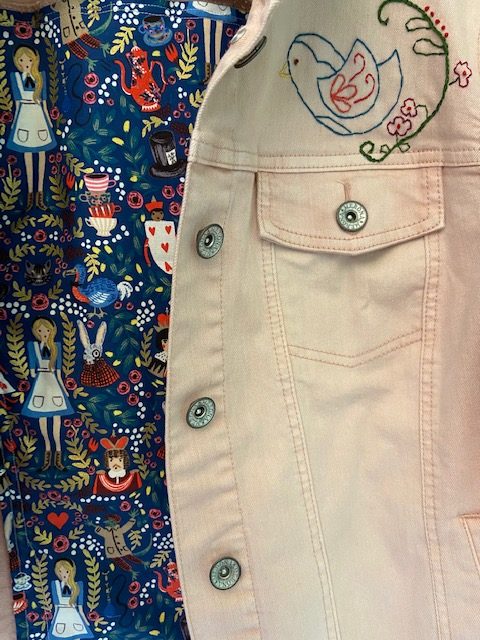
The pale pink jean jacket was perfect for some embroidery and a fun pop of fabric inside. You can read all about creating this jacket here: DIY Embroidered Jacket Project. I loved the process of making this one, but I’ve never actually worn it. Now that I’m looking at it again, I think it might need MORE. More what? Not sure yet. Maybe some tie-dye, bleach dye, or even paint? This one is still a work in progress and I’ll pick it back up when the mood strikes me.

For the blue denim jacket, I had a specific idea of a mix of kantha patches and made my vision a reality. You can read about it here: DIY Style Fun: Adding Kantha Fabric to a Denim Jacket. I have worn this project and it looks super cute over pretty much any dress in my closet.

Part of what I love about a good denim jacket project is that you get to pick the perfect denim fabric and add unique embellishments like patches, embroidery, fabric, paint, beads or customized buttons and it can be perfectly YOU for very little money. My pink jacket above was thrifted for $12 and the denim one was thrifted for $15. There are always TONS of fun denim jackets at the thrift store, so definitely look there first!

I recently had the idea that I’d like to add a denim vest to my wardrobe. So, with that in mind I picked up yet another denim jacket at the thrift store. This one was just $8.99!

I’m planning to cut off the sleeves at the seams and then do something fun with the back panel. I may also add a little something to the front too, we will just have to see how it all turns out when I start working on it.

When it comes to inspiration for this project, I’m kind of all over the place. Here are the top ideas that are currently in my head:

This Sunrise Moonrise dress from Thread + Sprout (click the arrow to see the moon side, that’s the one I really love):

This sweatshirt and sweater from Marine Layer:

These adorable embroidered projects from Flynn and Mabel:

Right now, I’m thinking I might do some sort of hybrid idea — perhaps a moon and stars on the back (with some of those cool mountains on the bottom) and then some embroidery on the front pocket? I haven’t done anything with paint in awhile, so maybe I’ll paint the back and then surround each color with embroidery or even beads.

The possibilities are endless!