Before/After: Bathrooms

Next up on our fun before/after list is our three bathrooms – one half-bath on the first floor and two full bathrooms upstairs. Three bathrooms sounds like kind of a lot, but our townhouse had four full bathrooms so having one less to clean really rocks my world.

Bathroom #1
Unfortunately I don’t have a ‘before’ picture of this bathroom, so you’ll have to use your imagination. It was covered in wallpaper. The wallpaper wasn’t quite as offensive as the design that you’ll see in bathroom #2, but still bad enough that it had to go. And yes, I realize I just said “number two” and “had to go” in the same sentence and I’m giggling because apparently I’m a 12 year old boy.

Before we even moved into our house, I hired a handyman friend to remove all the wallpaper from the stairs going upstairs, the upstairs foyer, the upstairs bathroom AND the downstairs bathroom. Yes, I could have done it myself… but I was 8 months pregnant so I splurged a little. Also, we got a really good deal on his handyman help because we did a trade where my husband worked on his jeep in exchange for house help.

I remember that I painted this bathroom one day soon after Jack came home from the hospital. The first coat went up during a morning nap and the second coat went up a few hours later when he was napping again. It’s funny the things you remember two years after they happen.

Downstairs bathroom - 2014

Downstairs bathroom b - 2014

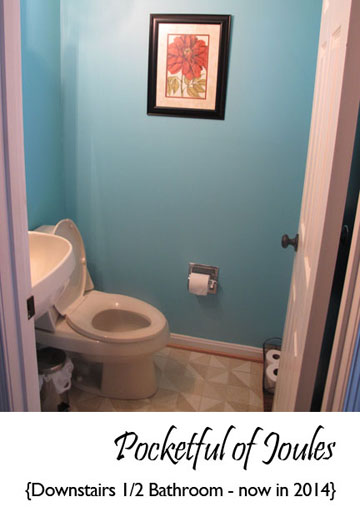
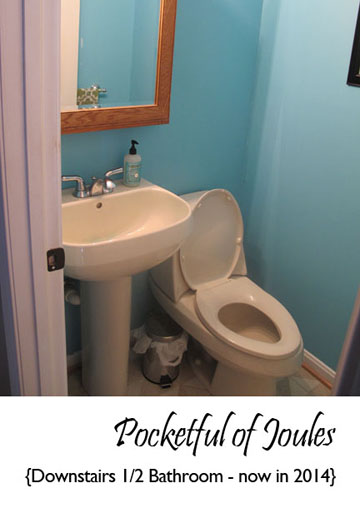
Throwing some paint on the wall is pretty much all we did for this bathroom. The flower picture came from Homegoods a few years ago and was in a bathroom in our last house too. The basket that we use for storing extra TP came as part of a gift set at some point in the last 10 years. I swear, I think I have dozens of baskets hidden away in this house and I probably only paid for 1/3 of them. I think I might be a basket hoarder.

What Still Needs to Change?
The drawback of this bathroom is that it’s incredibly tiny. You pretty much have to squeeze in awkwardly to shut the door behind you. The pedestal sink doesn’t really take up that much area, but I often wonder if it would feel a little less cramped if I tore it out and replaced it with one of those trendy half-sinks like this one. Also, I could replace the medicine cabinet/light with a prettier light and flat mirror. It’s workable though, so these projects are WAY DOWN on my list.

Bathroom #2
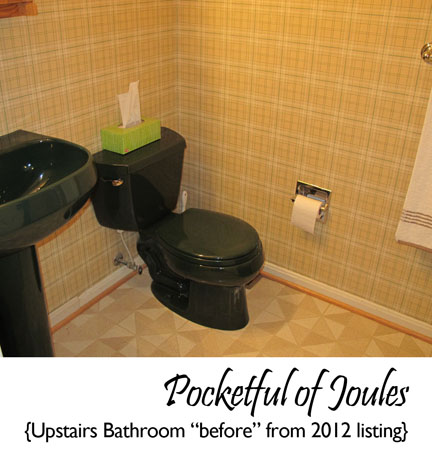
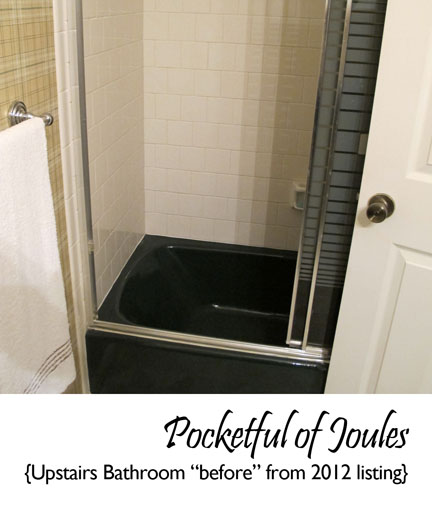
Now THIS bathroom has changed quite a lot from when we moved it. Here’s the before pictures and I’m sure you can see why I called it my “Ugly Green Bathroom.”

Upstairs bathroom - 2012

Upstairs bathroom b - 2012

I actually blogged about the changes step-by-step if you’re interested in seeing how we did things.

My Ugly Green Bathroom
Ugly Green Bathroom Update: Less Ugly and Less Green
No Longer the Ugly Green Bathroom

The “after” is quite impressive, so I’ll pat myself on the back for a minute while you check it out:

Upstairs bathroom - 2014

Upstairs bathroom details - 2014

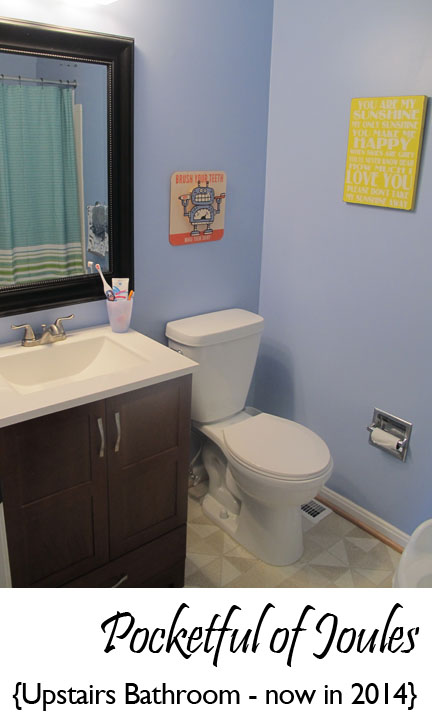
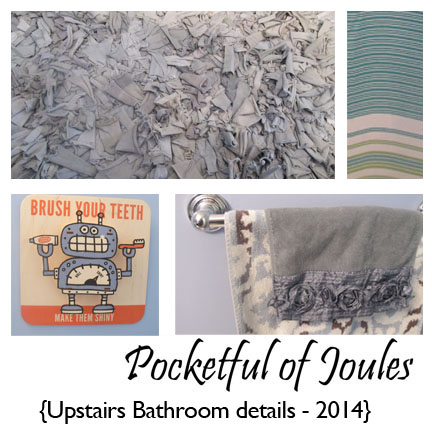
The shower curtain is from West Elm, the rug is from World Market and the hand towels are from Homegoods. I found the “You are my sunshine” plaque on Etsy and the Robot wall art at a local kids shop called Greenberries. It’s from Modern Moose and I LOVE it so much that I’m considering buying one of their clocks for Jack’s room.

What Still Needs to Change?
Well, the ugly green bathtub is still there… hidden behind the curtain. However, the tub and tile are both in fine shape so it doesn’t make sense to demolish the bathroom just to switch out to a white tub. For the time being (and possibly forever), we are done with this room.

Bathroom #3
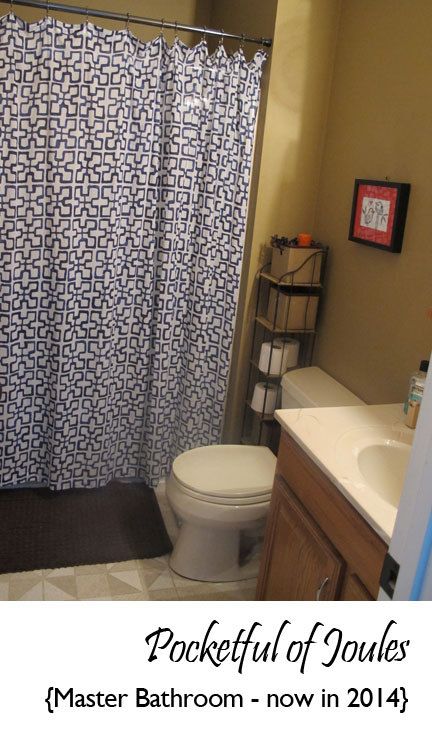
For a master bathroom, our bathroom isn’t very master-like. It’s actually quite small. If it were on an episode of House Hunters, the buyers would be disappointed at the lack of double-sinks or a soaking tub.

Master Bathroom - 2012

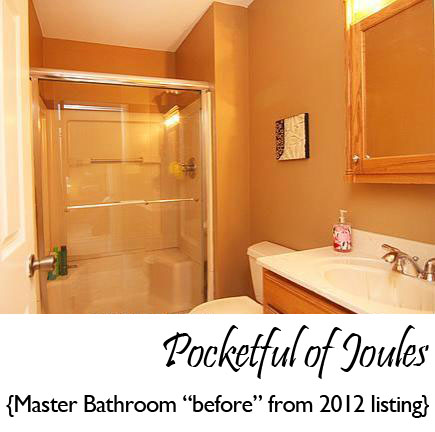
We haven’t really made many changes to this room. I hung a tension shower curtain rod and curtain (from West Elm) because I don’t like being all naked in the middle of a room. We also switched out the leaky silver builder-grade faucet with a new one in oil-rubbed bronze. I added in an old CD stand holder that I got from a friend for free years ago to hold some stuff like extra toilet paper, soap, etc. That’s about it.

Master Bathroom - 2014

What Still Needs to Change?
I want to rip this bathroom down to the studs with a full renovation. I want to take out the capsule shower, bust down some walls (maybe into my office, which is on the other side) and put in a nicer shower. Maybe something pretty like travertine with one of those rain shower faucets. If we can make the room for it, I’d love to have a double vanity with a long space of countertop. The medicine cabinet will be replaced with one that sits flush with the wall (and fits in between the wall studs) and the lighting will also be upgraded. I pinned a few ideas on Pinterest that show you the ‘feeling’ that I’d like. This sounds expensive though, right? Yup. That’s why we haven’t done it.

What do you think?
This was probably the least exciting of my before/after posts because on all three bathrooms we’ve probably spent less than $700 total in the past two years. Even though I’d love a designer master bathroom, the one we have is livable… so a full gut-job will probably not happen for a long, long time.

How about you, which rooms do you make your priorities when doing home improvement projects? For me, I’d rather have an un-updated bathroom as long as I have new, matching appliances in my kitchen!

Before/After: Den & Laundry

As I mentioned earlier this week, I’m planning to celebrate our 2 years of living in our home by comparing the 2012 version of each room with where we are now in 2014.

If we’re going to start at the very beginning, it only makes sense to start with that first room that I painted… while 8 months pregnant.

The Den
Now you may be thinking, “Um, Joules…aren’t you supposed to stay away from fumes and stuff while you’re growing a human?” and the answer is YES. I didn’t PLAN to paint this room myself… the original plan was for me to paint the dark trim white (with the windows and doors open), while my friend painted the walls. However, due to some mixed up communication (that I’m totally not still annoyed about), that friend’s plans changed and I ended up working on the project with just a little help… instead of the other way around.

I don’t know why my preggo mind decided that I simply could not LIVE with the original dark trim and cream walls, but I REFUSED to move into the house unless this room was done.

I know. Pregnant Type A Joules is weird.

Here’s the original version of the room as we first saw it:

Den - 2012It’s wasn’t totally horrible, it just looked very mid-90’s to me. We hated the brass fireplace insert with a passion, and the cream painted paneling walls just looked kind of dirty and dingy up close. The laminate floor looks like wood, but it feels really cheap when you walk on it.

Den B - 2012I have no idea what they were thinking with room set up. If you were sitting on their couch, you’d have to be laying sideways and crane your neck to see the TV which was shoved into the little alcove.

Here is our den now:

Den - 2014I tried to take very similar angles to the original pictures for comparison purposes. For for painting changes, I painted all the trim at the tops and bottoms of the walls a nice, bright white to go with the rest of the house. Then, I painted the walls this pretty medium blue color — I unfortunately can’t find the name of the paint color I used, but it was definitely from Duron (they’re always my favorite). We ripped out the brass insert and replaced it with one from Home Depot in a more “us” oil rubbed bronze finish.

Den 1 - 2014As you can see in the above picture, there is still the odd little alcove in the corner. I had originally planned to build in some bookshelves, but at Christmas that is the perfect place to put the tree… so I don’t want to build in something permanent. I’m thinking that I may either purchase or build in a removable bench, kind of like a little window seat for reading (without the window).

Here are some of my favorite room details:

Den details - 2014I didn’t really have a place for my favorite books, so I stuck them up on the mantle and LOVE the way they look there. Even though Travis is convinced they are a fire hazard. Which they are NOT. My little flying pig was a Homegoods find for less than $15.

The doggie bookends are from Target a year or two ago, also on sale. The rug was a steal from RugsUSA — it looks similar to a West Elm rug I loved, but was WAY cheaper and has been holding up quite well. I made the Valentine’s banner last year for less than $5 and just remembered to bring it out again this year. I love it though and I’m considering it being a year-round piece of den decor.

What still needs to change?
This is actually one of my favorite rooms in the house. This view totally does it for me, especially when there is a roaring fire (just pretend it’s there):

FireplaceHowever, I do still really want to deal with that weird alcove. It’s not really a priority right now though, since it seems to be fine for a dog bed and feeding station. Eventually, it will either become a built in bookcase or reading nook. I hate the laminate flooring and plan to replace it with some gorgeous hardwood floors. However, Jack is pretty tough on the floors and it’s nice to not worry about him scratching them up with his toys. I think we’re going to give it another couple years and then move forward with the hardwood installation.

The Laundry Room
Another change that happened quite quickly after we moved in, is that we got rid of the existing washer and dryer. Here’s what the laundry room looked like when we first saw our house:

Laundry room - 2012The laundry room is a pretty open area right near the den (there is a small hallway that leads from the den to the laundry with our first-floor 1/2 bathroom), and the old machines were REALLY LOUD. Considering that we were bringing a baby home soon, we really didn’t want to wake him with the entire house shaking to do laundry, so we figured that we should switch them out with new, quieter models.

Here’s the laundry room now:

laundry room - 2014The walls were in great shape and the color was nice and neutral, so I didn’t bother painting a thing in here. We basically just brought in the new washer and dryer and then threw in stuff from our old house.

The rug was from our old laundry room and came from World Market probably 10 years ago (and it’s still in great shape). The pictures were leftover from when I sold Home Interiors stuff as a consultant, so they found a new home brightening up the neutral walls. I bought the paper towel holder (mounted on the wall) for $1 at DollarTree.

laundry room details - 2014The small hallway leading to the laundry room has become Jack’s art wall (inspired by Kari’s kid art wall over at A Grace Full Life) and it’s the first thing you see when you exit the bathroom.

There is no cabinetry to hide laundry stuff, so I re-purposed a basket we received as part of a Christmas gift a couple years ago to keep my detergent, bleach and dryer sheets corralled in one place. The only thing I actually made was the cafe curtains — just a bit of material from Joann’s and maybe 5 minutes on a sewing machine to stitch up the edges and BOOM you have a curtain!

What still needs to change?
I’m pretty happy with this room — it’s (mostly) clean and functional. The work-sink is a great place for my husband to clean up his dirty hands from working in the garage and the dirt mostly seems to stay in the sink. Okay, maybe half of the time. But still, that’s a success! I may add a hanging cabinet at some point, so I can hide away my detergents… however, the basket system seems to be working fine so maybe I’ll just save my time and money.

For both of the rooms, I really worked with what we already had. I’d love to be so wealthy that I could just throw out everything and buy new stuff at West Elm and World Market… but we’re not. Actually, even if we WERE that rich I’d probably still be buying birdhouses at the thrift store and spray painting them in my backyard. It’s just who I am.

What do you think?
Since this is my first before/after post and a bunch of you guys asked for me to write them for home decor help, did I include everything you wanted to know? Is there anything I’m missing? Do you want to come over and curl up in front of the fireplace with some hot chocolate?


Looking Back: Before/After Fun

I can’t believe that we had our two year house anniversary yesterday.

There was a lot of drama leading up to the purchase of this house. Here’s the Reader’s Digest version, but you’re welcome to go back and read through the archives for the full nitty-gritty. I worked at a job for 6 years when I heard that I may be losing it. At that same time, I also happened to be pregnant with Jack. Oh, and we had our townhouse on the market for over a year and had FINALLY gotten an offer. So there we were, townhouse sold, pregnant, jobless and moving into a rental house owned by my parents.

A little bit of stress… right?

We were incredibly lucky though – I ended up keeping busy with freelance work and landed a job that started just 4 weeks after my last day at my previous position. After a couple weeks at my new job, we restarted our search for the perfect home… and found one on Christmas Day. We put our contract in on New Year’s Day, went to settlement on January 27, 2012.

I started painting my first room that Saturday. While I was almost 8 months pregnant.

A few days later my pregnancy became a bit more complicated when I received a double diagnoses of gestational diabetes and cholestasis.

Just 15 days after we signed the contract for our house I went into early labor at 31 ½ weeks of pregnancy. When they told me that they were going to try and stop my labor and keep me in the hospital on bed rest, I told them that we had just moved and I need to go home and unpack.

I remember I was very upset that the crib was in pieces.
And I had more rooms to paint.

After hours upon hours of the doctors trying to stop my labor, Jack was born on February 15, 2012. Just 19 days after settlement. And the house was a mess.

Leaving the hospital a couple days later, while Jack had to stay in the NICU was one of the hardest things I’ve ever dealt with in my life. So, each day I would throw myself into house projects in morning, scrub the paint off my hands at the NICU scrubbing station each afternoon and spend as long as possible just staring at Jack through the walls of the incubator. Travis would work a full day and then join me in the hospital. Sometimes we were allowed to hold Jack and sometimes I was only able to poke a finger in to touch his soft skin.

Oh and I licked him.
Because he was mine and I could.

Then, when we were so tired that we couldn’t stay for another minute, we’d make the hour long trip home and I’d wake up the next day and do it again.

Turning our house into a home was the only thing keeping me sane.

Over the past two years, I’ve done more house projects then I can count. I can truly say (even though I’ll never be DONE) that our house feels like a home.

So each Thursday for the next month or so, I’ll be sharing the before and after of each room. Each before picture will come directly from the listing photos of how we first saw our house. Each after photo is the actual NOW that we are living in.

I hope you enjoy them!

Oh, and if you have been reading this blog so long that you were reading along when I was going through all the drama, leave me a comment. I’d love to know if there are any long, LONG time readers!