Building a Birthday Earring Stack: Studs, Jackets & an Earcuff

It is officially my birthday month! While it’s not a “BIG” birthday… it is the year before a BIG birthday and I really feel the need for a bit of a treat/self care spectacular.

One of my treat ideas for the month is that I’ve been drooling over some earring stacks lately, so it’s the perfect opportunity to curate one for myself. I have one piercing in my left ear and three piercings in my right ear, so I decided to get a little extra fancy on the right.

Here’s what I’ve decided on:

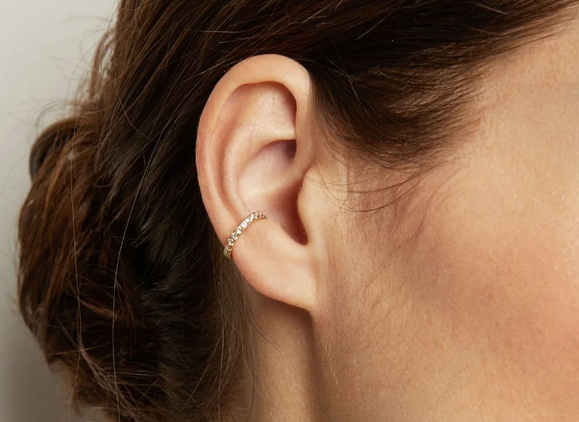
Ear Cuff

I’ve considered getting an additional piercing in my cartilage, but I honestly don’t have the patience to deal with the healing process at this point. So, I decided to get a sparkly ear cuff to add on to my stack – it has all the gorgeous sparkle and none of the pain!
Source: Aurate.com

I love this one made of lab grown white sapphires from Aurate, ordered it and I’m waiting for it to arrive. I think it will be great to pop on when I want to add a little extra sparkle.

Studs

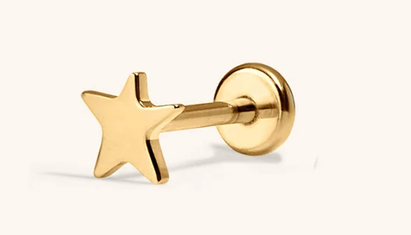
In my main (lower) piercings, I wear a set of tiny diamond studs my dad gave me when I was in college. These are my daily earrings that I typically don’t change unless I’m dressing up to go out into the world. In my two higher right piercings, I found these a couple years ago and I LOVE them:
Source: MaisonMiru.com

The Star Push Pin Flat Backed Earrings from Maison Miru are the first earrings I ever purchased with a ‘flat back’ design and I’m never going back! I put these in probably 2 years ago and they are the ‘set it and forget it’ kind of earring. Other than cleaning them when they need it, they just stay in my ears 24/7. They are super comfortable and I love the cute little stars.

Jackets

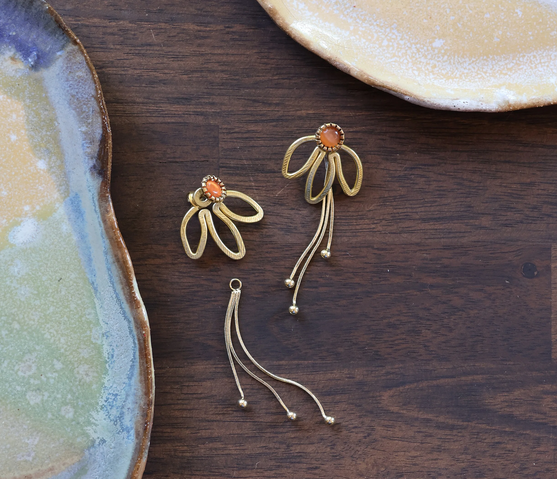
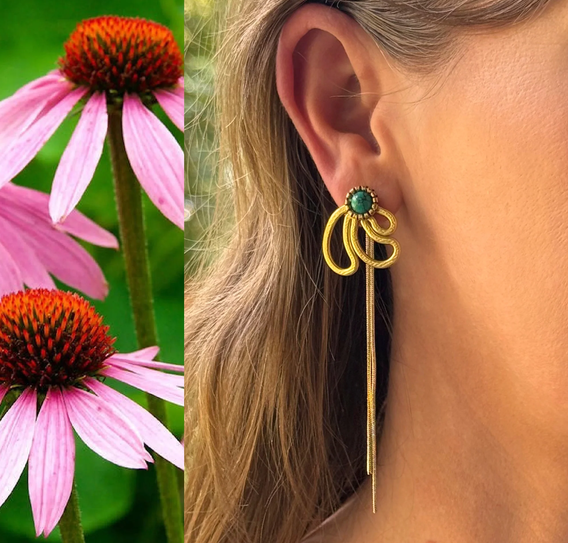
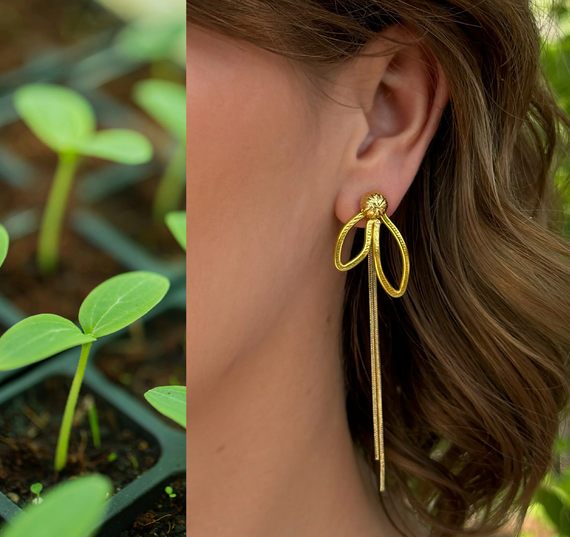
I’ve been following Liz Fox Roseberry on Instagram for quite some time and I absolutely love her earring jacket designs. They are all handmade and many can be worn in a few different ways – in front of the ear, behind the ear, with or without additional chains. They are also made to mix-and-match with different designs in her collection. Each jacket comes with a pair of surprise studs (not made in house by them), that compliment the look.

I had been planning to order one or two of her Curated Mystery Trio sets, but then narrowed down my absolute favorites to three designs that I would love to mix and match. So, for my birthday I added them to my cart.
Source: LizFoxRoseberry.com

Source: LizFoxRoseberry.com

I decided to do singles for The Sapling and The Coneflower because I love how they are similar but different. They can both be worn in front of the ear, behind the ear, alone or paired with their little chains. Since I’ll get a set of studs with The Sapling and a different set of studs with The Coneflower, that will give me additional options for mixing and matching too.

I also decided to order a full set of The Daisy. This design will also mix and match well with both The Sapling and The Coneflower. Or, I can wear the full set together. Once again, the earring jacket can be styled in front of the ear, behind the ear, and with or without the chains. However, the chains on The Daisy pair are different than the chains on The Sapling and The Coneflower… so I can also mix and match those little chains with everything else OR even wear them alone behind the ear with any stud.

I can’t wait until my earring stack orders arrive and I can start playing with all the possibilities!

Disclosure: This post may contain opportunities for me to earn compensation. If you click and make a purchase, I may earn a small commission at no extra cost to you.

Jack’s First Day of 9th Grade

And just like that, Jack has started high school!

This year, I actually was not planning to blog about Jack’s first day of school. However, when I told him that high school was probably a good cut off for it, he said ABSOLUTELY NOT and wanted me to continue sharing. So, here we go… back to school and the start of high school!

If he looks taller than our end-of-school post in June, it’s because he shot up 2 more inches over the summer, bringing him to a height of 5’9” so far. Which is officially 2 inches taller than me (and he’s quite smug about it). Of course, we’re expecting him to continue growing like a weed, as Travis is 6’4” and Jack currently eats like a never-ending pit.

Jack also got his braces off at the beginning of the summer. Oh and yes, his hair is wet in the photo because high school starts SO DANG EARLY! His bus comes before 7am, which seems completely inhumane.

One cool thing about starting high school, is that it is the first time he’s able to choose his path/focus/electives, so this year looks quite STEM heavy with classes in Business Communications & Keyboarding, Honors Geometry, Exploring Computer Science, and Honors Conceptional Physics.

As always, I’m hoping that he finds *his people* with making friends and just overall high school success. Also, I’d REALLY like to not hear from the high school principal this year. At all. For any reason.  

So, fingers crossed for an awesome year!

Stained Glass Studio: A Rainbow Panel & Scraps Sun Catcher

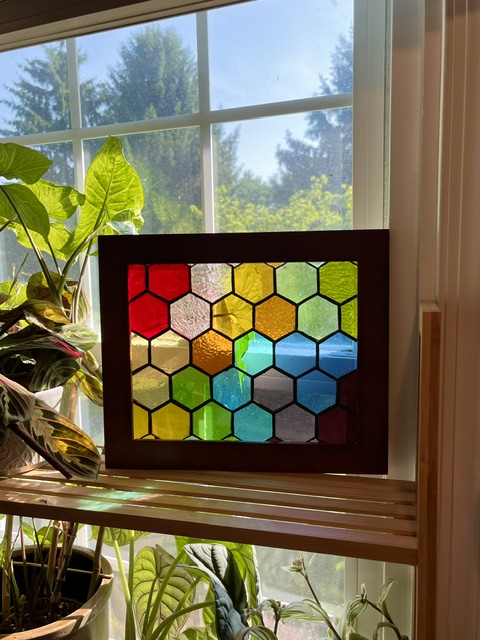
I have two more stained glass creations to share with you and they both center around rainbows. I’ve always loved rainbows and actively hunt for them after rainstorms. Lately, I feel like I’ve needed more rainbows in my life so I decided to make a rainbow honeycomb panel.

For this panel, I created my own pattern and learned a lot from it (once again). Looking back, the little pieces around the top and bottom are WAY too small and I should have adjusted the pattern to get rid of them. For the first time, I used sticker paper for my pattern pieces and that was an absolute game changer! Even with the challenges, I love the way that this one turned out.

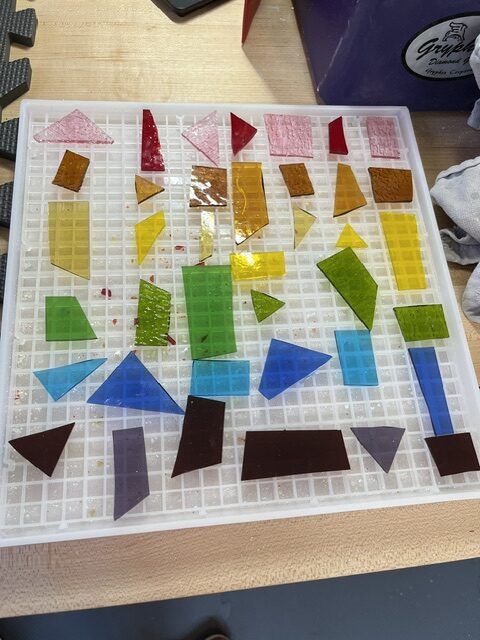
As I was cutting each glass piece for the panel, I kept all the scraps in a little container. I loved the colors I used and realized that they would make a really fun scrappy sun catcher.

Here’s what sparked the idea:

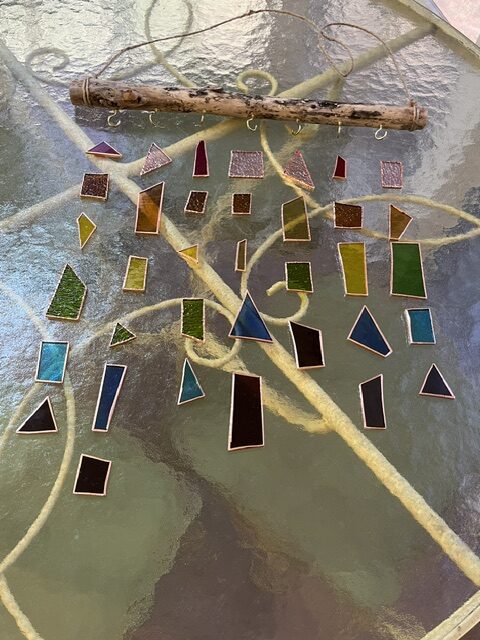
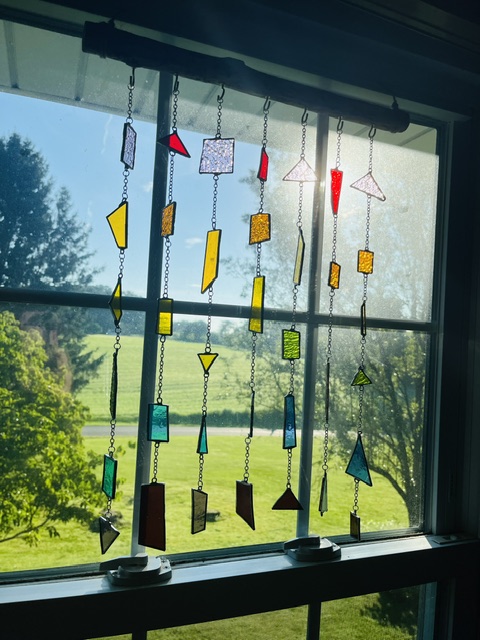
This sun catcher turned out to be so dang difficult and I had to teach myself how to do a bunch more things to make it happen. It started off as scraps, which I then foiled and soldered individually. I then made handmade jump rings for every single piece of glass, and soldered them on to the top and bottom of each piece.

I tried hanging on jewelry string and clear plastic string and just didn’t like the look of it. So, I purchased some jewelry making chain, cut each piece to the length I wanted, added jump rings and attached them to each piece of stained glass. And then, I hung each strand on a piece of driftwood.

This was absolutely one of those “for science” pieces because I had to stumble through each and every step. Also, I’m not sure if this is going to hold up long term. When soldering on jump rings, you typically need to extend the metal into a space between two pieces of glass to anchor it. Since I was working with just individual pieces, that wasn’t an option. So, it is quite possible that the weight of the piece eventually pulls the solder away from the glass. Guess I’ll see! And learn from it, of course.

Next Up on the Horizon

I still have a plan to try 3D designs like plants/succulents, as well as use scrap glass for mosaics. However, my next challenge is… plant stakes!

I have a couple designs in mind that I’m going to start with, including a bee and hexagonal hive, and some cute cactus/succulent plants. I plan to gift some of my plant stakes, so in addition to learning how to solder them onto a copper stake properly, I’m also going to be experimenting with lead-free solder.